Azure IoT Hub
The ScaleOut Azure IoT Hub Connector allows real-time digital twins to communicate with data sources (such as IoT devices) managed in the Microsoft Azure IoT Hub and receive messages originated by these devices.
Concepts
Azure IoT Hub provides a powerful, highly scalable hub for mediating the exchange of messages between data sources and their corresponding real-time digital twin instances running in the ScaleOut Digital Twin Cloud Service or in an on-premises deployment of ScaleOut StreamServer. You can create an Azure IoT Hub Connector to connect the cloud service or on-premises deployment to your existing account on Azure IoT Event Hub. Your data sources can then communicate with Azure IoT Hub, and their messages will be forwarded to real-time digital twin instances.
To properly route messages from a data source to its corresponding real-time digital twin instance, each JSON-encoded message needs to have a property called ModuleName with the value set to the instance’s digital twin model name, which was set within the Azure application properties (not the JSON message itself); please refer to language-specific Azure documentation on setting application properties.
Note
In the context of digital twins, the ModuleName property refers to the name of the digital twin model.
The connector uses this property to identify the data source’s real-time digital twin model. (Note that the use of application properties avoids the need to deserialize the message body.) In addition, the connector uses Azure IoT Hub’s DeviceId property to identify a specific digital twin instance. This ensures that all messages from a given data source are routed to the correct instance. An example of setting ModuleName in the Azure application properties is shown in the C# example below.
Azure IoT Hub allows the user to create consumer groups for exchanging messages with clients (such as the ScaleOut Digital Twin Cloud Service). In order not to interfere with other usages of your Azure IoT Event Hub, you should create a unique consumer group for the Azure IoT Hub connector.
Azure IoT Hub also allows an Event Hub to control the number of partitions (i.e., connection endpoints) so that it can maximize the message-sending throughput of its clients. Since the Azure IoT Hub connector is highly scalable by design, you should configure the Event Hub to use at least four partitions.
Creating an Azure IoT Hub Connector
In order to create an Azure IoT Hub connector, you need to supply several parameters that are associated with your Azure IoT Hub’s account. This enables the connector to connect to Azure IoT Hub and exchange messages with data sources. The parameters are as follows (and additional information about how to obtain them from the Azure IoT Hub Portal UI is below):
Event Hub Name - the name of your Azure event hub
Event Hub Connection String - the event hub’s service connection string key (either the primary or secondary connection string key), which enables the connector to connect to the hub and retrieve messages
Event Hub Events Endpoint - the hub’s connection string specified as the Event Hub compatible endpoint, which the connector uses to identify the endpoint and exchange messages
Storage Connection String - the connection string to the Azure Storage account you set up for Azure IoT Hub to store leases and checkpoint information (such as, pending messages)
Consumer Group Name - the name of the consumer group you created within the Event Hub for the connector to use (see below)
Maximum Batch Size - the maximum number of messages that can be processed at once as a group. The allowed range is 10 to 1000. This parameter corresponds to the EventProcessorOptions.MaxBatchSize property of the Event Processor Host API in the Microsoft Azure Event Hubs SDK. Larger values allow higher message throughput but can delay recovery in case of delivery failures.
You can find Event Hub Connection String on the Shared access policies screen of Azure IoT Hub Portal in the section Shared access keys:

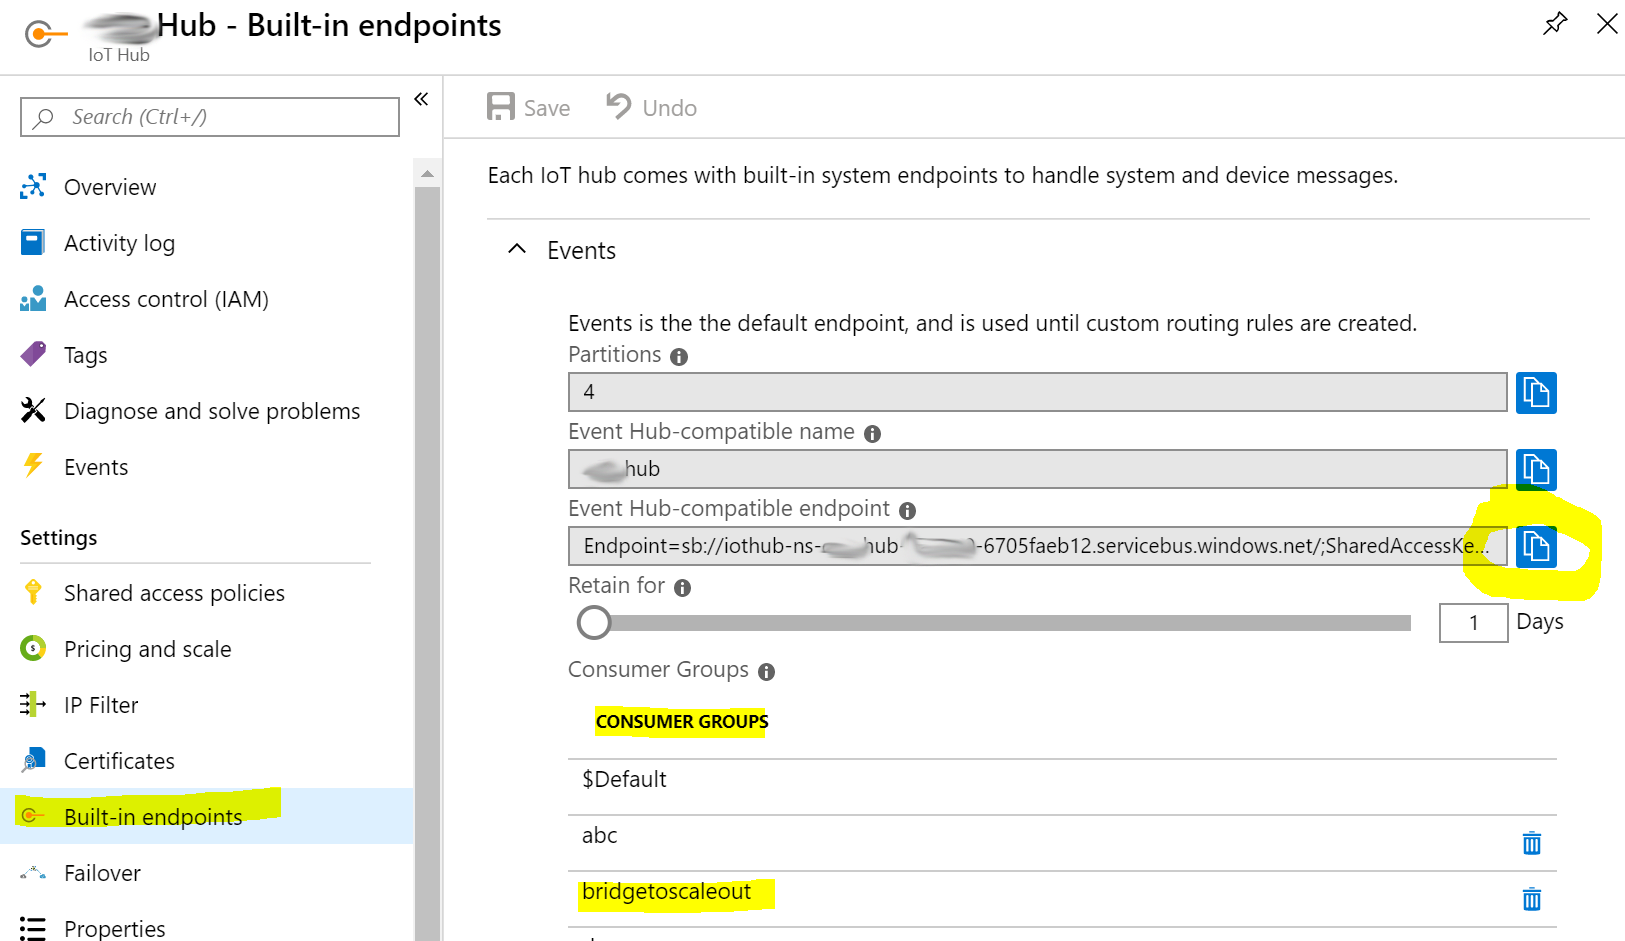
You can retrieve the values for the Event Hub Events Endpoint and Consumer Group Name parameters on the Portal’s Built-in endpoints screen, where you can create new consumer groups. It is a best practice to use a unique consumer group for the connector.
After a Azure IoT Hub Connector has been created and deployed to ScaleOut StreamServer, it is ready to receive messages from data sources and route to the corresponding real-time digital twin instances. Each instance is automatically created when the first message is routed to it by the connector. Incoming messages are then passed the message processor class implemented for each digital twin model. You can read more about the role of the message processor and how to define it here. The requirements for routing messages to instances are described above.
Managing an Existing Azure IoT Hub Connector
You can stop, restart, disable and enable an existing Azure IoT Hub connector. When a connector is disabled, it will stop routing incoming messages to real-time digital twin instances until the connector is re-enabled.
Sending a Test Message
The next code snippet shows how you can send messages to Azure IoT Hub on behalf of the registered IoT devices using Azure IoT libraries for .NET:
using System;
using System.Text;
using System.Threading.Tasks;

using Microsoft.Azure.Devices.Client;
using Newtonsoft.Json;

namespace Scaleout.Documentation.Samples
{
   class AzureIoTClient
   {
      static DeviceClient _device;
      static string deviceConnectionString =
         "HostName=MyHub.azure-devices.net;DeviceId=MyDevice;SharedAccessKey=key_value";

      static async Task Main(string[] args)
      {
         _device = DeviceClient.CreateFromConnectionString(deviceConnectionString);
         await _device.OpenAsync();

         // Create a new message and serialize it to JSON
         var msg = new MyMessage()
         {
            Latitude = 47.6M,
            Longitude = -122.34M,
            Timestamp = DateTime.UtcNow
         };
         var jsonMsg = JsonConvert.SerializeObject(msg);
         var message = new Message(Encoding.UTF8.GetBytes(jsonMsg));

         // Add ScaleOut required ModuleName user property with the name of the model
         message.Properties.Add("ModuleName", "my_dt_model");

         // Send message to Azure IoT Hub
         await _device.SendEventAsync(message);
         Console.WriteLine("Message sent to the cloud.");

         Console.WriteLine("Press Enter to exit the program.");
         Console.ReadLine();
      }
   }
}
The JSON message sent by the program above on the Azure IoT Hub receiving side looks like this:
{
   "body": {
      "Latitude": 47.6,
      "Longitude": -122.34,
      "Timestamp": "2019-10-04T00:30:41.3903956Z"
   },
   "applicationProperties": {
      "ModuleName": "my_dt_model"
   }
}
Note that the message has a section called applicationProperties which includes the ModuleName property described above. The value of ModuleName is set to the name of the digital twin model to which you want to route the message. You can use multiple digital twin models to receive messages from the same Azure IoT Hub, and the connector routes each message to the appropriate instance based on the ModuleName and DeviceId specified in the device connection string above.