Testing a Model
The ScaleOut Model Development Tool offers a test view that allows users to test newly created models by creating simulated real-time digital twin instances and sending them messages. In this self-contained development environment, users can observe the effect of rules execution on the values of instance properties and verify correct operation of both machine learning and rules-based models.
Note
The Test view can only be used if all rules are valid. Before testing a model, be sure to fix any outstanding syntax errors. Errors will be displayed when switching to the Test view.
Using the Test Tab to Send Messages to Model Instances
After defining the model’s properties and rules, select the Test Model tab to test your model. Next, start testing by sending messages to instances of the model. To send a message, first fill out the instance id to select an instance to receive the message and then fill out all properties of the message. Click one of the two buttons to send the message:
Send message and run model: This button sends the message and runs all rules.
Send message and run single step: This button sends the message and runs the rules one at a time so that you can observe each rule’s execution.
If the message is sent to an instance that does not exist yet, the tool will automatically create one and show it in the tree on the left. If you select an instance in the tree, messages will be sent to that instance by default. (Otherwise, you can fill in the instance ID.) The instance will process the message by running the model’s rules. In the tables on the right, you can examine changes in instance properties and any messages that the instance may have sent or logged:
Viewing Properties and Messages in Test Model
You can select an existing instance in the tree at the left to display its properties on the top right under Instance properties, which show the current state of the instance. As messages are sent to that instance and processed, the values of the properties will be updated to reflect its current state. When a value changes, it is highlighted in bold for convenience. This helps you observe the changes to instance properties from rule execution so that you can validate correct behavior.
The Messages table at the bottom right shows messages sent by the selected instance. These include messages that would be sent back to the data source and messages that would be logged to the UI in a production deployment. You can optionally clear messages from the table by clicking on the Clear messages button.
Using Single-Step Mode to Debug a Model
In cases where a model does not produce the expected results, it may be helpful to step through the rules one at a time in single-step mode and observe the results of each rule’s execution. In this mode, each rule is executed only when you click on the Run next rule button. The tool highlights the next rule to be executed. The rules table in the center under Examine/Run Rules displays information about each rule to help identify potential issues. You can combine that information with changes in instance properties and the message list to identify possible issues with the model.
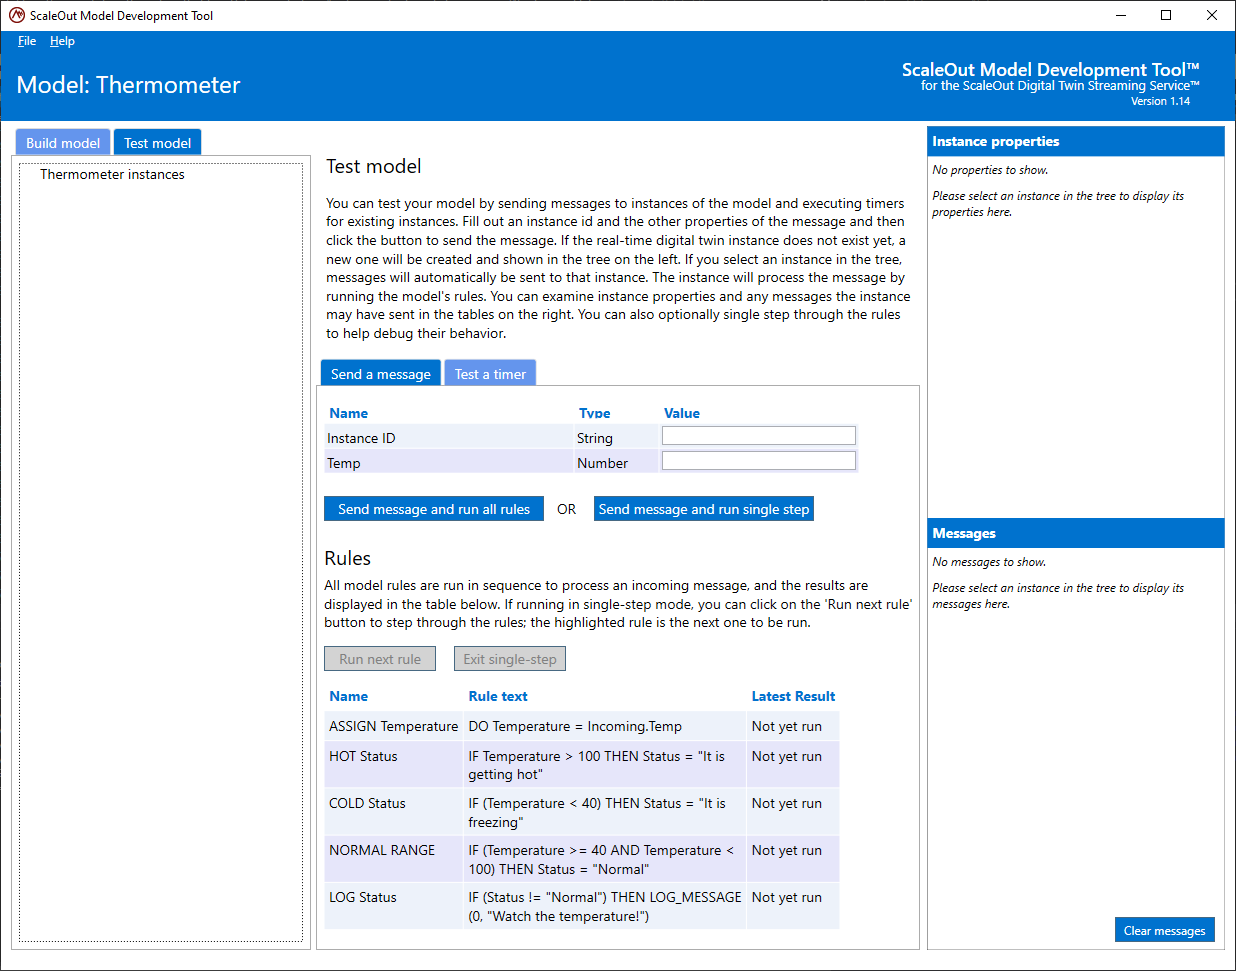
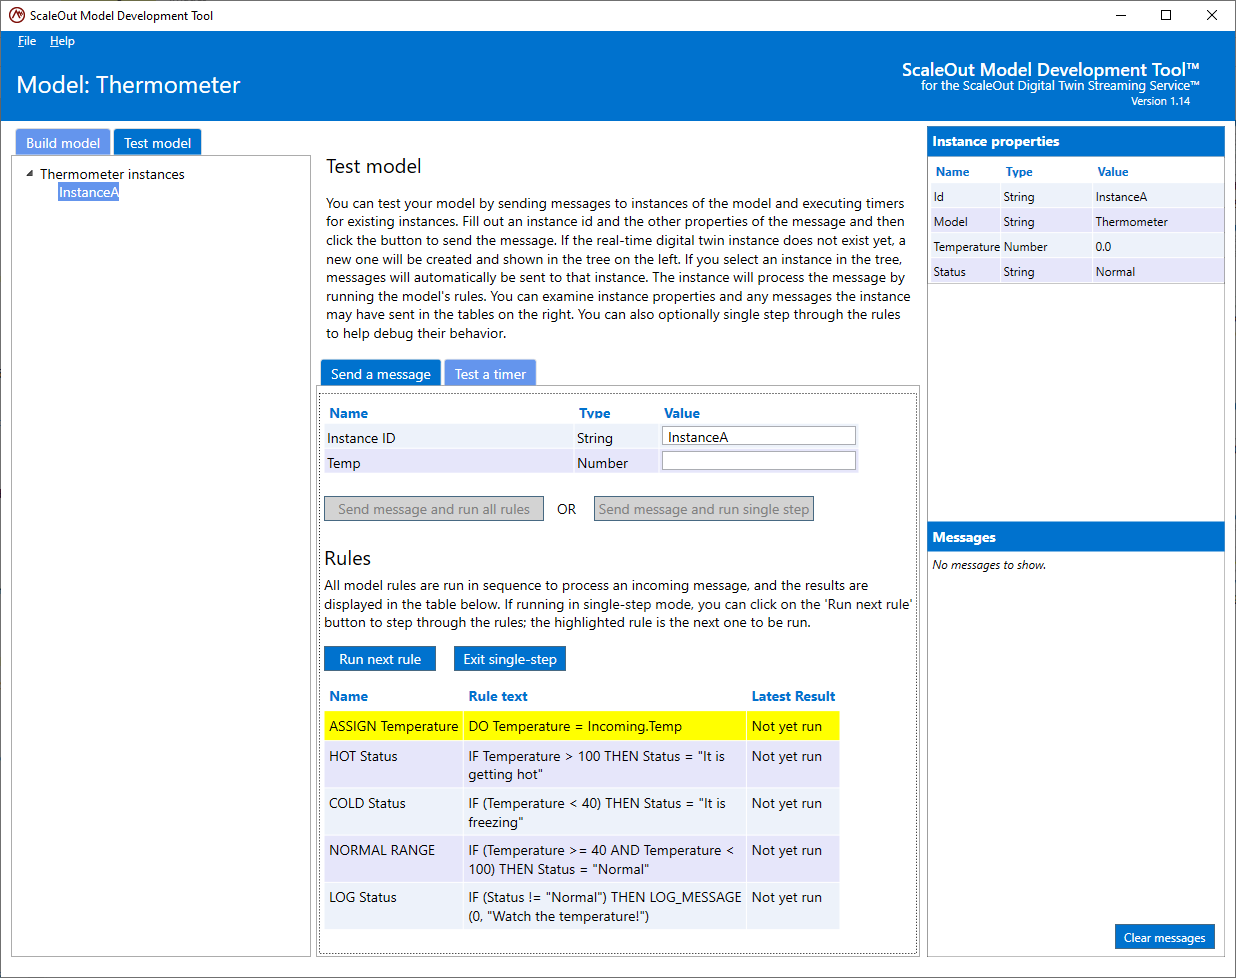
Here is an example of testing a rules-based model with single-step execution. The screenshot below shows a simple Thermometer model at the start of a test with no instances yet created:
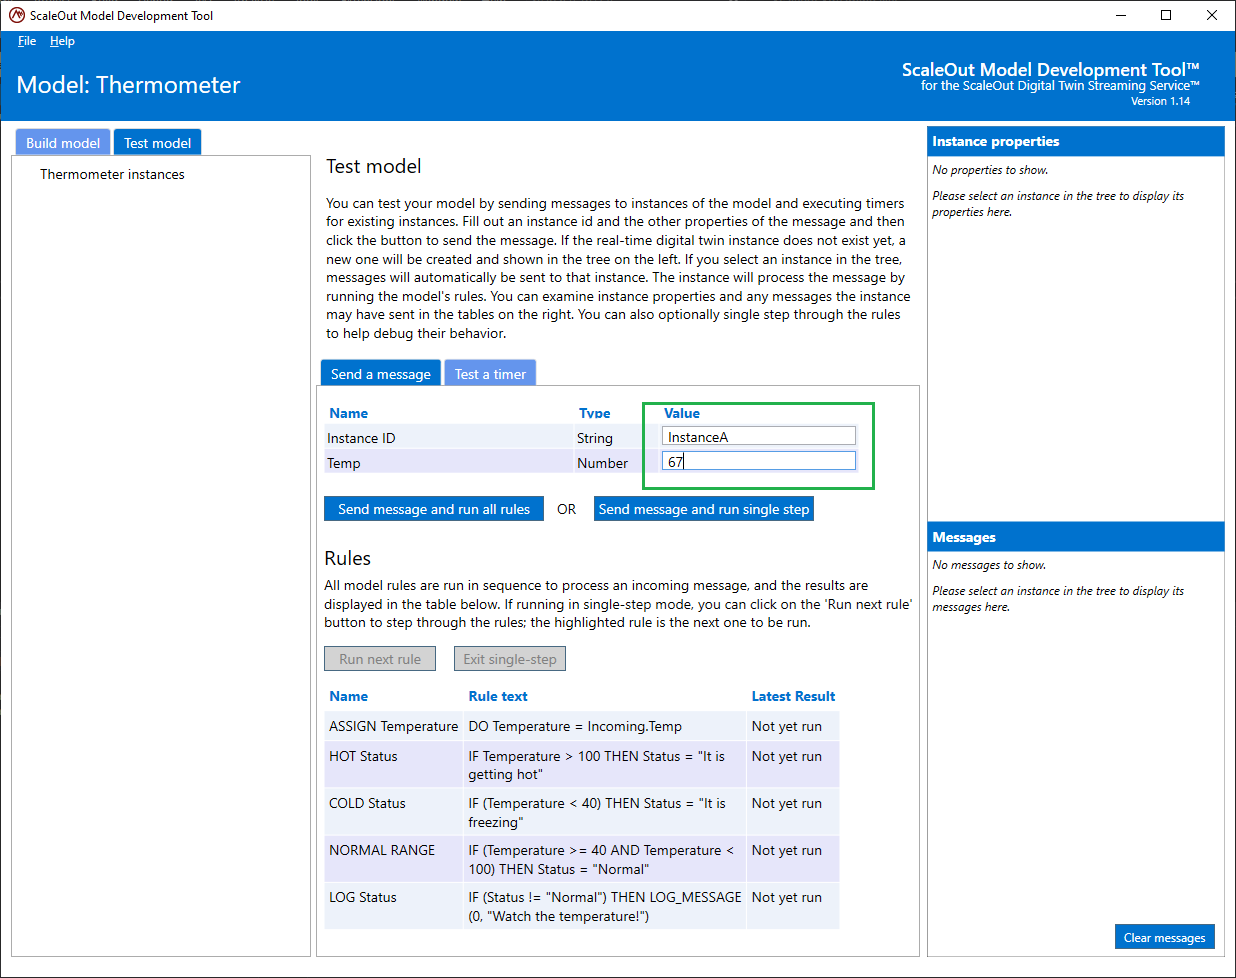
The user picks a name for an instance ID and fills out the properties of the message to send:
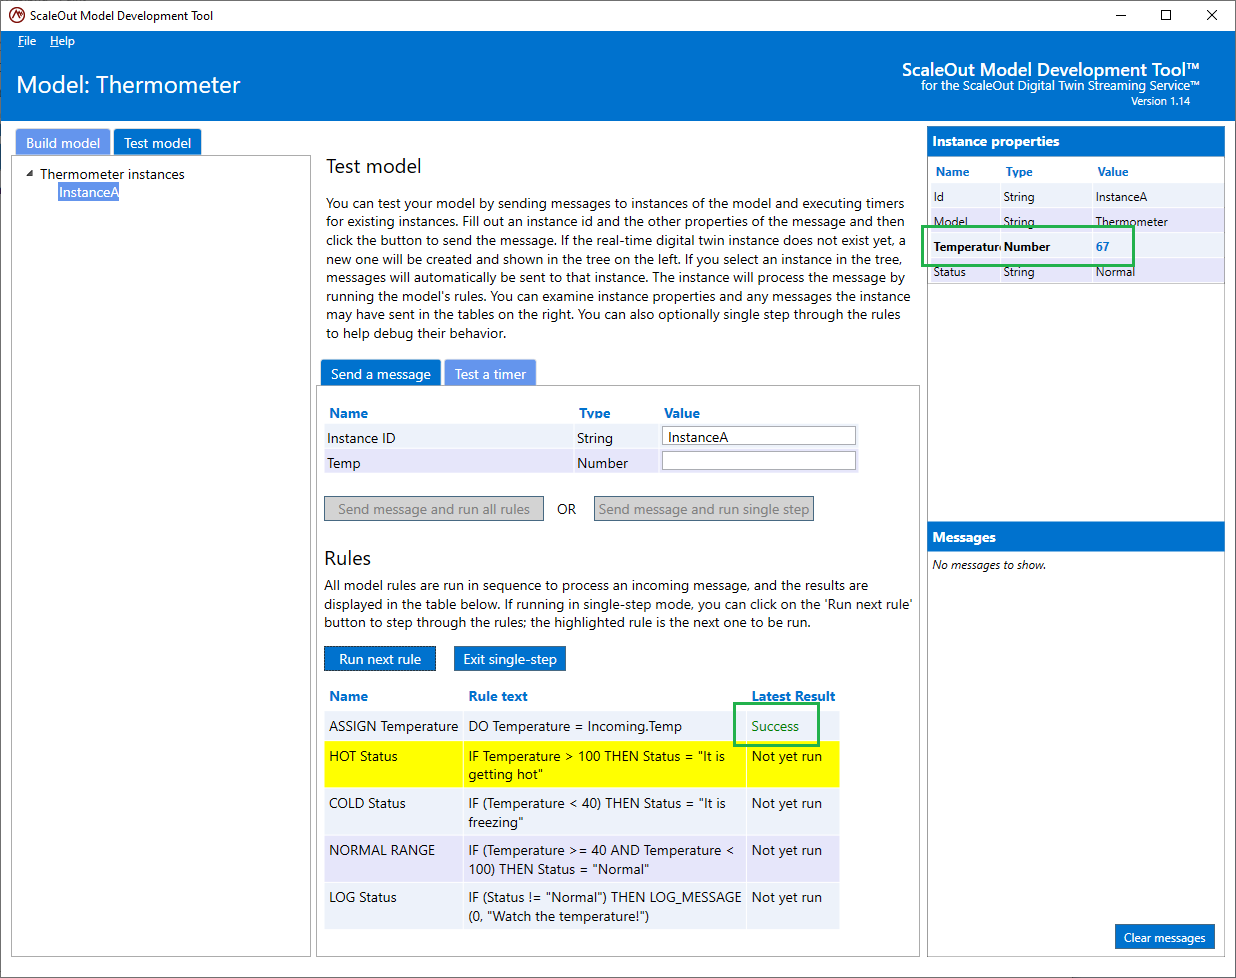
The user now picks to Send message and run single step. This starts single-step mode. The first rule is highlighted and ready to be run:
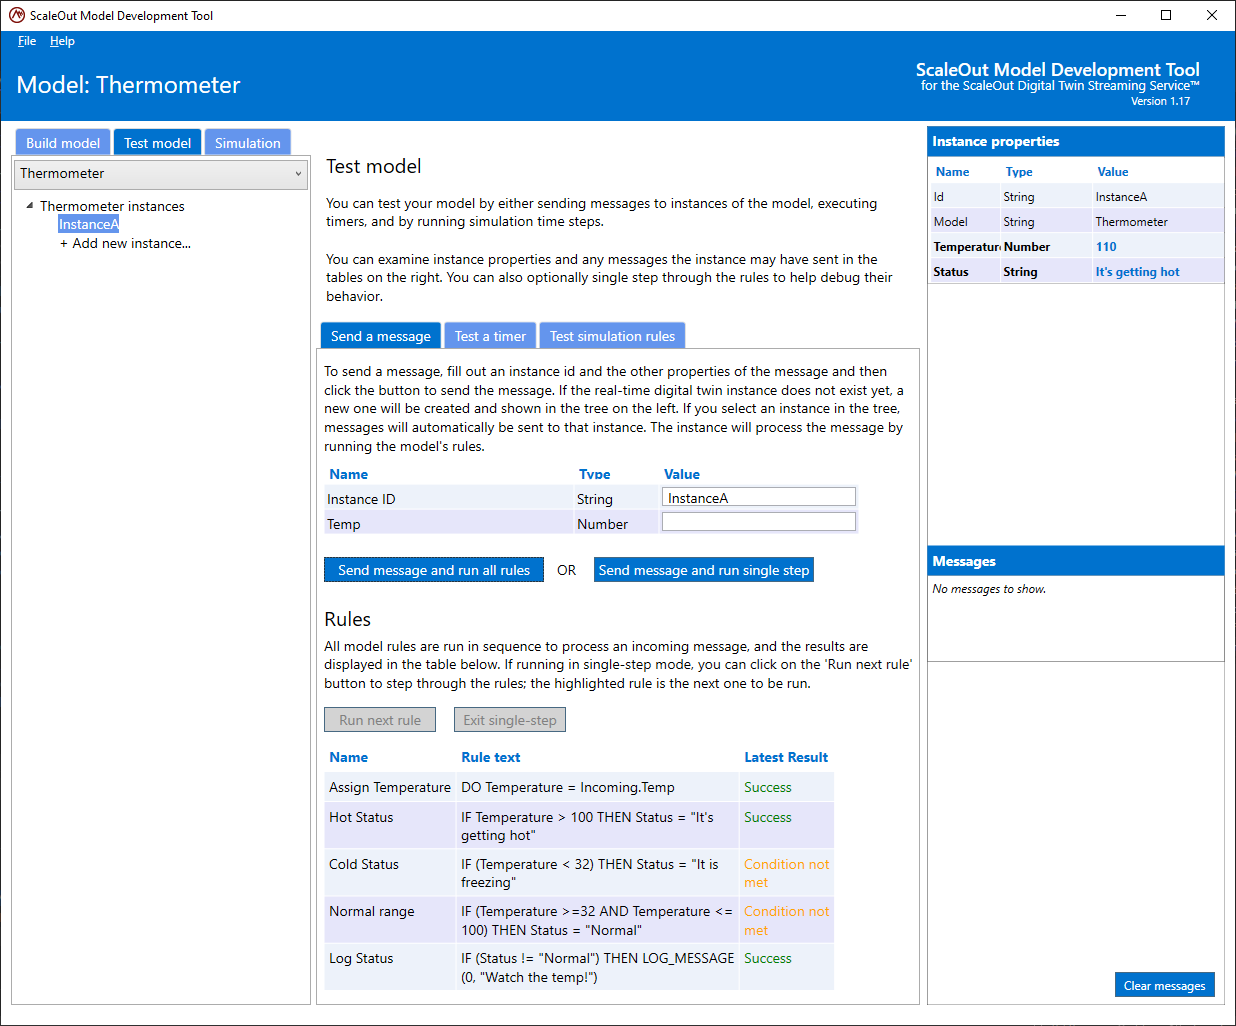
The user clicks Run next rule to execute the first rule. The result of executing this rule is shown in the rules table, and the changes to instance properties are shown in the Instance properties table at the upper right. Note that the rule runs successfully, and the Temperature property is set to the value 67 in the message.
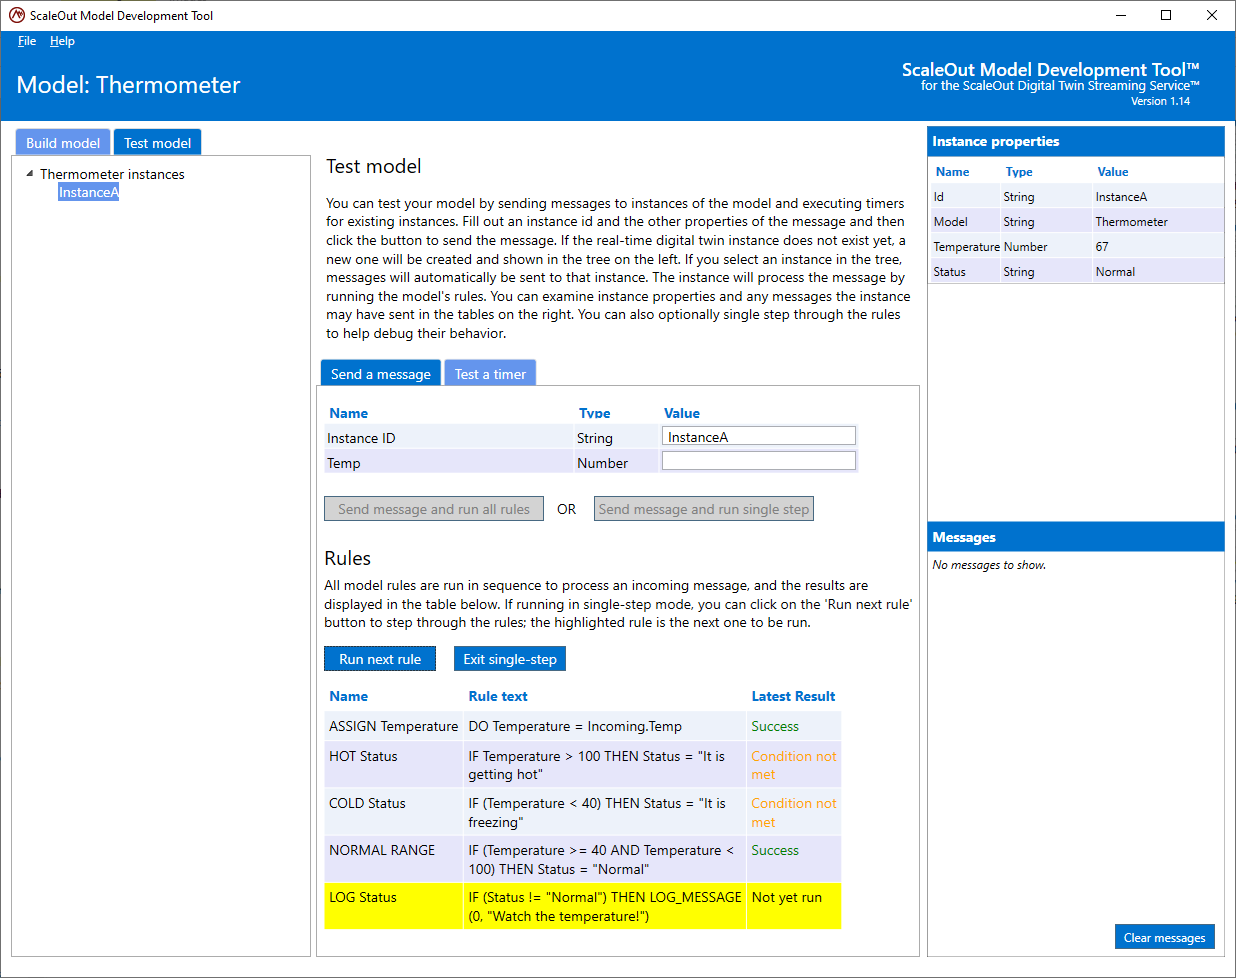
Clicking on Run next rule again iteratively executes the rules and shows the results:
The single step mode exits automatically after the last rule is executed. It also can be manually terminated by clicking on the Exit single-step button.
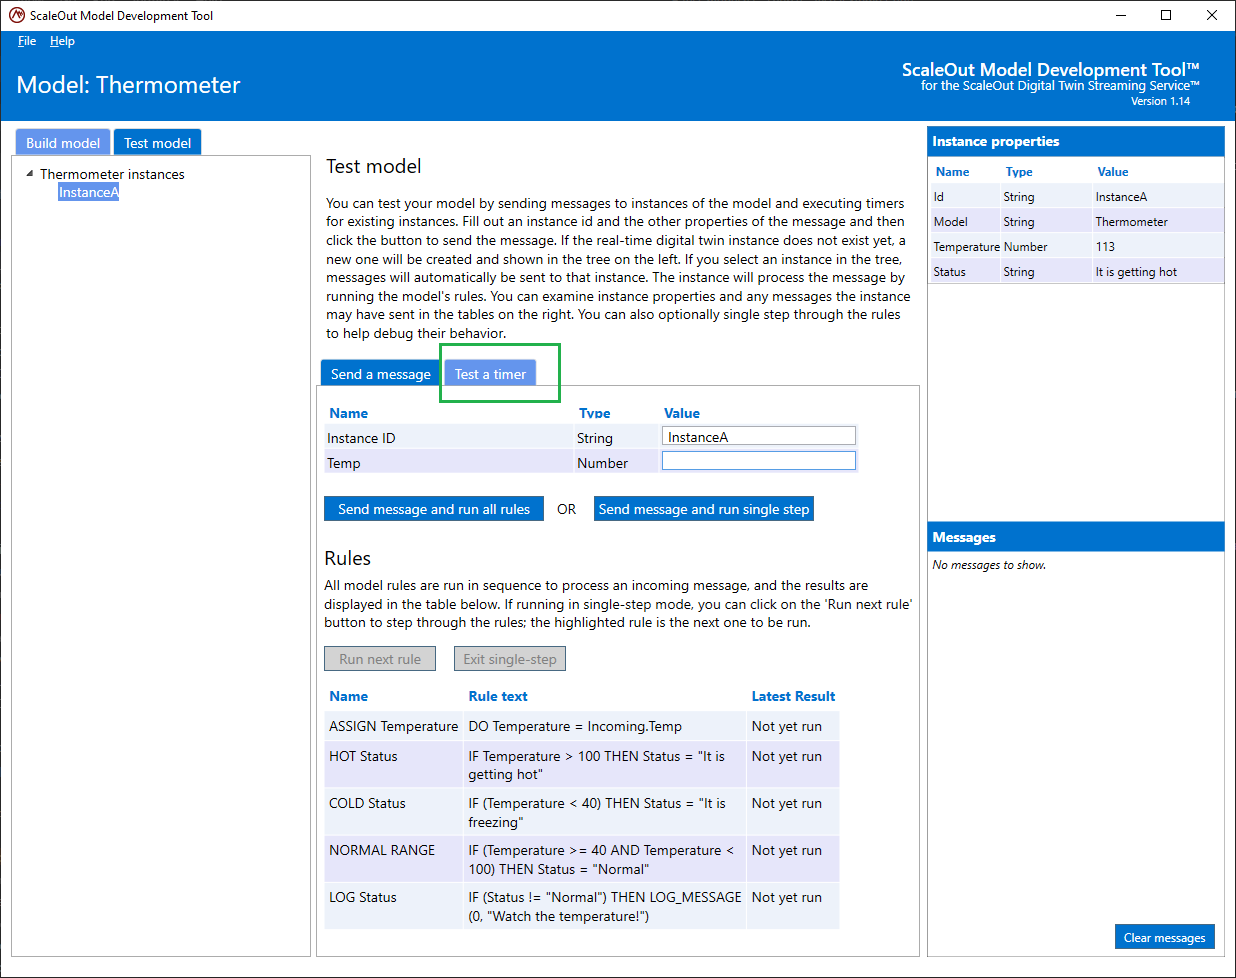
Testing Timers
In the test view, you can select the Test a timer in order to manually test the execution of timer rules.
Note
You need to have an existing instance to test timers so you will need to send at least one message before you can start testing timers.
The timer view is very similar to the message view. Instead of sending a message and running message rules, you will pick a timer and then run its rules.
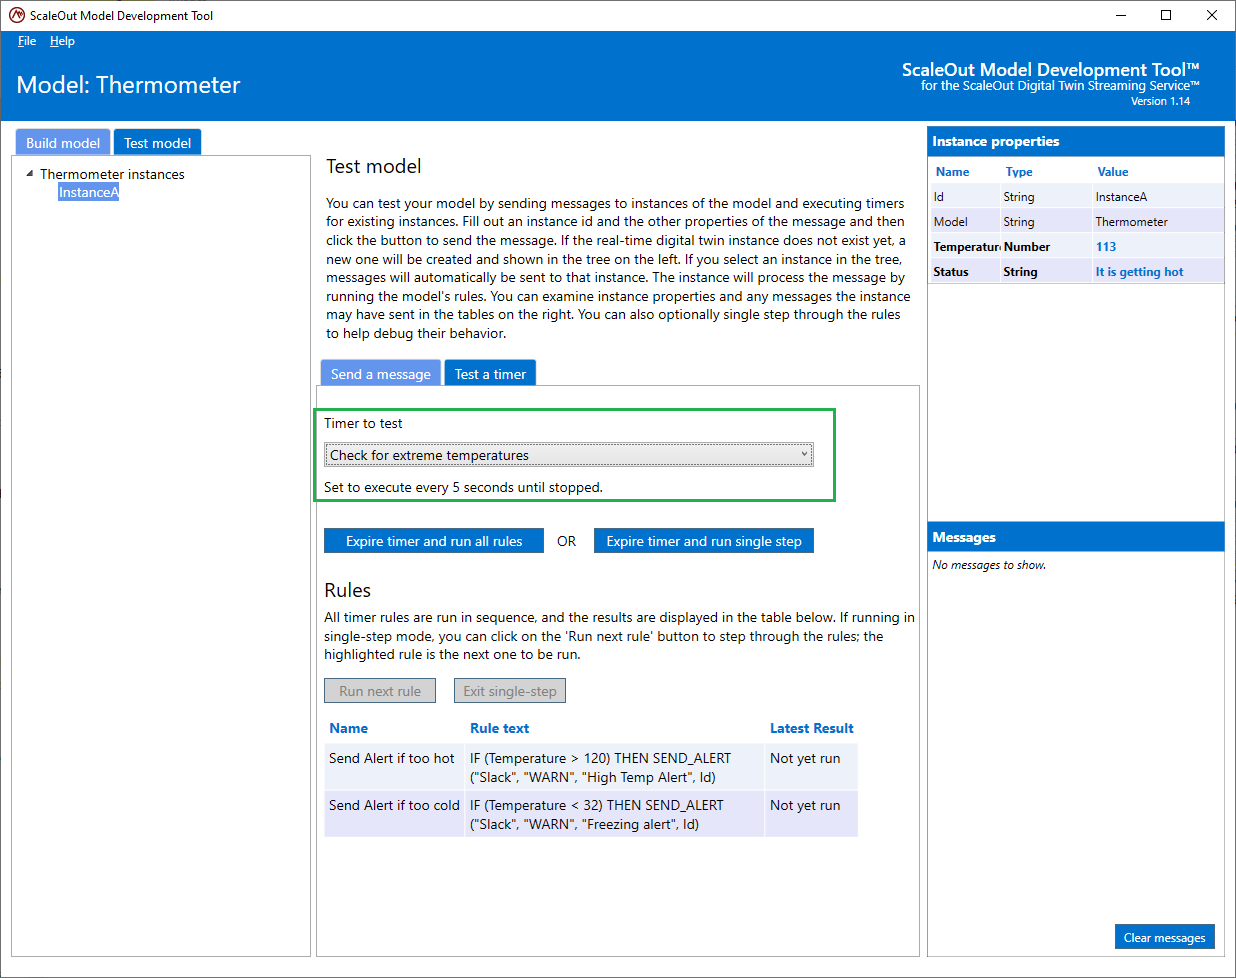
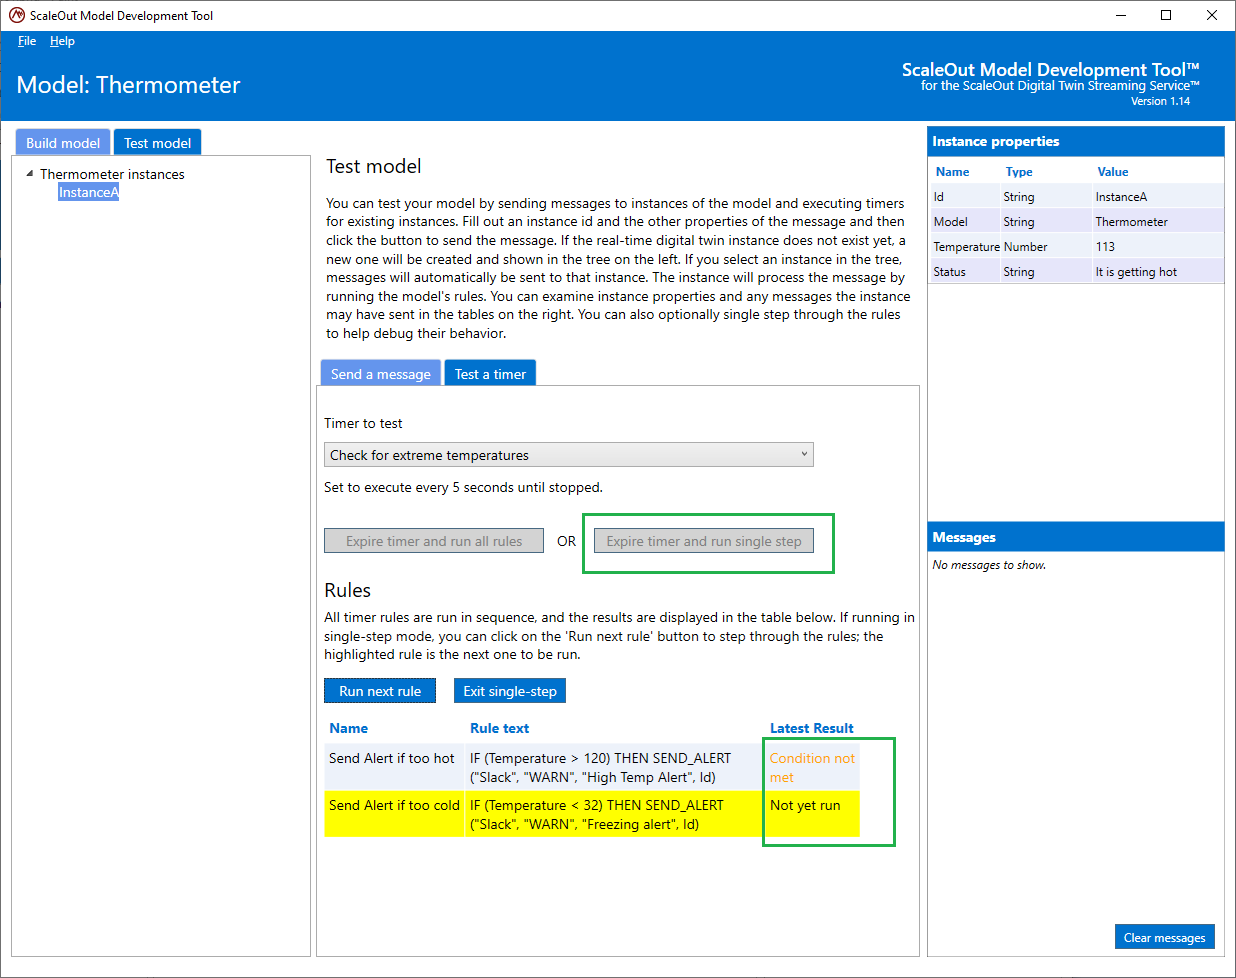
In the same way you would debug message rules, you have the option to run all rules at once, or iterate through each of them. Affected instance properties or log messages will be updated in the same way as for message rules.
Testing Simulation Rules
The ScaleOut Model Development Tool allows you to test the rules you designed for your simulation. After you create an instance you can use the test view to start a simulation. You can iterate through simulation time steps and validate that the rules produce the expected results. You can even debug the simulation rules in single step mode (like you do for other rules) if needed.
First make sure you create an instance. You can create an instance by sending a message to it. For example below, we send a message to our Thermometer model and this will create an instance.
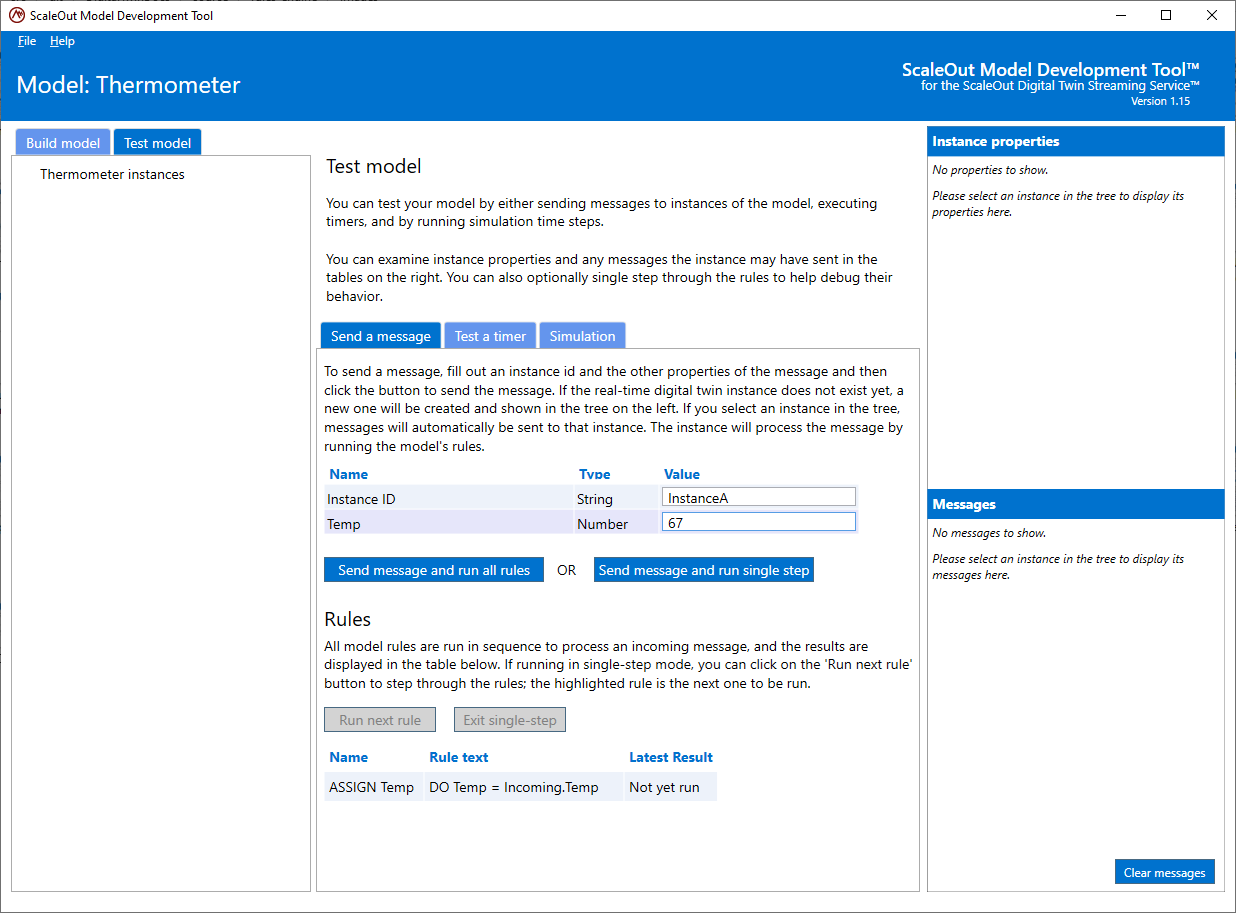
Once the instance is created, you can select the Simulation tab:
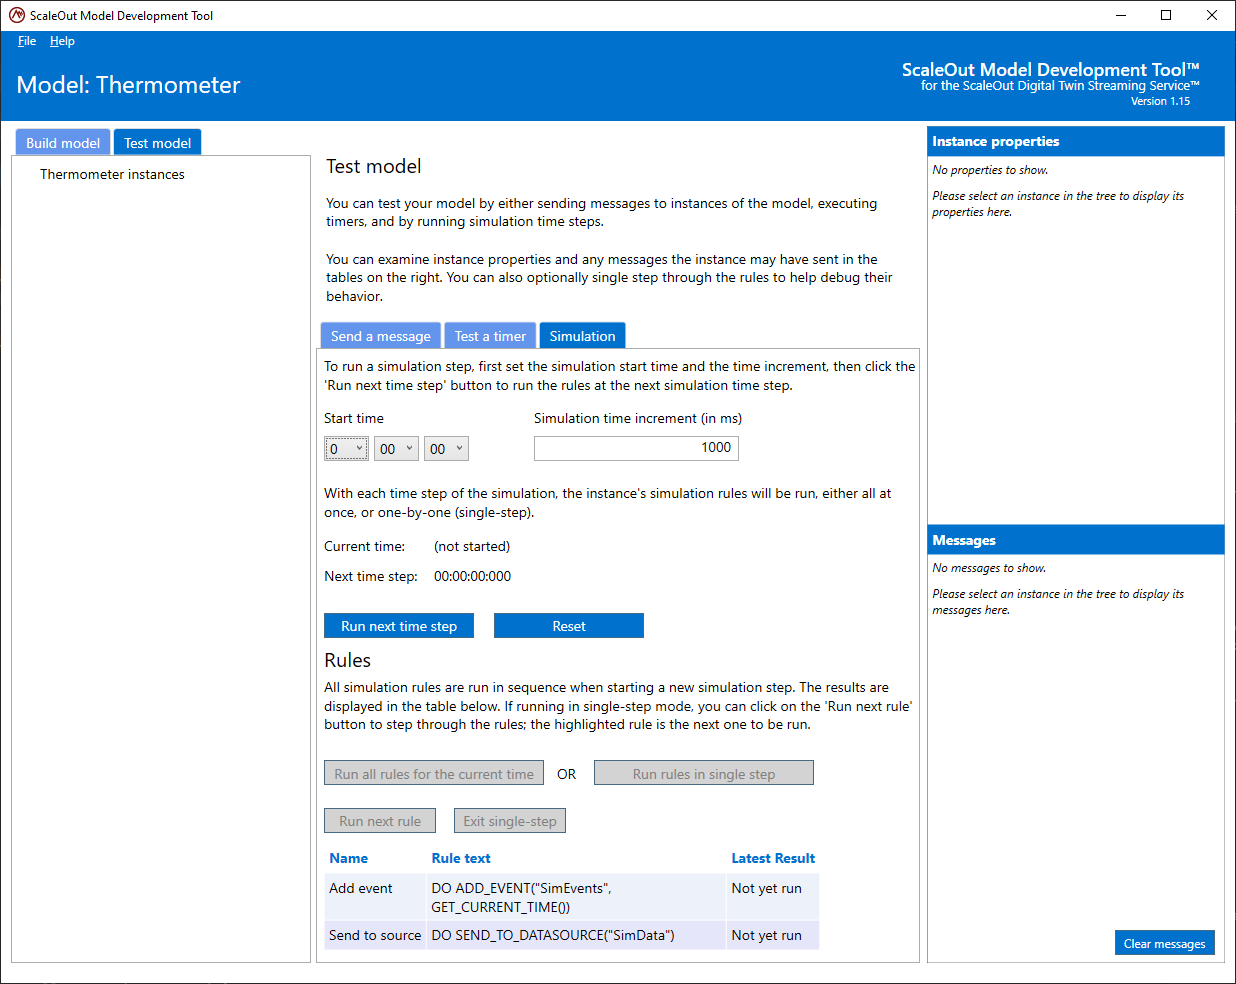
In this tab, you will find several components:
Parameters for the simulation
Controls for the execution of the simulation
Controls for the execution of the rules
Parameters for the Simulation
You can pick a Start time for your simulation. During the simulation, the “current” time is controlled by the simulation. Digital twin instances will obtain to the current time based on the start time and the number of steps into the simulation.
You will also need to define the simulation time step increment in milliseconds. Say you pick 1,000ms for the time increment, it means that each time step while the simulation is going, the current simulation time will increase by 1,000ms.
Controls for the Execution of the Simulation
When you are ready to start the simulation, click on the Run next time step button to push the simulation to the next time step. After each time step’s rules are executed, you will click on the same button to proceed to the next time step.
The Reset button allows you to reset the simulation to the start time.
Controls fo the Execution of the Rules
In the same way you can debug message rules or timer rules, you can decide whether to run all simulation rules at once by clicking Run all rules for the current time or enter the debug single step mode by clicking Run rules in single step.
If you decide to run all rules at once, the result of each rule will be displayed in the rule table:

If you decide to enter single step mode, you will get the opportunity to iterate through each of the simulation rules individually and check their impact on instance properties or messages, etc.

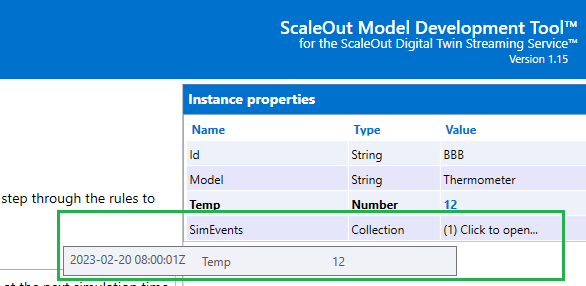
In this example the effect of the rule was to add and event to an event list, which is visible in the properties pane: