Account and Settings
This section describes how to view account details and manage UI settings, users, organizations, and admin functions.
User Settings
Non-administrator users are able to view details about their own account and organization.
Viewing User Details
To view details for the currently logged in user, first navigate to the Account & Settings page. Under Account, click the User Details link.
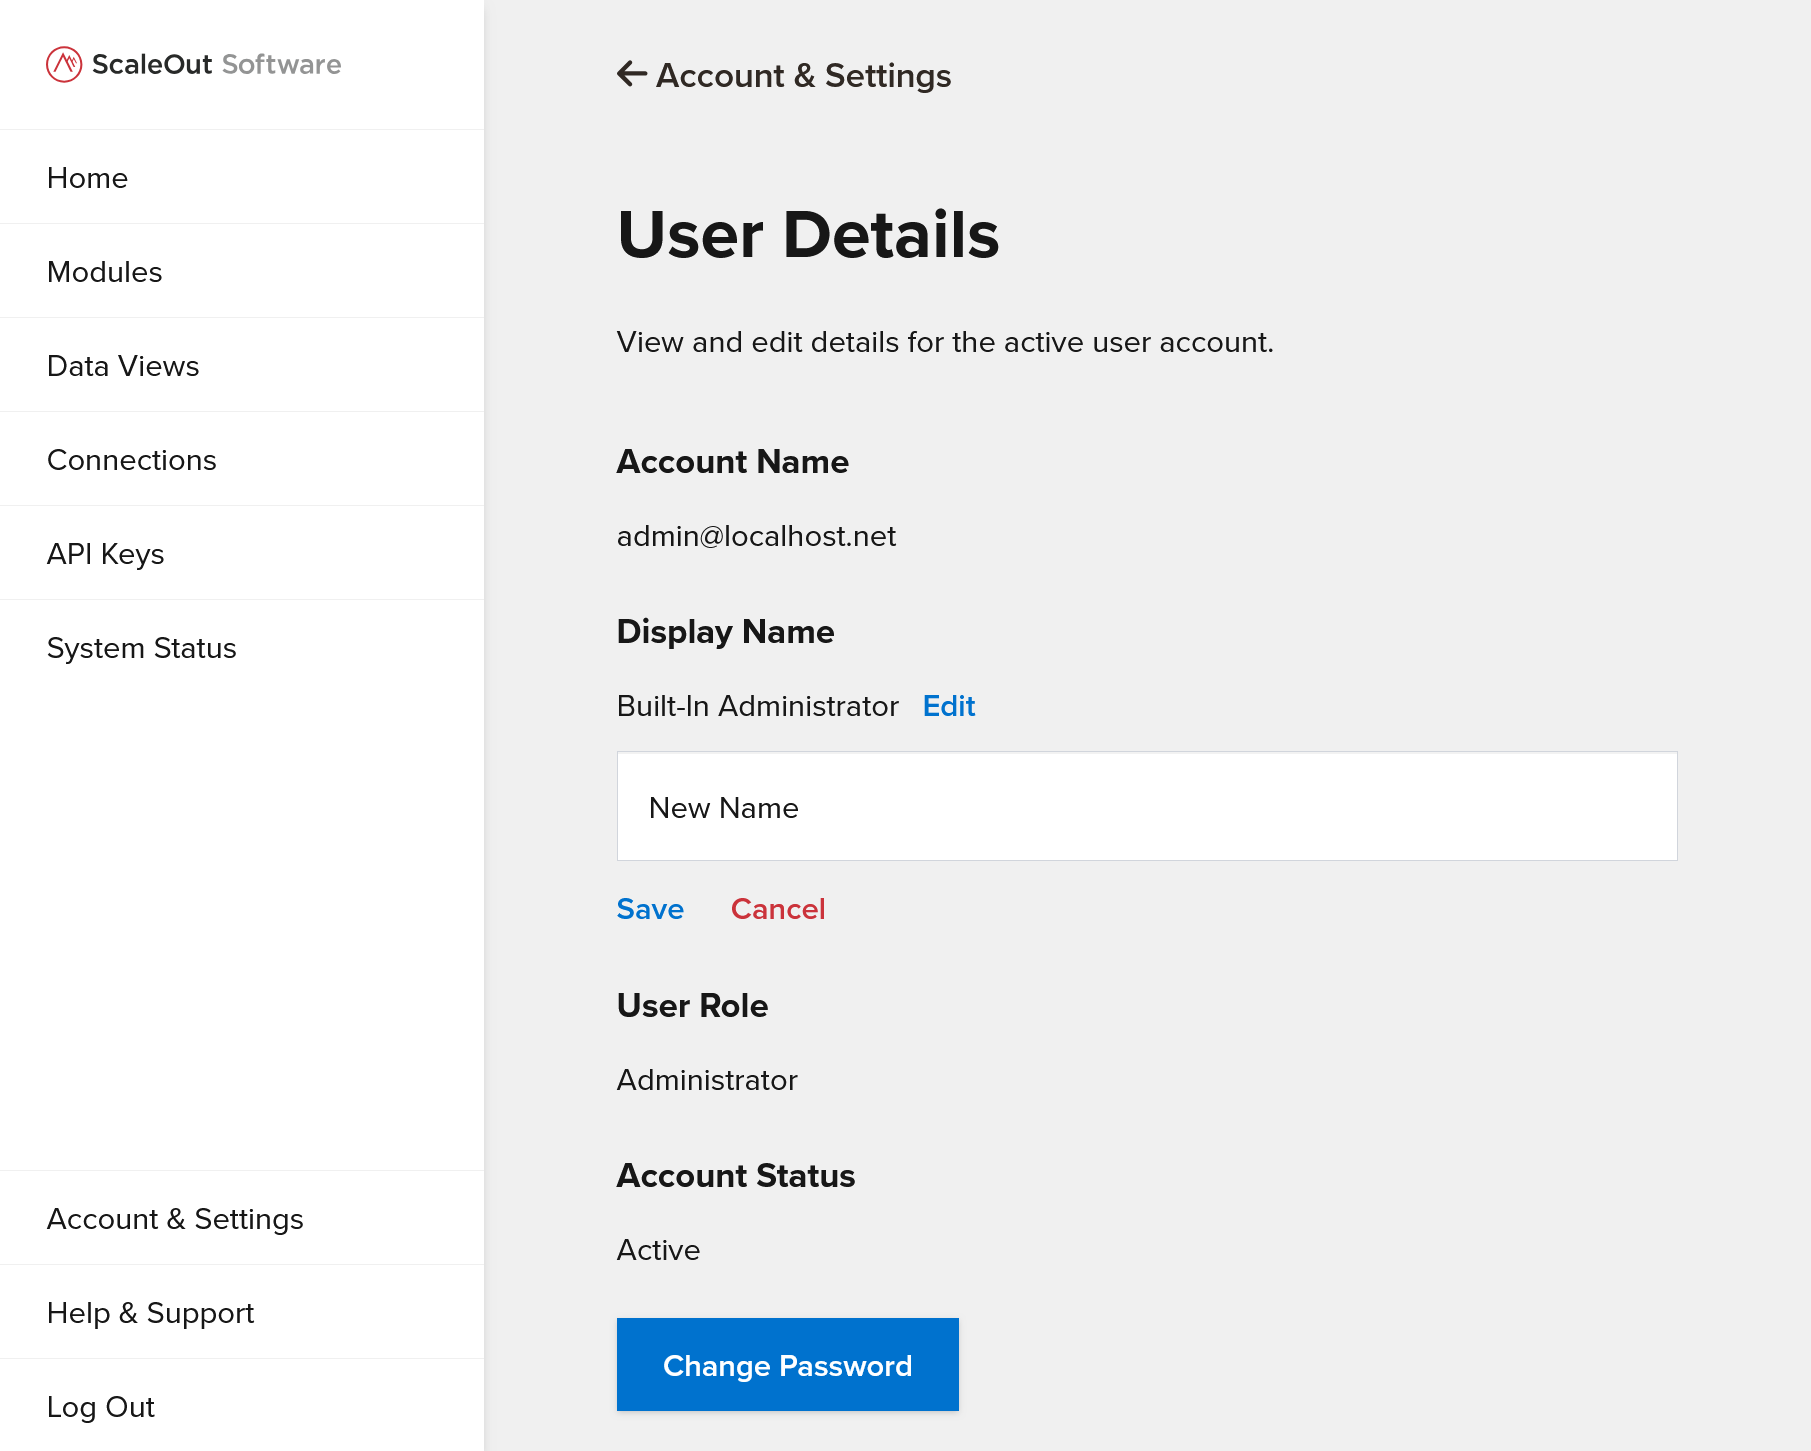
Changing Display Name
To change the display name for the current user, first ensure you are on the User Details page. Click the Edit button next to the display name. Enter a new display name, then click Save, or click Cancel to revert changes.
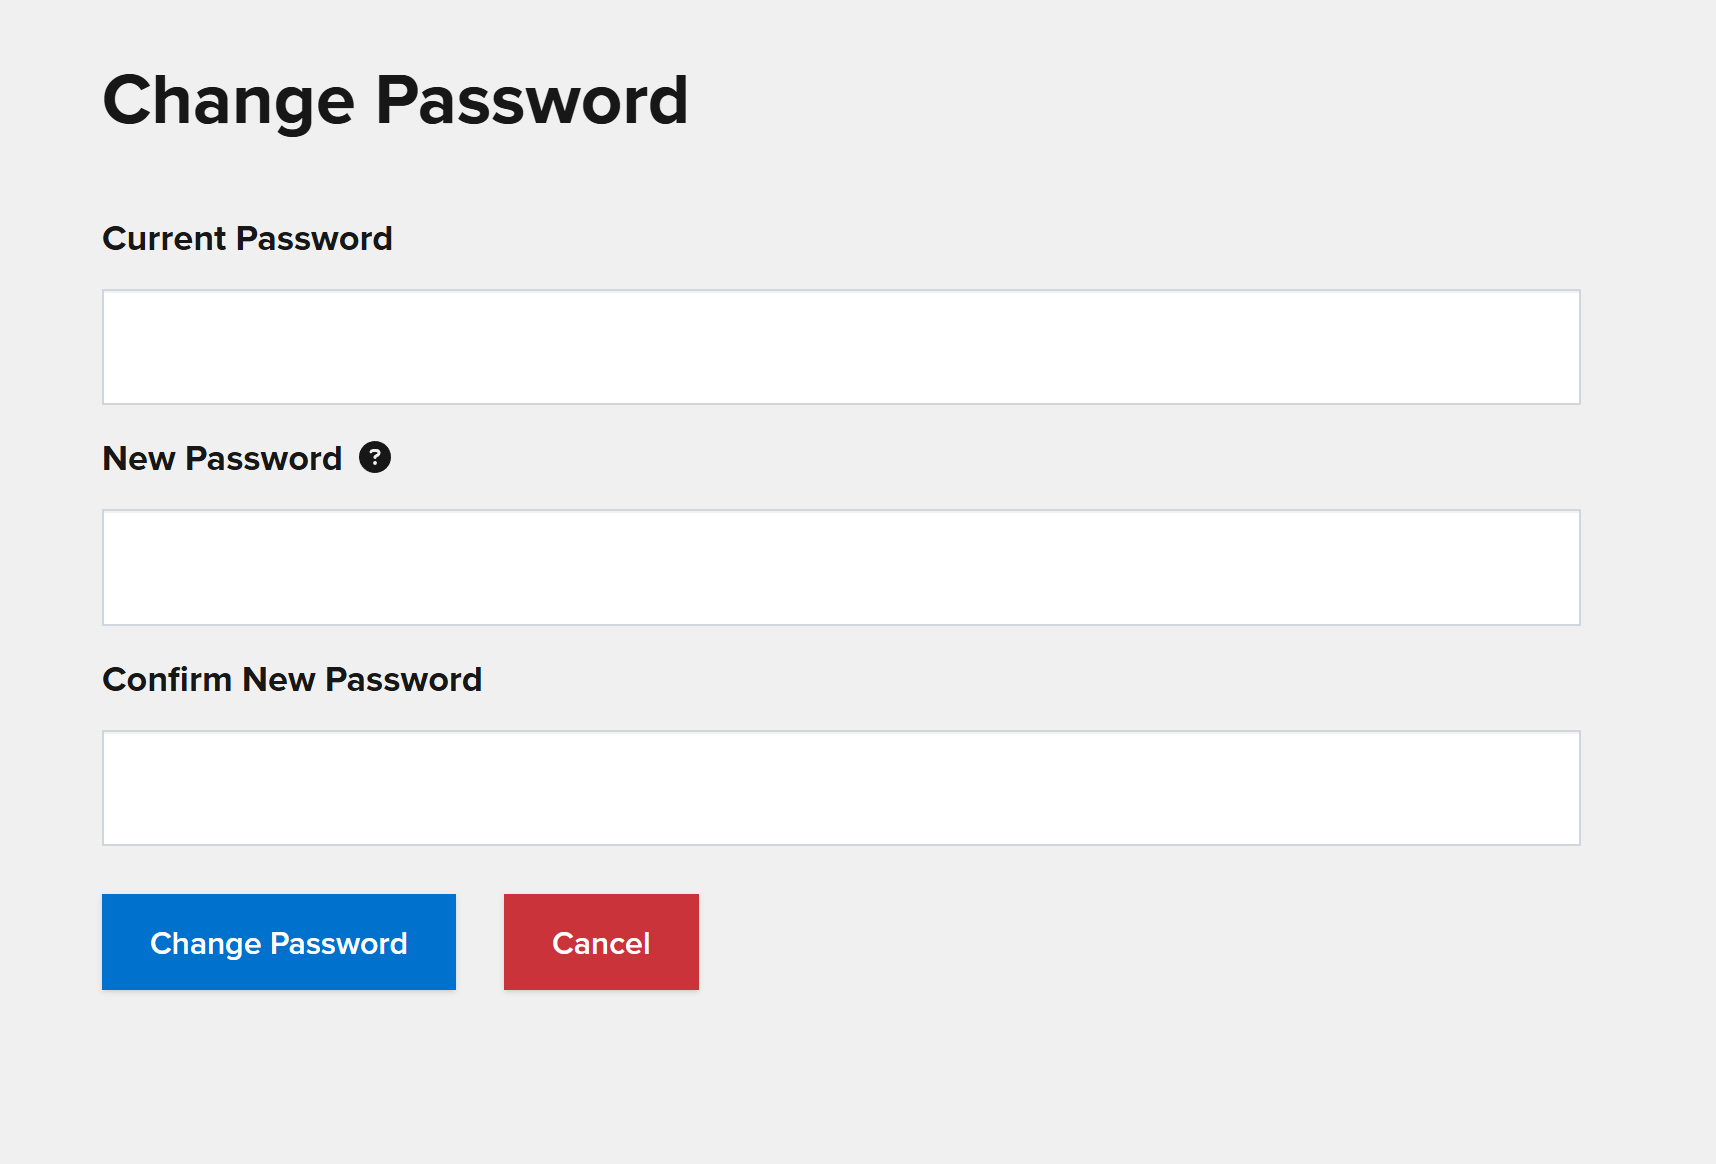
Changing Password
To change the password for the current user, first ensure you are on the User Details page. Click the Change Password button. In the form, enter a new password and click Change Password.
Organization Settings
Viewing Organization Details
To view details for the currently logged in user’s organization, first navigate to the Account & Settings page. Under Account, click the Organization link.
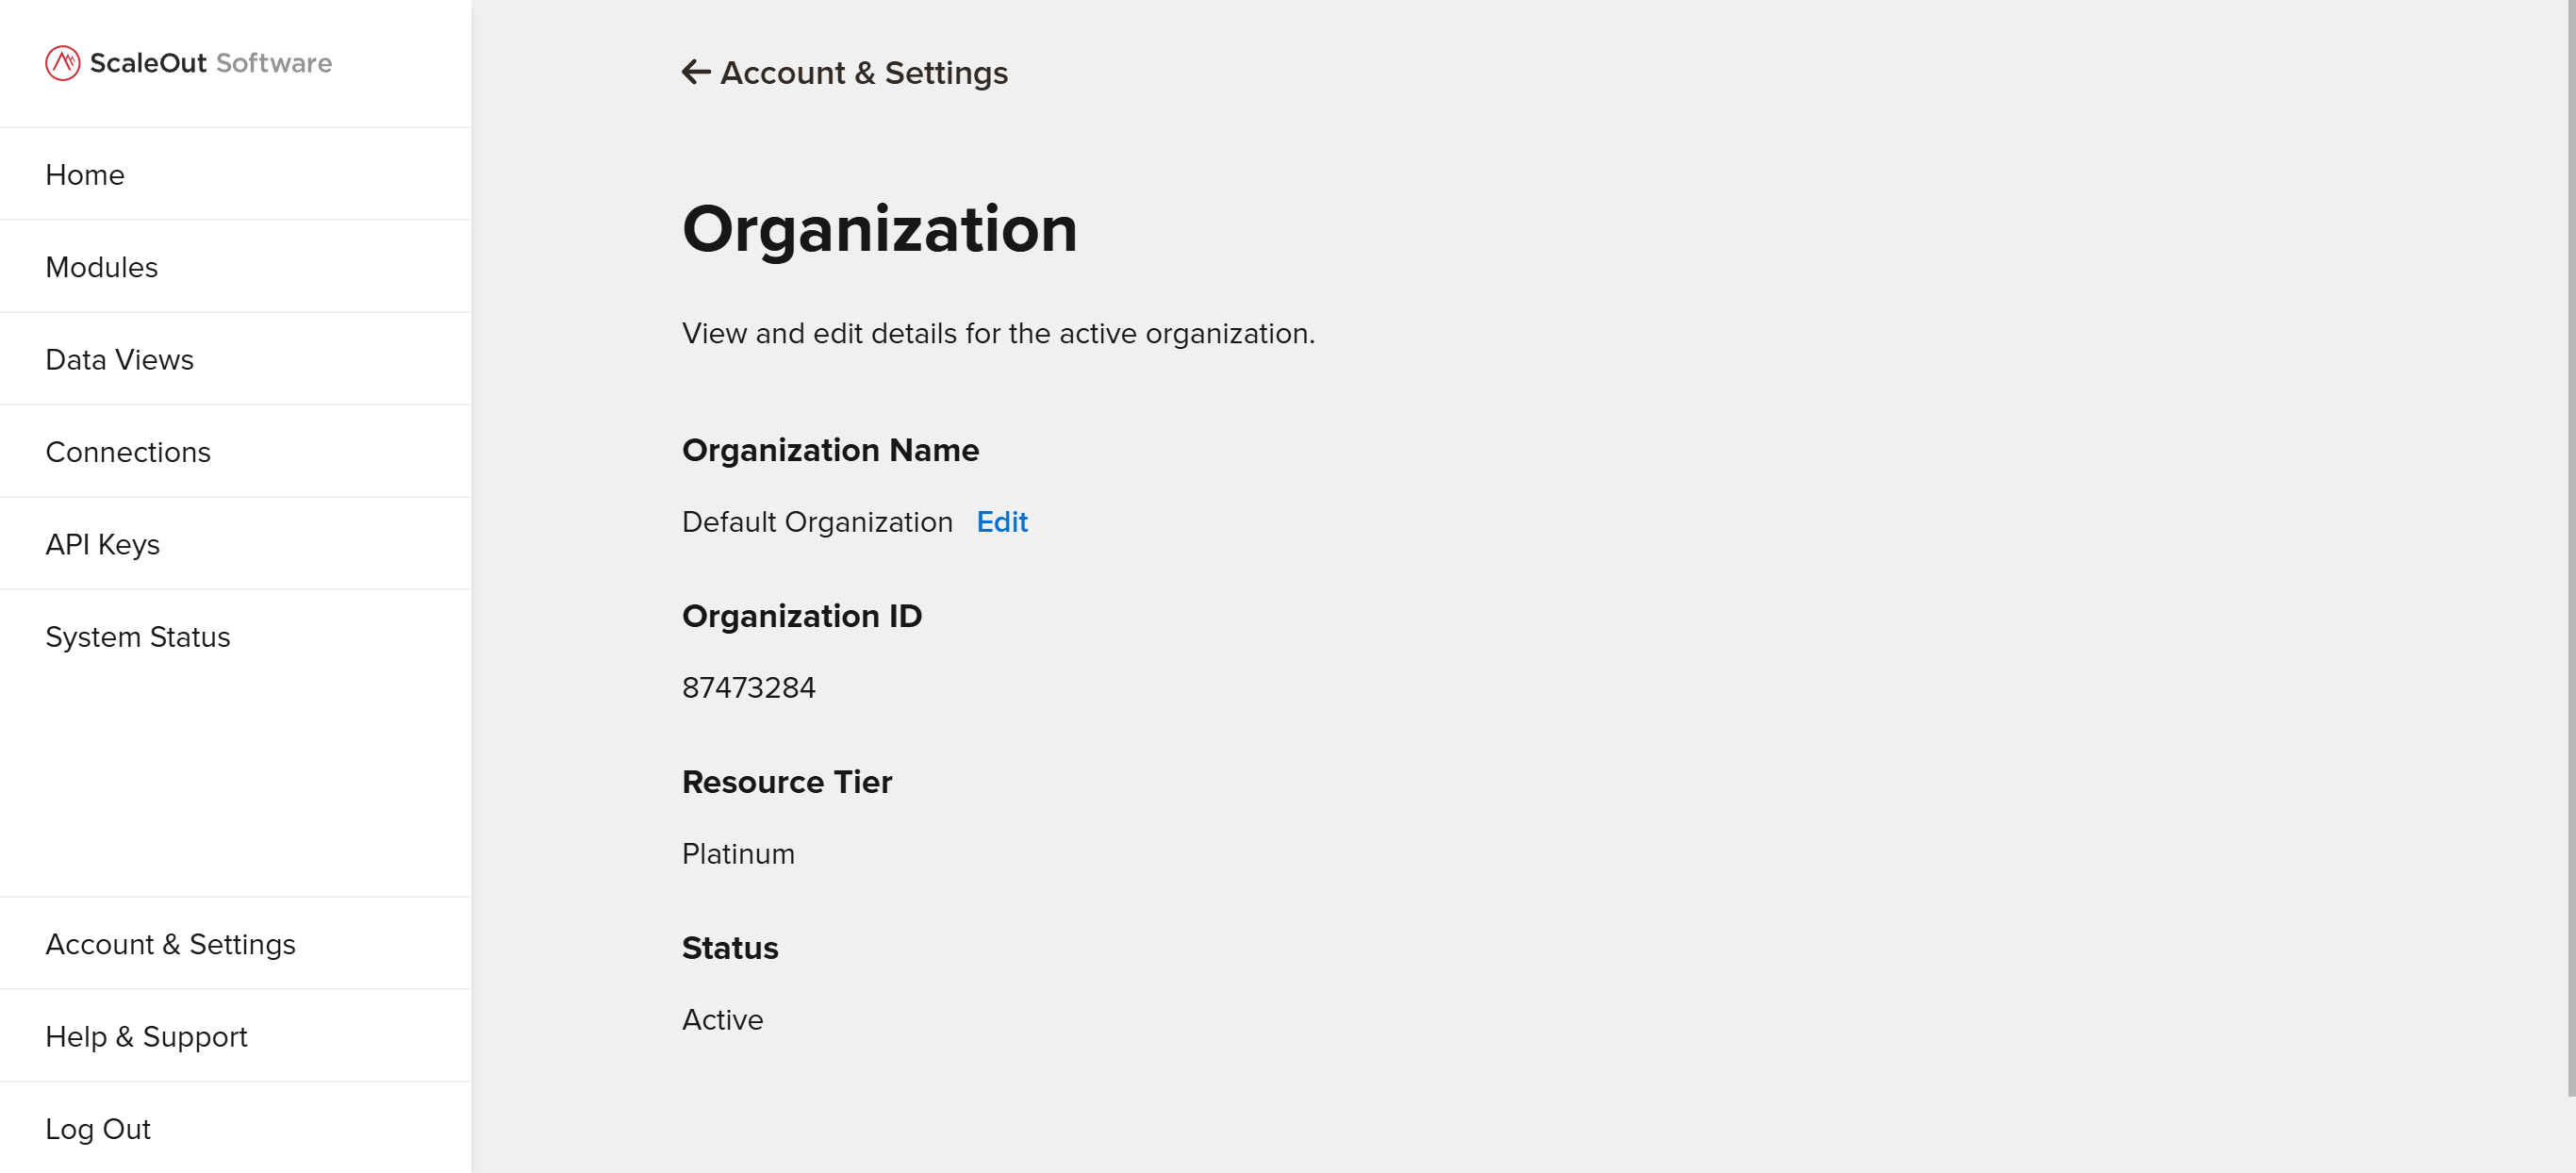
Changing Organization Name
To change the name for the current organiztion, first ensure you are on the Organization page. Click the Edit button next to the organization name. Enter a new name, then click Save, or click Cancel to revert changes.
Administrator Settings
The following settings are only accessible when logged in as an Administrator.
Managing Users
To manage users in the current organization, first navigate to the Account & Settings page, then click the Users link under Administrator Settings.

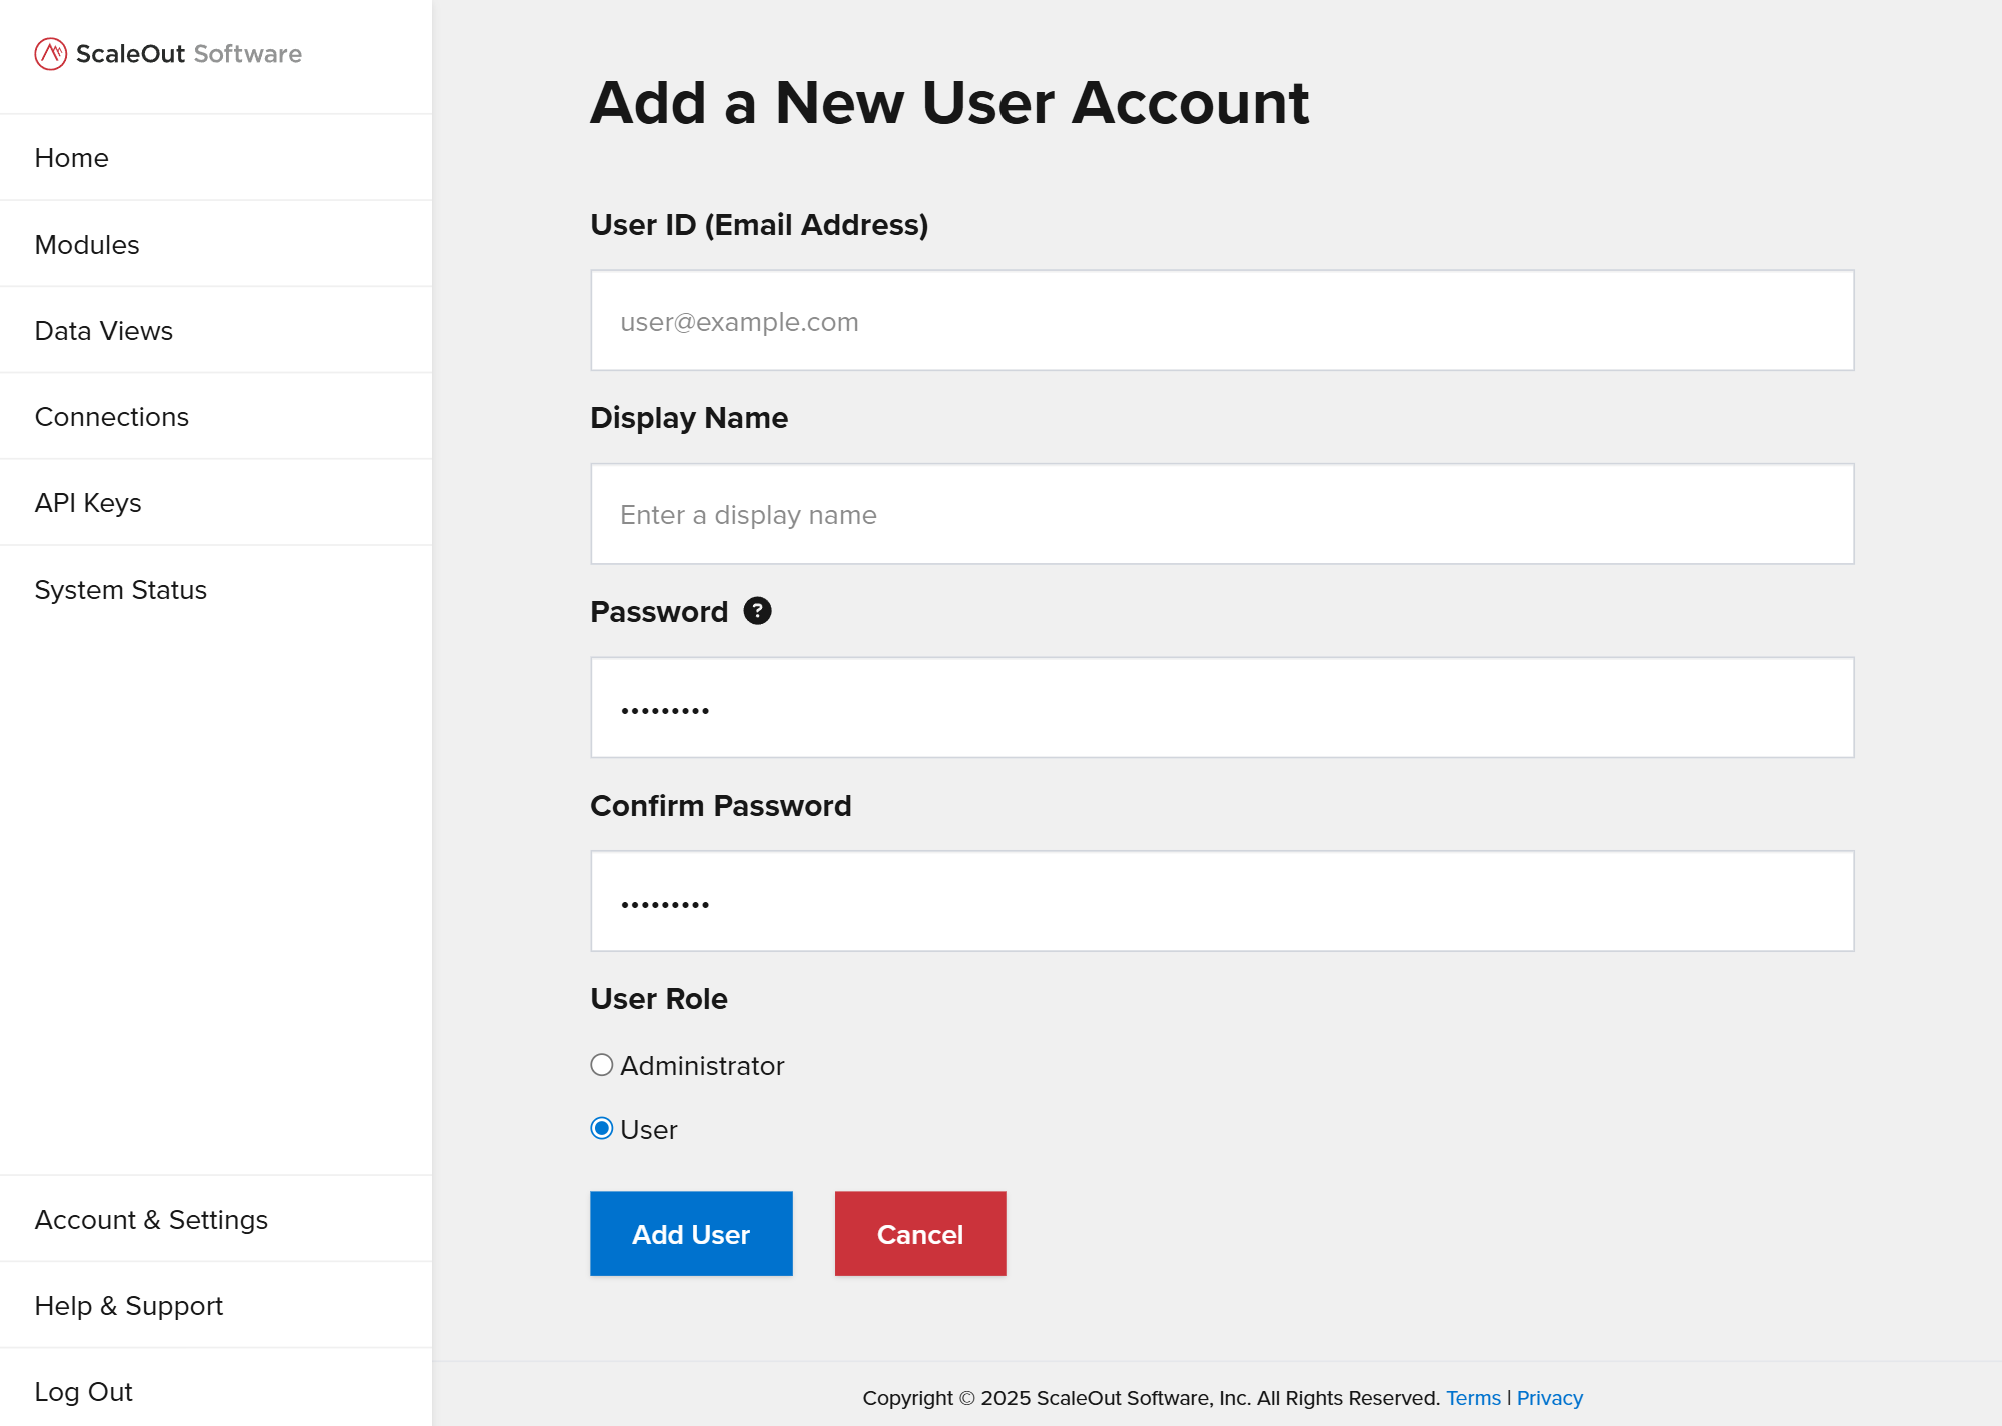
Adding Users
To add a user, click the Add User button below the Users table. Fill out the form by entering a user ID, display name, and password for the new user. Click the Add User button to register the new user account.
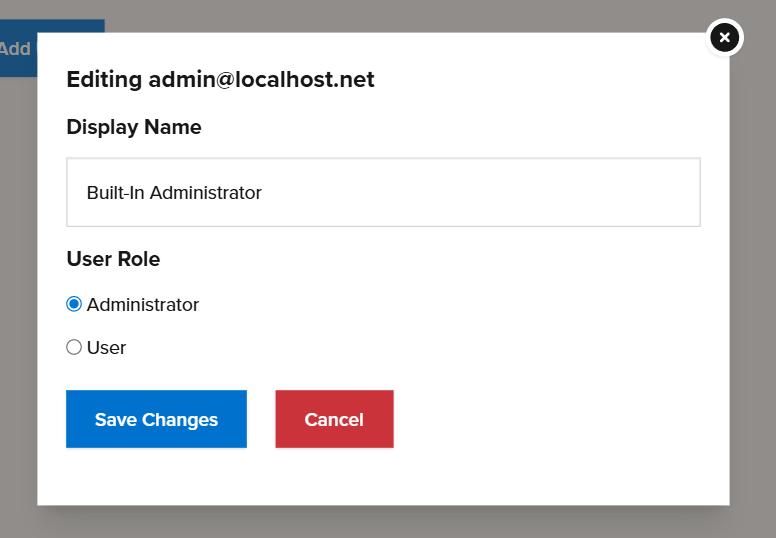
Editing User Details
To edit a user, click the 3 dots icon in the Options column of the table, then click Edit User Details. In the modal pop-up, you can specify a new display name and/or change the user role. Once you have finished making changes, click the Save Changes button, or click Cancel to revert the changes.
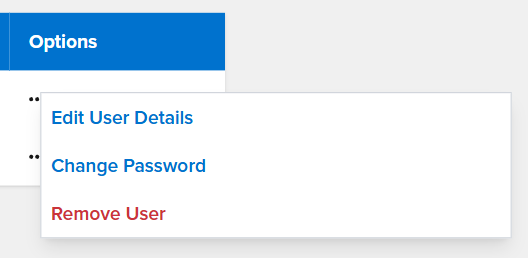
Changing User Password
To change a user’s password, click the 3 dots icon in the Options column of the table, then click Change Password. In the Change Password for User screen, enter and confirm the user’s new password. Click Change Password to validate and apply the new password, or click Cancel to discard the change.
Removing Users
To remove a single user, you can click the 3 dots icon in the Options column of the table, then click Remove User.
Note
The organization must always have at least one administrator, so it is not permitted to remove the only administrator or demote them to a user.
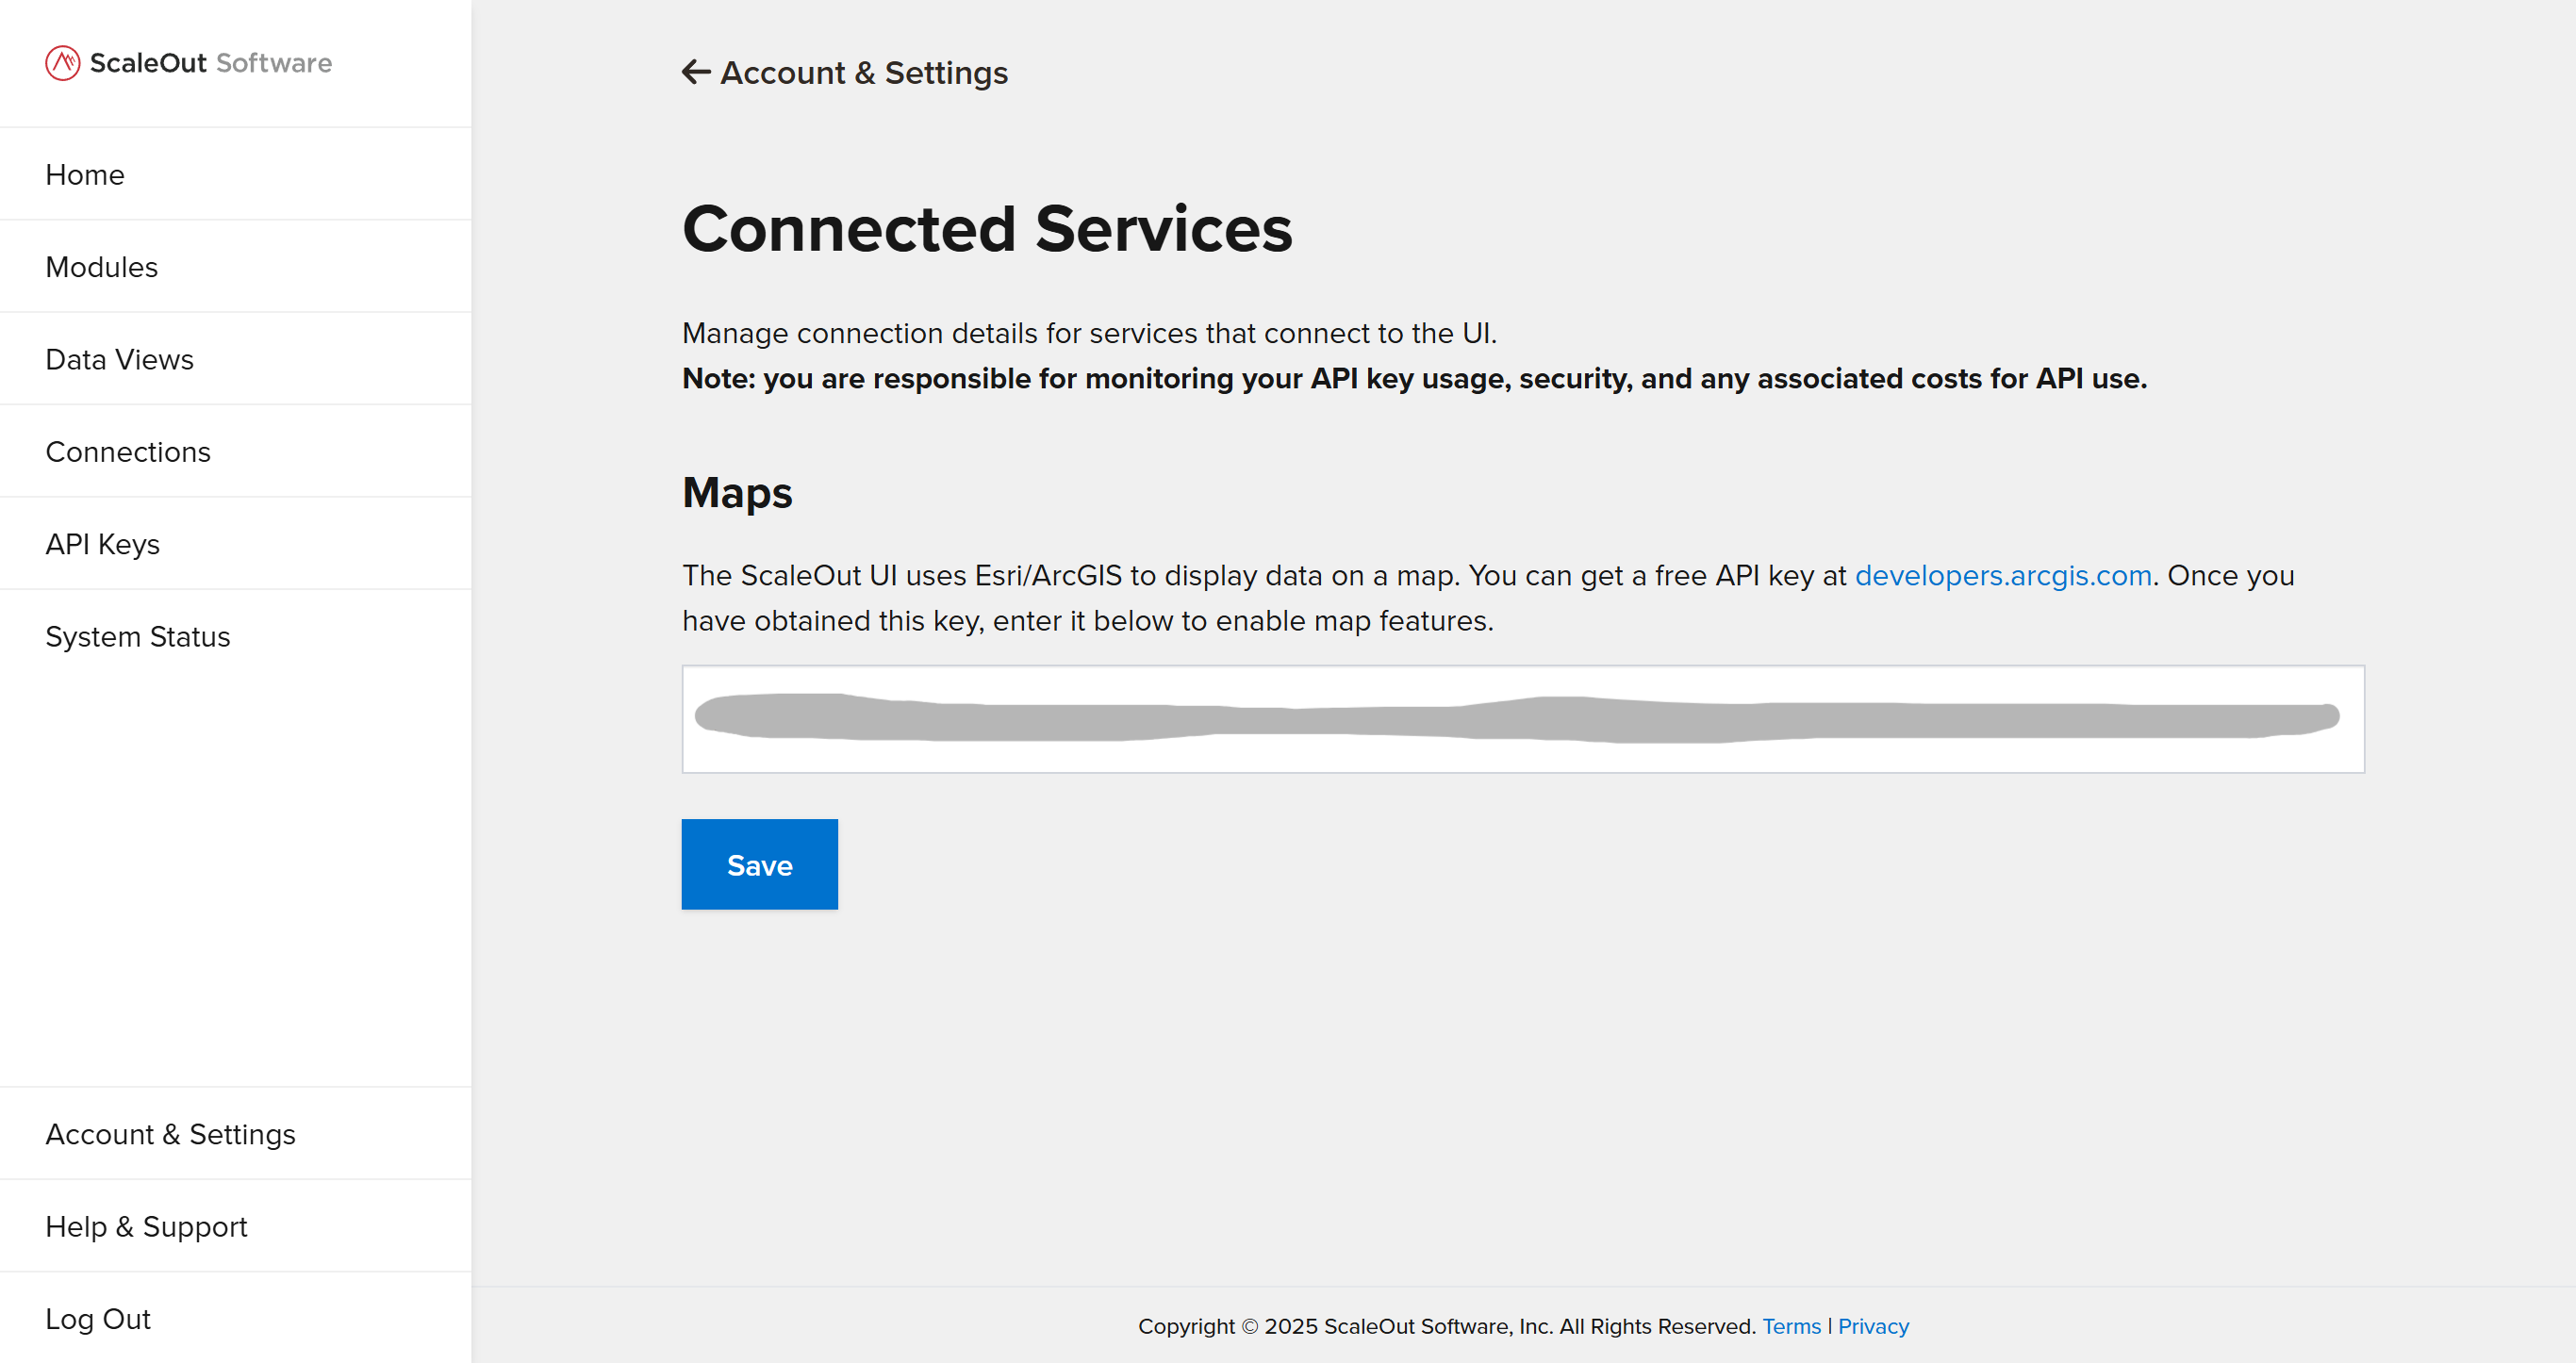
Connected Services
Connected services support UI functionality, such as mapping. Some of these services require you to provide your own API key. To manage connected services, first navigate to the Account & Settings page, then click the Connected Services link under Administrator Settings.
Note
Important: You are responsible for monitoring your API key usage, security, and any associated costs for API use.
Adding Your ArcGIS API Key
Adding an ArcGIS API key enables you to use mapping features in the UI. To get a free API key, visit https://developers.arcgis.com/ and follow the steps to create an account and generate an API key. Once you obtain your key, return to the UI and paste it into the form field under Maps on the Connected Services page. Click Save, and the key will be used when displaying maps.
Adding Your OpenAI API Key
To use the optional generative AI features, you must provide your OpenAI API key. You can create a key at https://platform.openai.com. Once you have obtained this key, follow these steps to activate generative AI and provide your API key:
Under Generative AI, check the
Enable generative AIcheckbox. If this is the first time you are activating AI features, accept the terms by checking the box in the popup window.Paste your OpenAI API key into the
OpenAI API Keyfield.Click the
Savebutton.
AI features will now be available throughout the UI. You can disable them at any time by unchecking the Enable generative AI box. For more information, see the section on generative AI features.
UI Settings
To modify UI settings, first navigate to the Account & Settings page and click the UI Settings link under Administrator Settings.
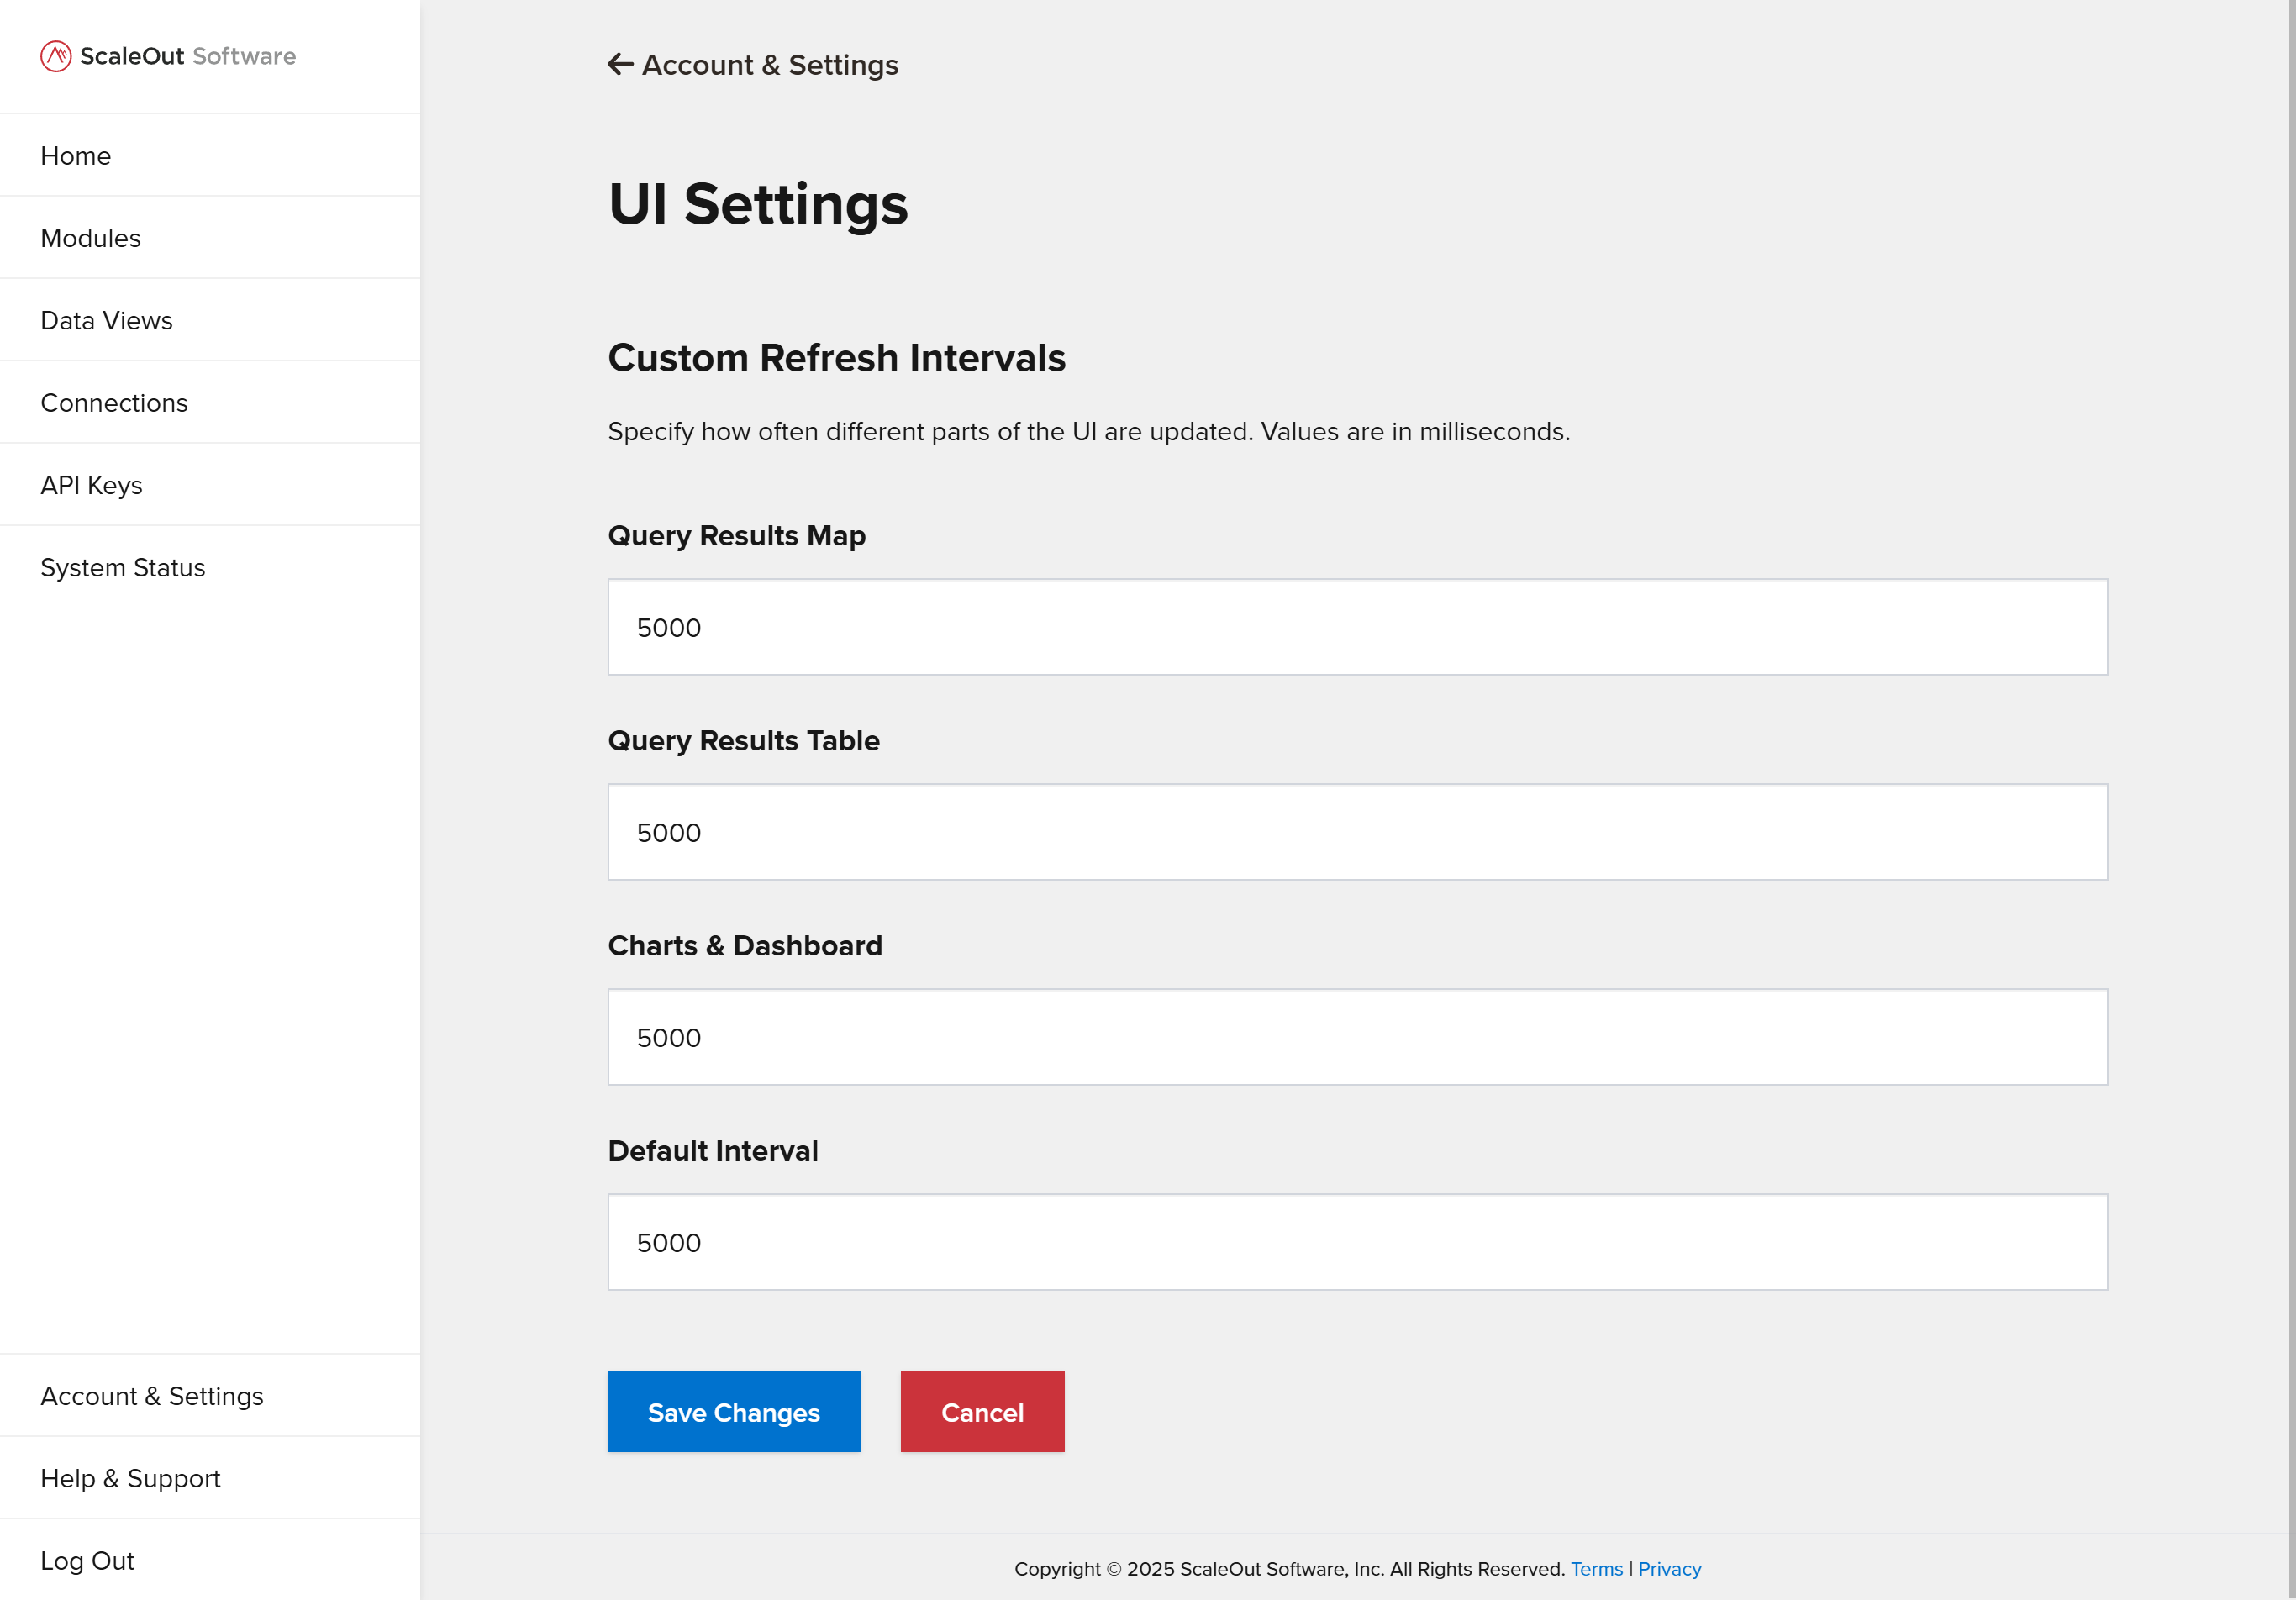
UI Refresh Intervals
These settings allow you to customize how frequently different parts of the UI are refreshed. You can specify a custom value for the query map, query table, charts and dashboard, and the default refresh interval. Enter your preferred intervals in the corresponding form fields and click the Save Changes button to apply your changes. Values must be between 1000-60000 ms.
IP Configuration
The UI allows you to view and edit the host IP configuration. To access these settings, navigate to the Account & Settings page and click the IP Configuration link under Administrator Settings.
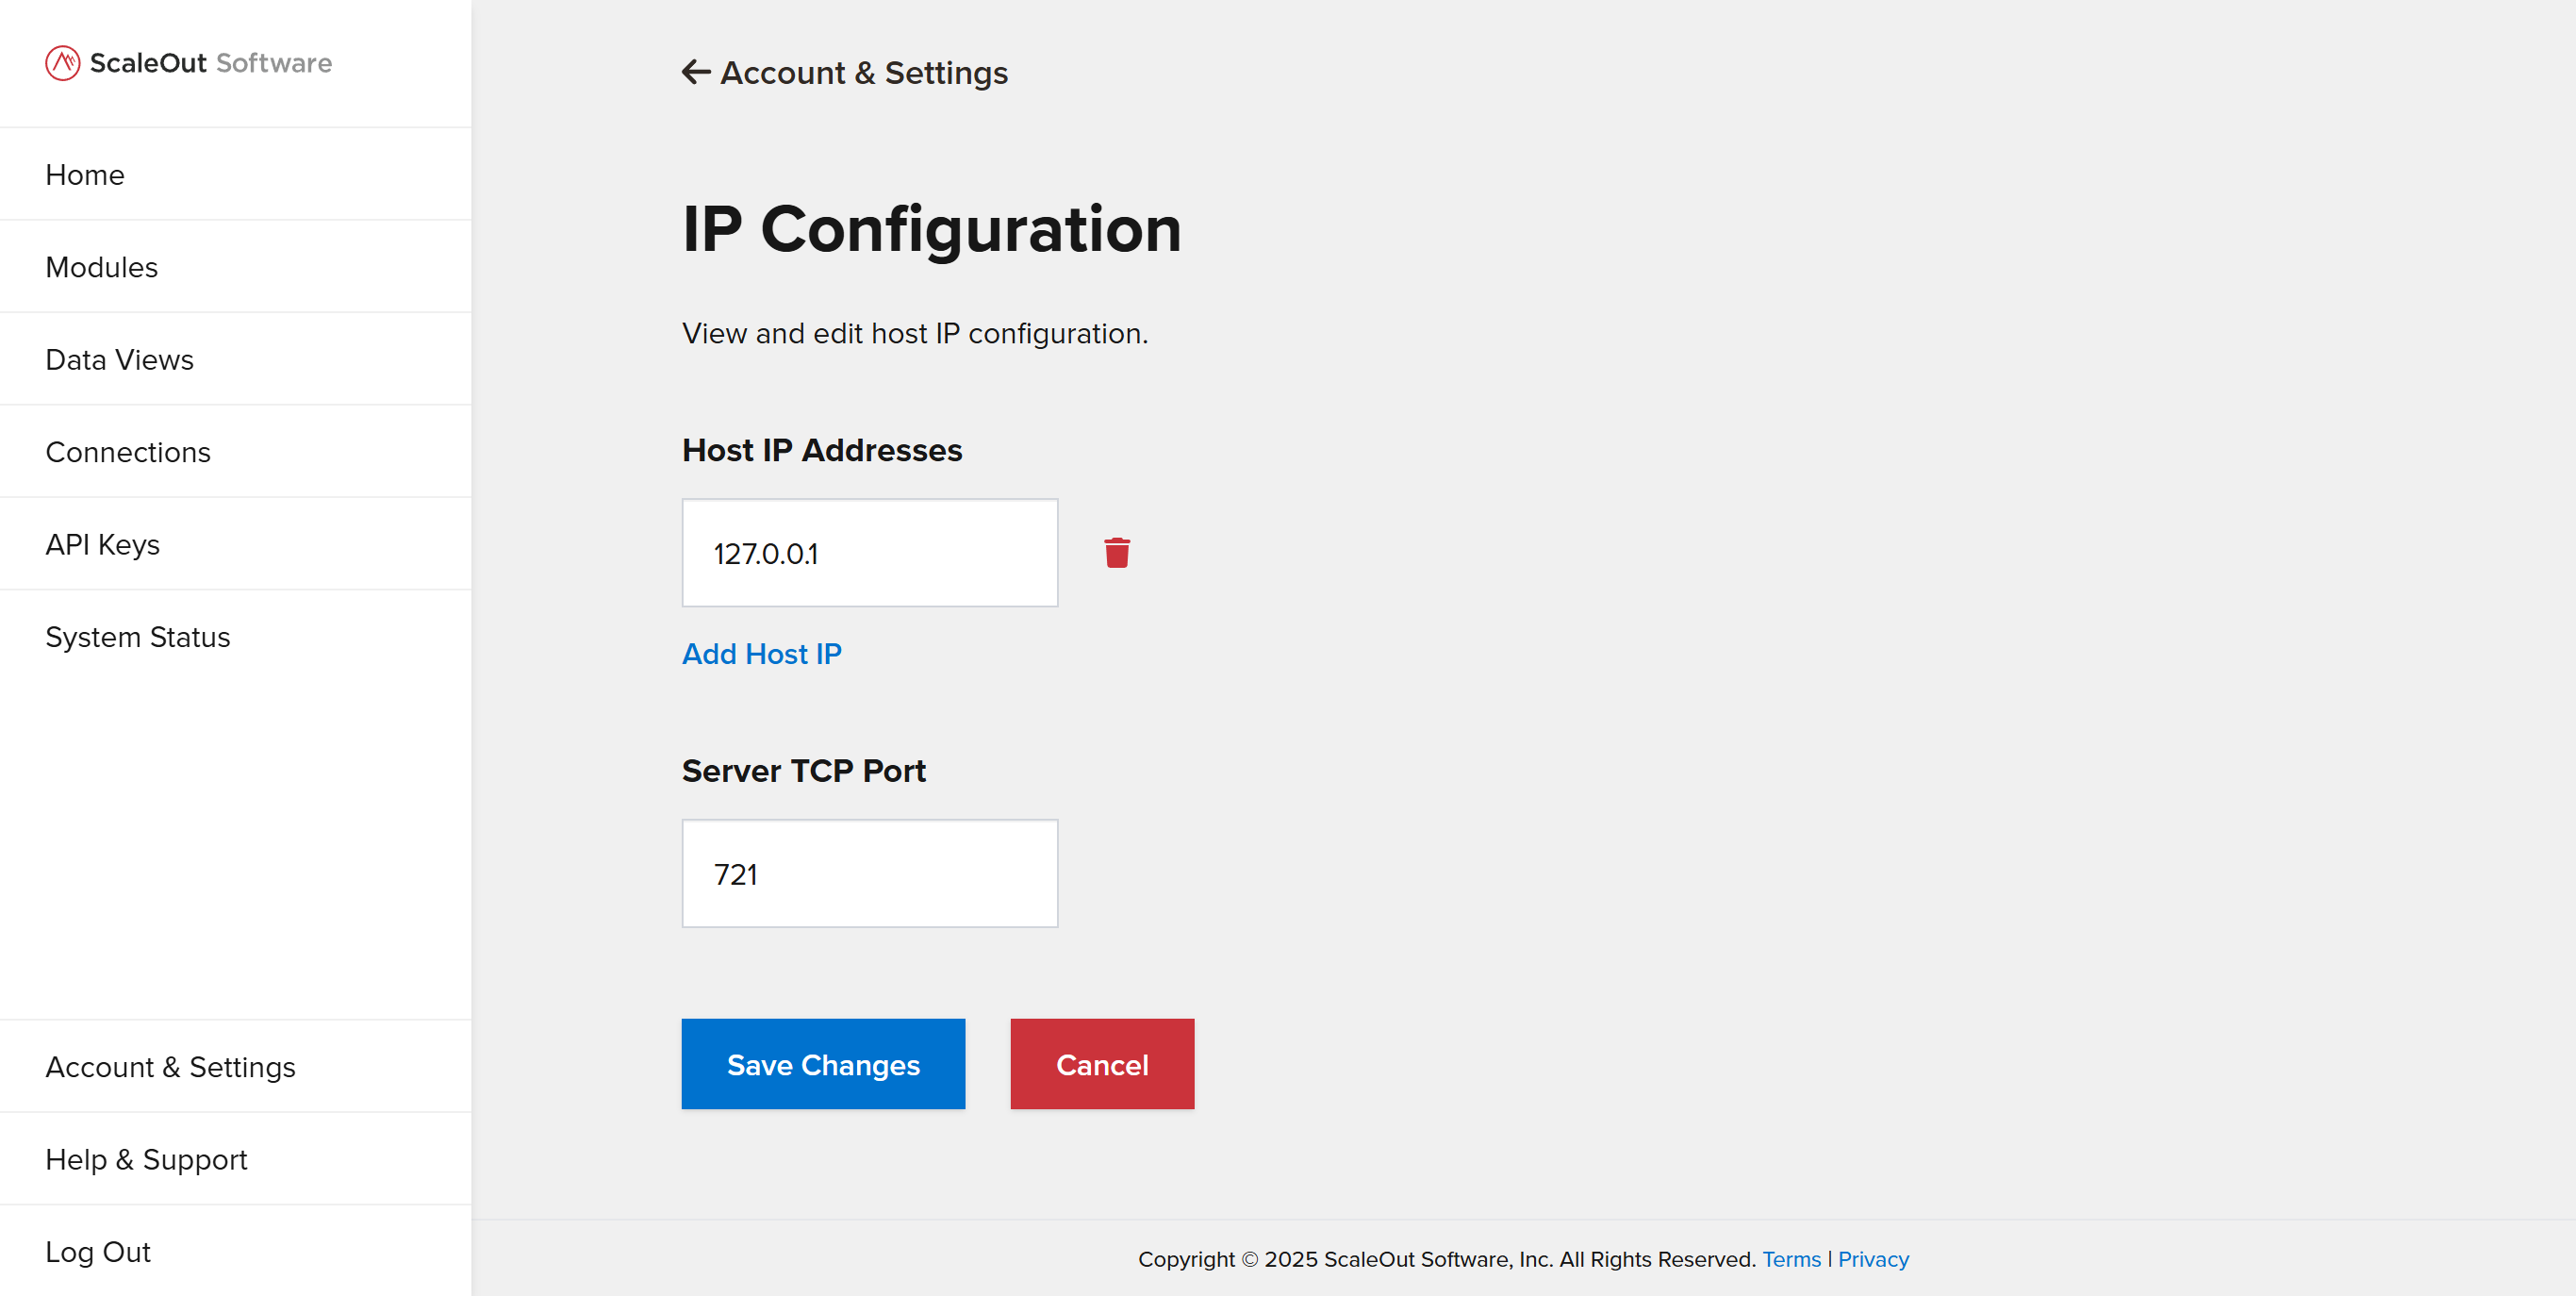
You can edit host IP addresses, add a new host IP by clicking the Add Host IP button, or delete a host IP by clicking the trash can icon to the right of the IP. You can also edit the server TCP port. When finished editing, click Save Changes to save, or Cancel to go back without saving.
Resync
The resync feature validates and resyncs (if necessary) all deployment entities with the SOSS store of the current deployment. To use it, navigate to the Account & Settings page and click the Resync button under Administrator Settings. Resyncing may take a few seconds. You will receive a notification when the process is complete.