Modules
This section explains how to upload and manage modules through the UI.
Adding a Module
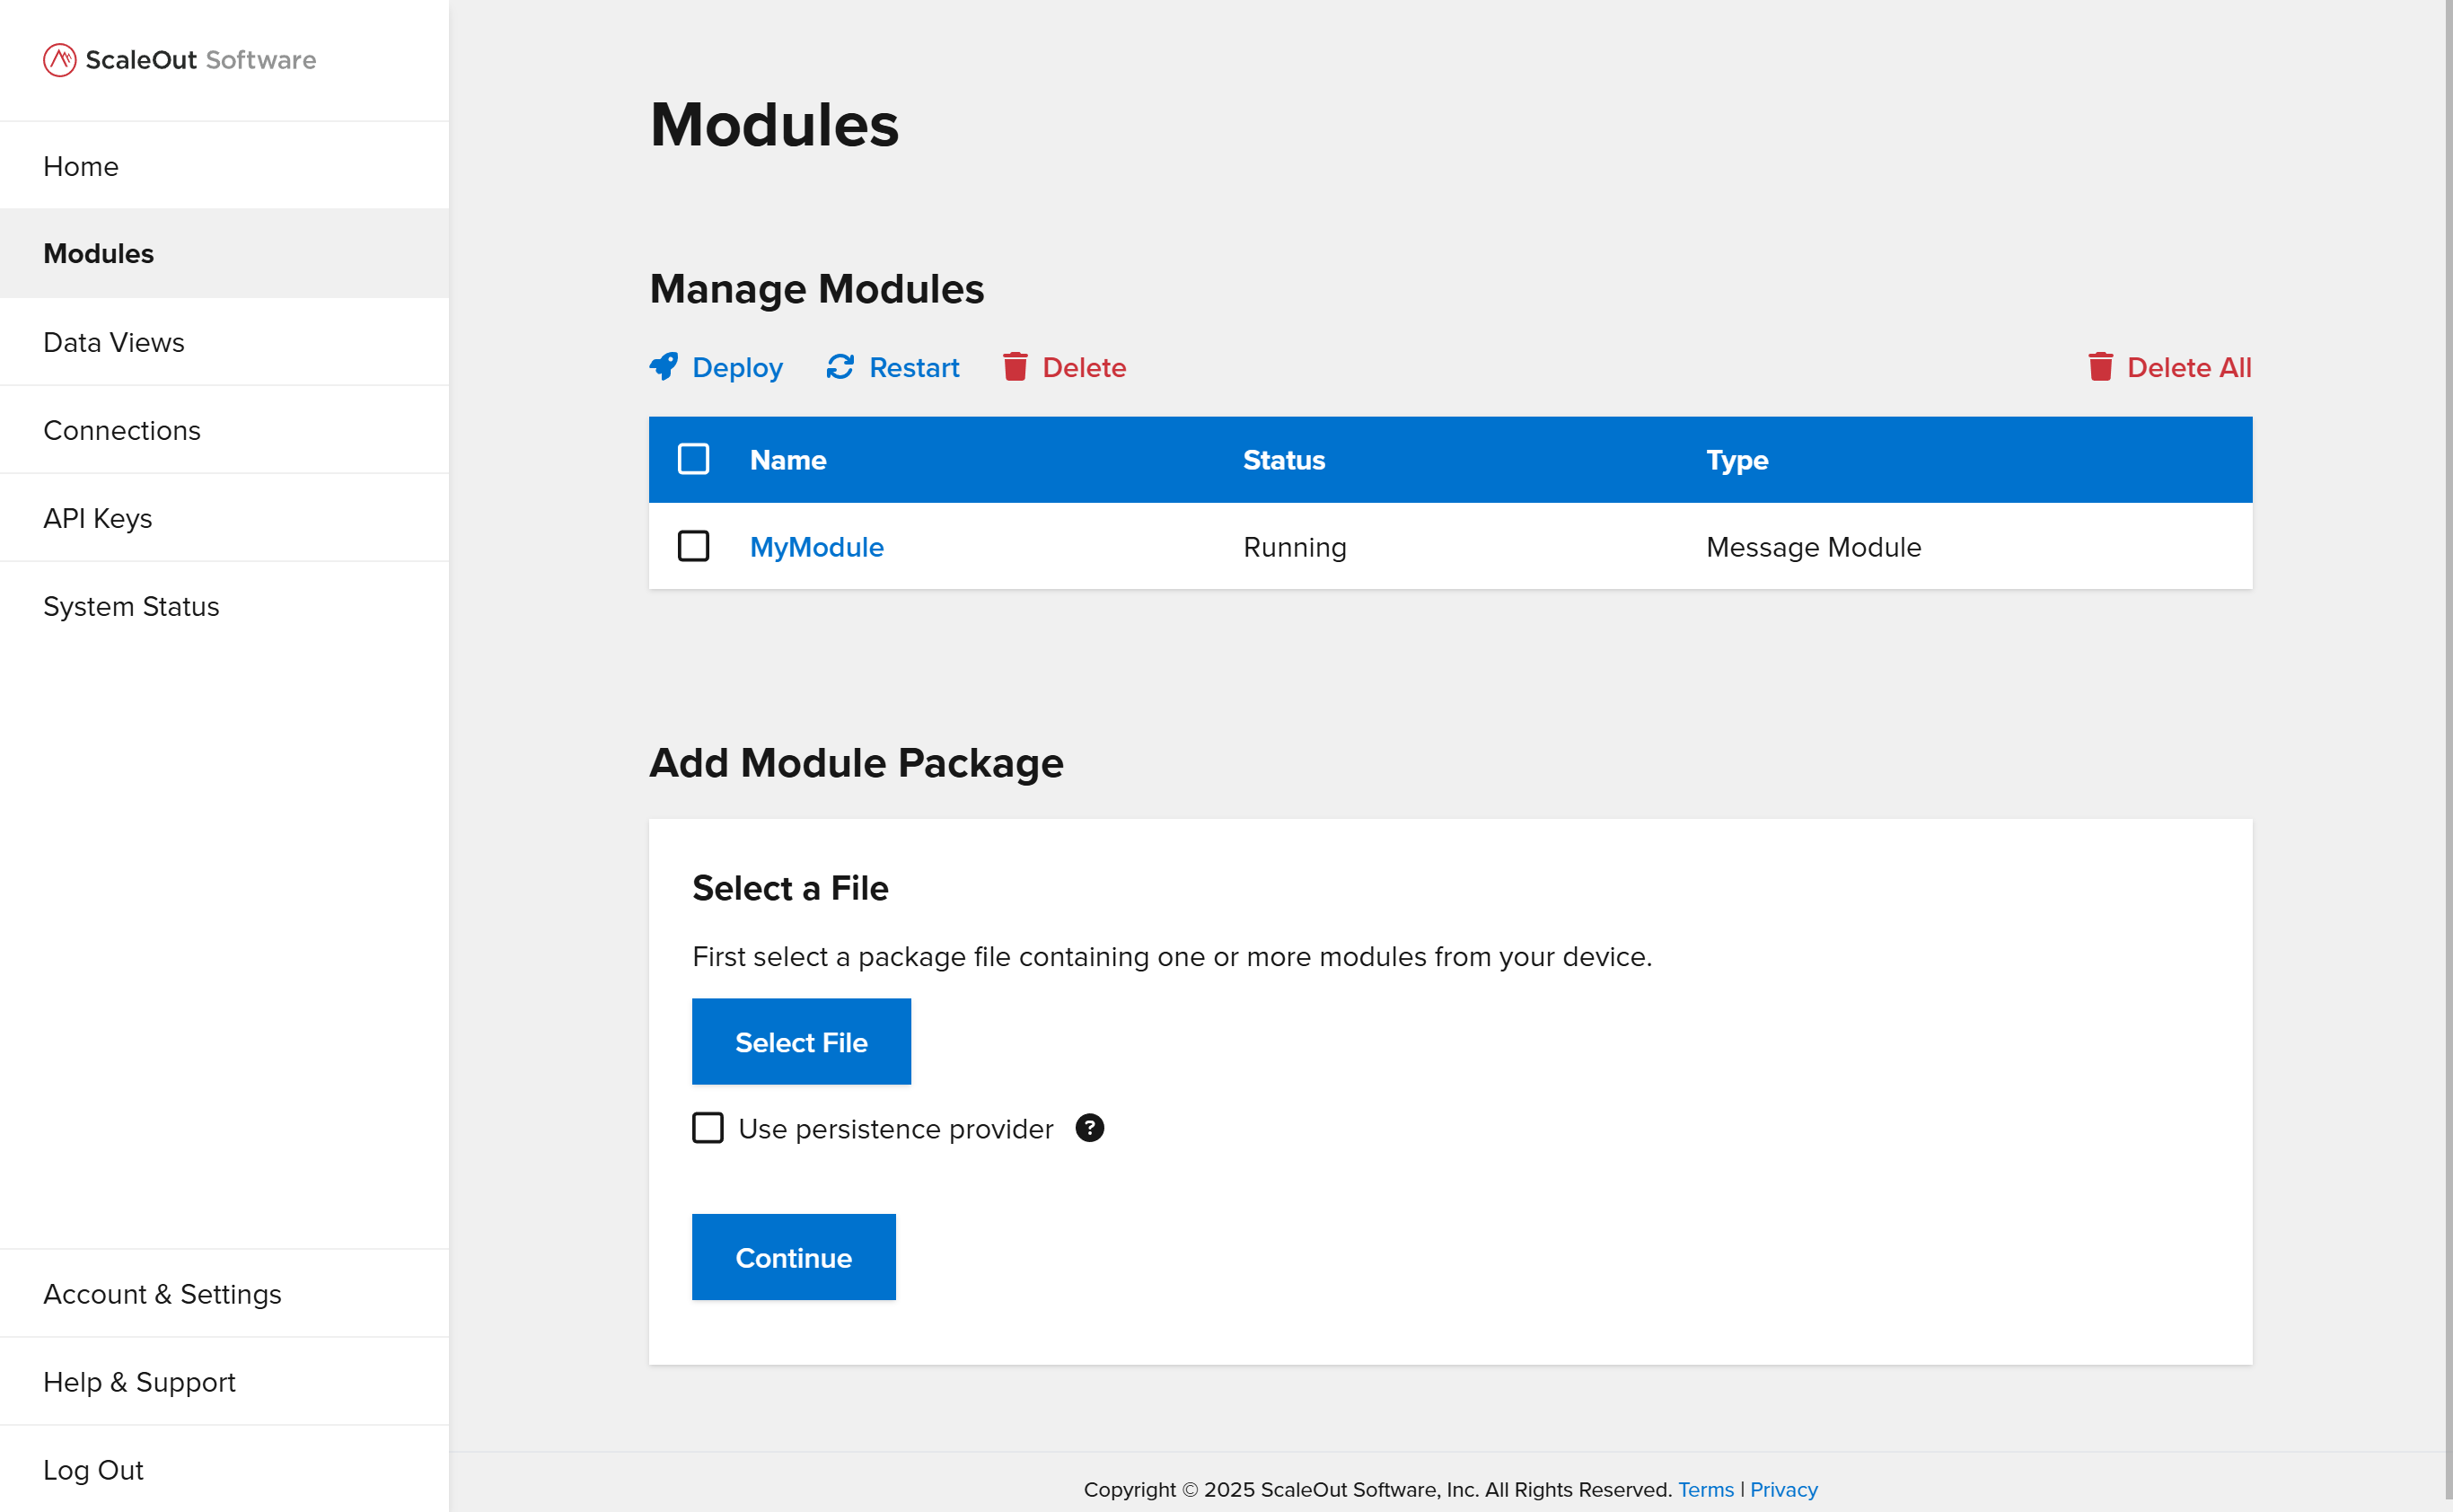
To add a module, first navigate to the Modules page. The page shows a table of all modules in the system, and below it the Add Module Package form to upload a new module package.
Follow the steps to add a new module:
Click
Select Fileand locate the module package file to upload.Optionally check the
Use Persistence Providercheckbox if you would like to use a persistence provider to persist data to an external database or store.Click
Continue.If you checked
Use Persistence Provider, select a persistence provider and backing store policy from the dropdown lists, then clickContinue.Review the summary to make sure the details are correct, then click
Add Moduleto finish adding the module.After the module is finished uploading, click
Doneto reset the form if you would like to upload another module.
Managing Modules
You can manage one or more modules using the Manage Modules table on the Modules page. Select modules by checking the boxes in the left column. Then choose one of the options (Deploy, Restart, or Delete) to apply the operation to the selected modules. To delete all modules, click the Delete All button.
Viewing Module Details
To view more details about a module, click on its name in the Manage Modules table.
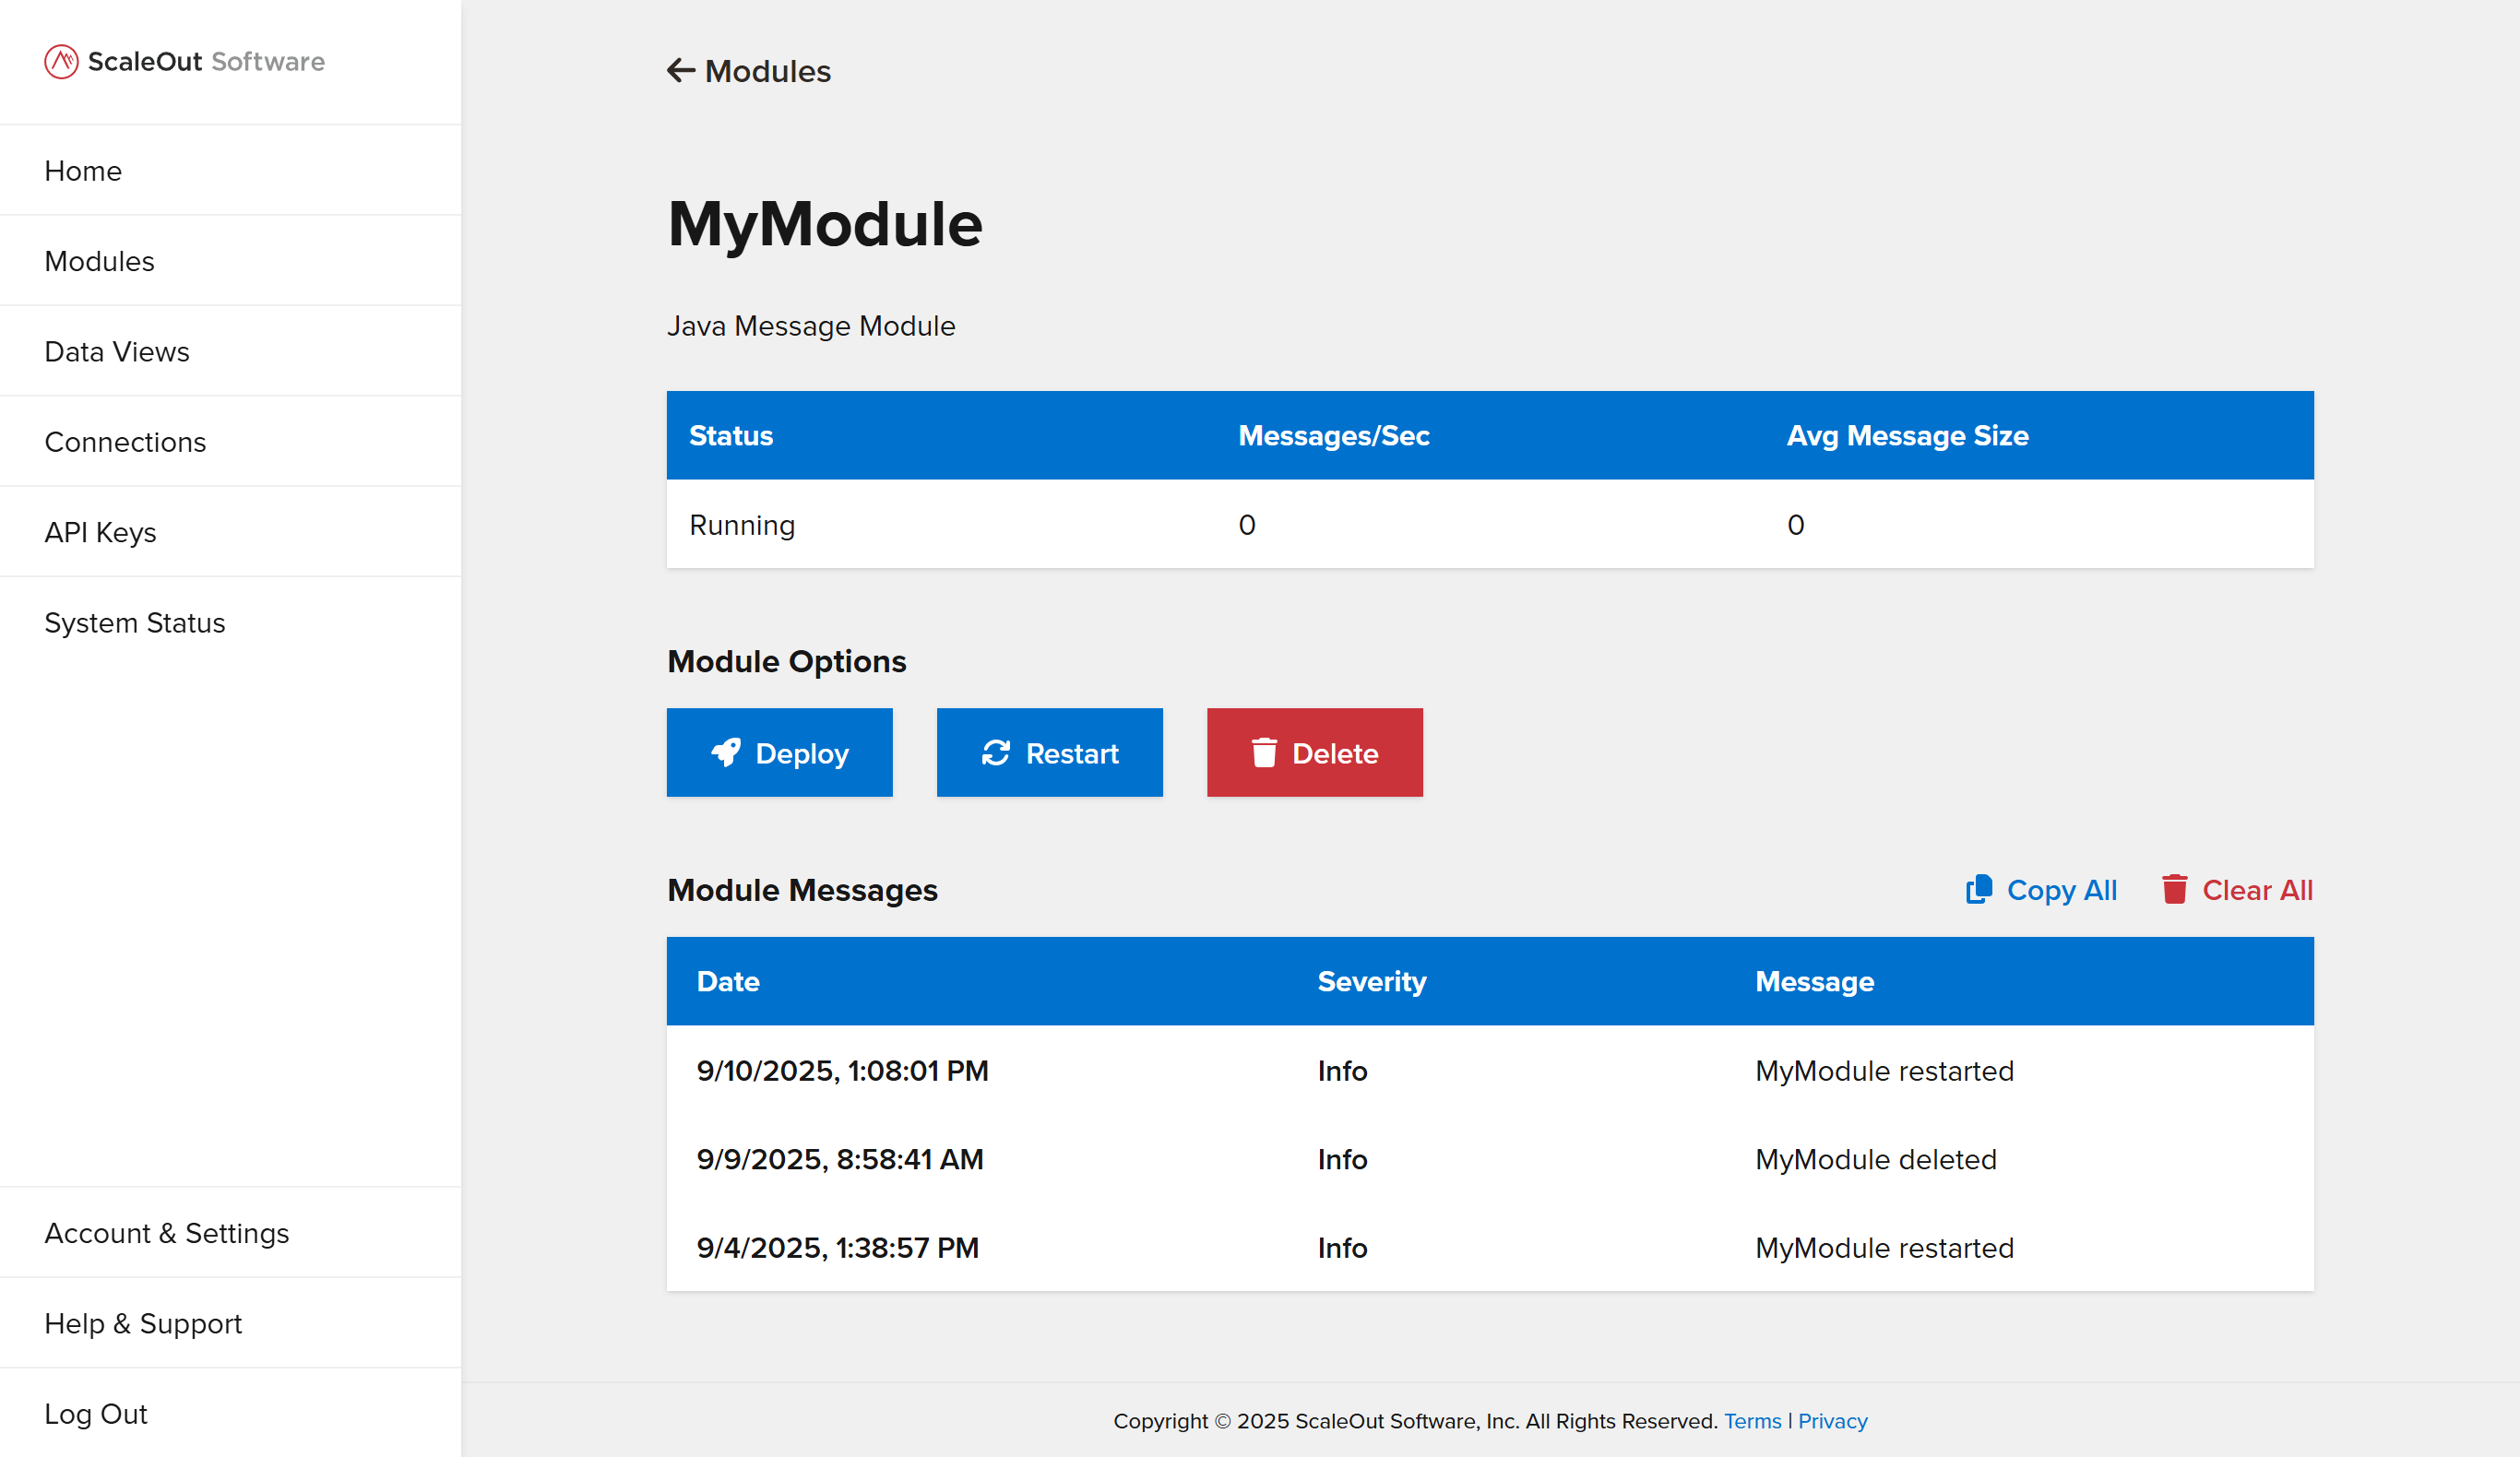
This page shows:
The module’s runtime and type
The module’s current status (e.g. Running, Not Deployed)
Real-time statistics including the number of messages the module is receiving per second and the average message size
A list of status messages for the module
You can also deploy, restart, or delete the module from this screen by using the buttons under Module Options.