Creating and Managing Digital Twin Models
After implementing a digital twin model using the development tools described in the ScaleOut Digital Twin Builder Toolkit, you can deploy the model to the ScaleOut Digital Twins™ UI so it can process messages or run simulations. This section explains how to deploy and manage twin models using the UI.
Note
When a digital twin model is created in the ScaleOut Digital Twins UI, it is uploaded to the service’s database. It can then be deployed immediately for processing or deployed later.
Creating a Digital Twin Model
To create a new real-time digital twin model in ScaleOut Digital Twins and optionally deploy it for processing, select the Create Model link under the “Models” section in the left-side navigation bar.
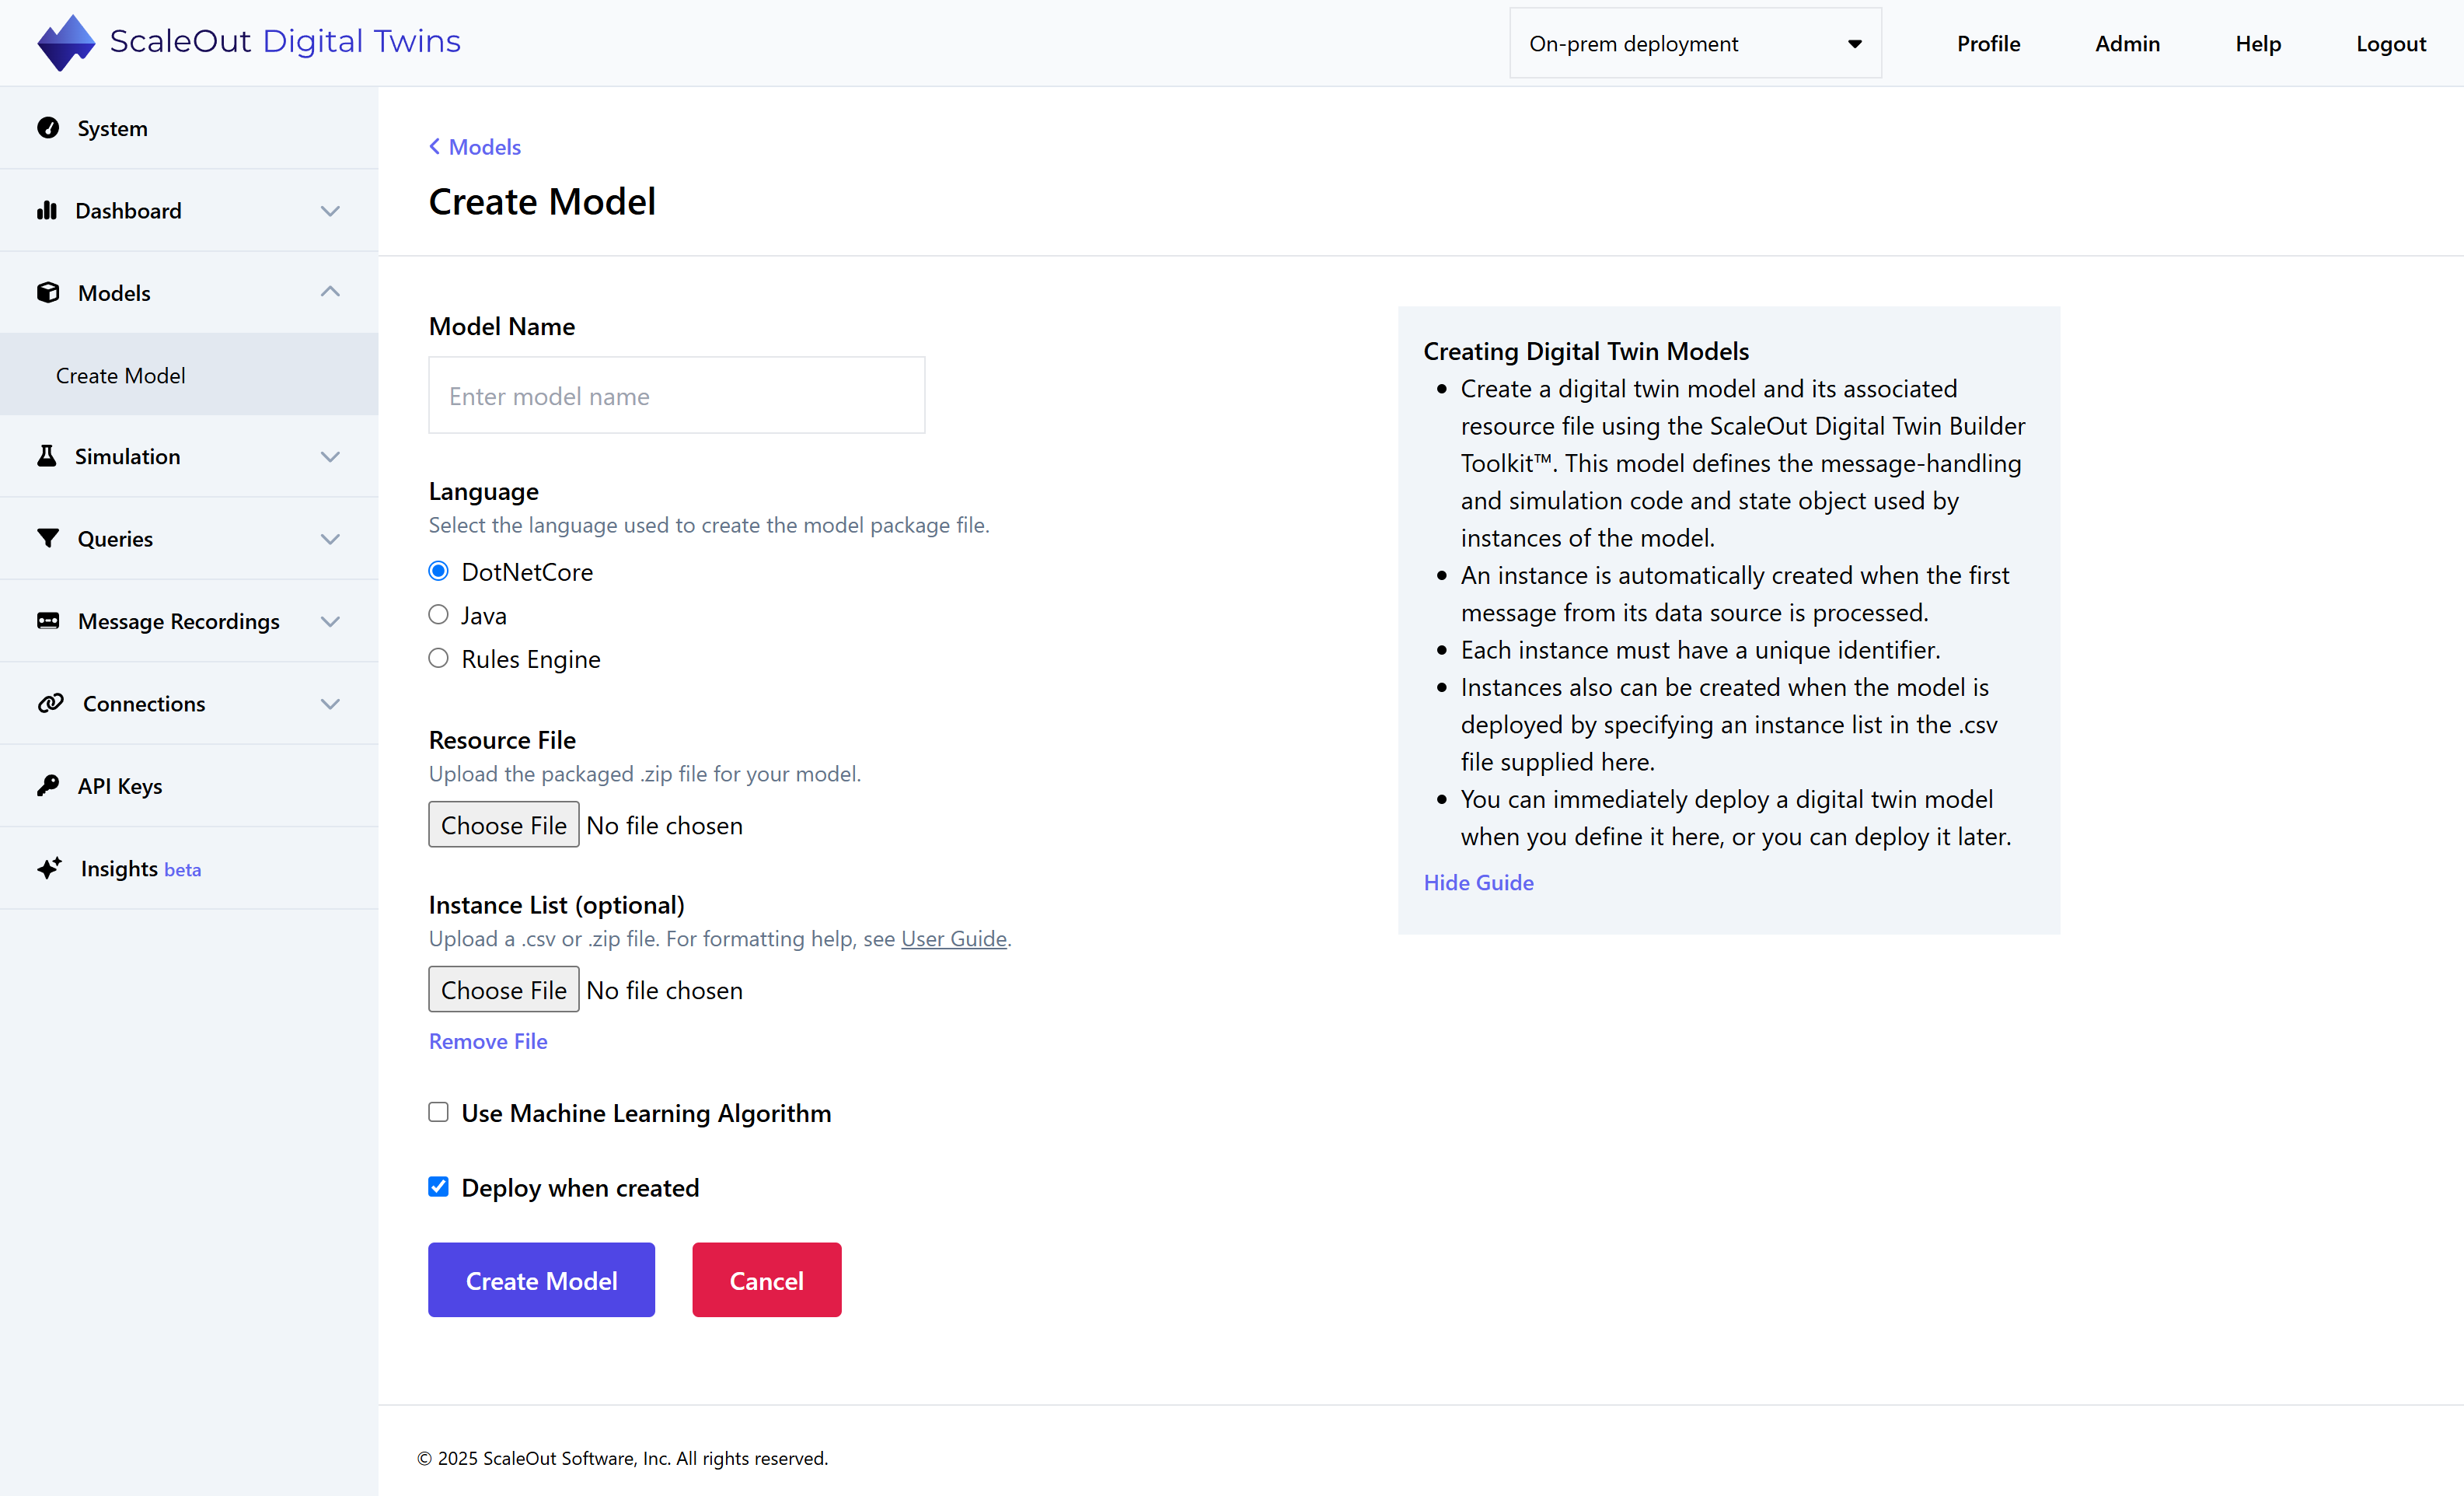
Resource File
First, select the resource file for upload (e.g., windTurbine.zip). After selecting a file, the model name and runtime will automatically display under Model Details.
Instance List
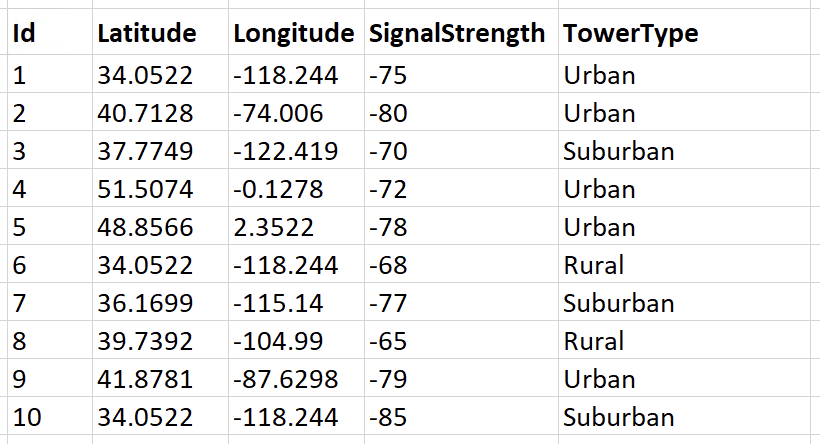
You can optionally provide an instance list as a CSV file to create an initial set of instances for your model. This file should contain columns for each property required for a digital twin instance. For example, to create a set of instances for a cell tower model with four properties (Latitude, Longitude, SignalStrength, and TowerType) the CSV file would look like this:
Note
The column names should match the property names, and the data in each column should correspond to the property type (i.e., use numbers in columns representing numerical properties). You can use any unique alphanumeric strings for the instance ids. Instance properties that are not specified in the csv file are set to their default values.
Use Persistence Provider
Check this box if you would like to use a persistence provider with the model. Choose a persistence provider from the dropdown list, or click Add new provider to add a new provider to the system. Next, select a backing store policy. If you choose a policy that includes Write-behind, you must also specify the write-behind interval in seconds.
Use Alert Provider
Check this box if you would like to use an alert provider with the model. Choose an alert provider from the dropdown list, or click Add new provider to add a new provider to the system.
Use Machine Learning Algorithm
This option is available for C# models. If you would like to use a machine learning algorithm, check the box. You can then select a machine learning file and specify the settings for automatic retraining.
Deploy When Created
By default, the model is deployed automatically after creation. If you don’t wish to deploy the model automatically, uncheck the “Deploy when created” checkbox.
Create Model
Click the Create Model button to create and/or deploy your new digital twin.
Managing Digital Twin Models
Managing a Single Model
After a digital twin has been created, you can manage it by navigating to the Models link in the left-side navigation bar. To manage one or more digital twin models, select the checkbox to the left of the model name in the table:
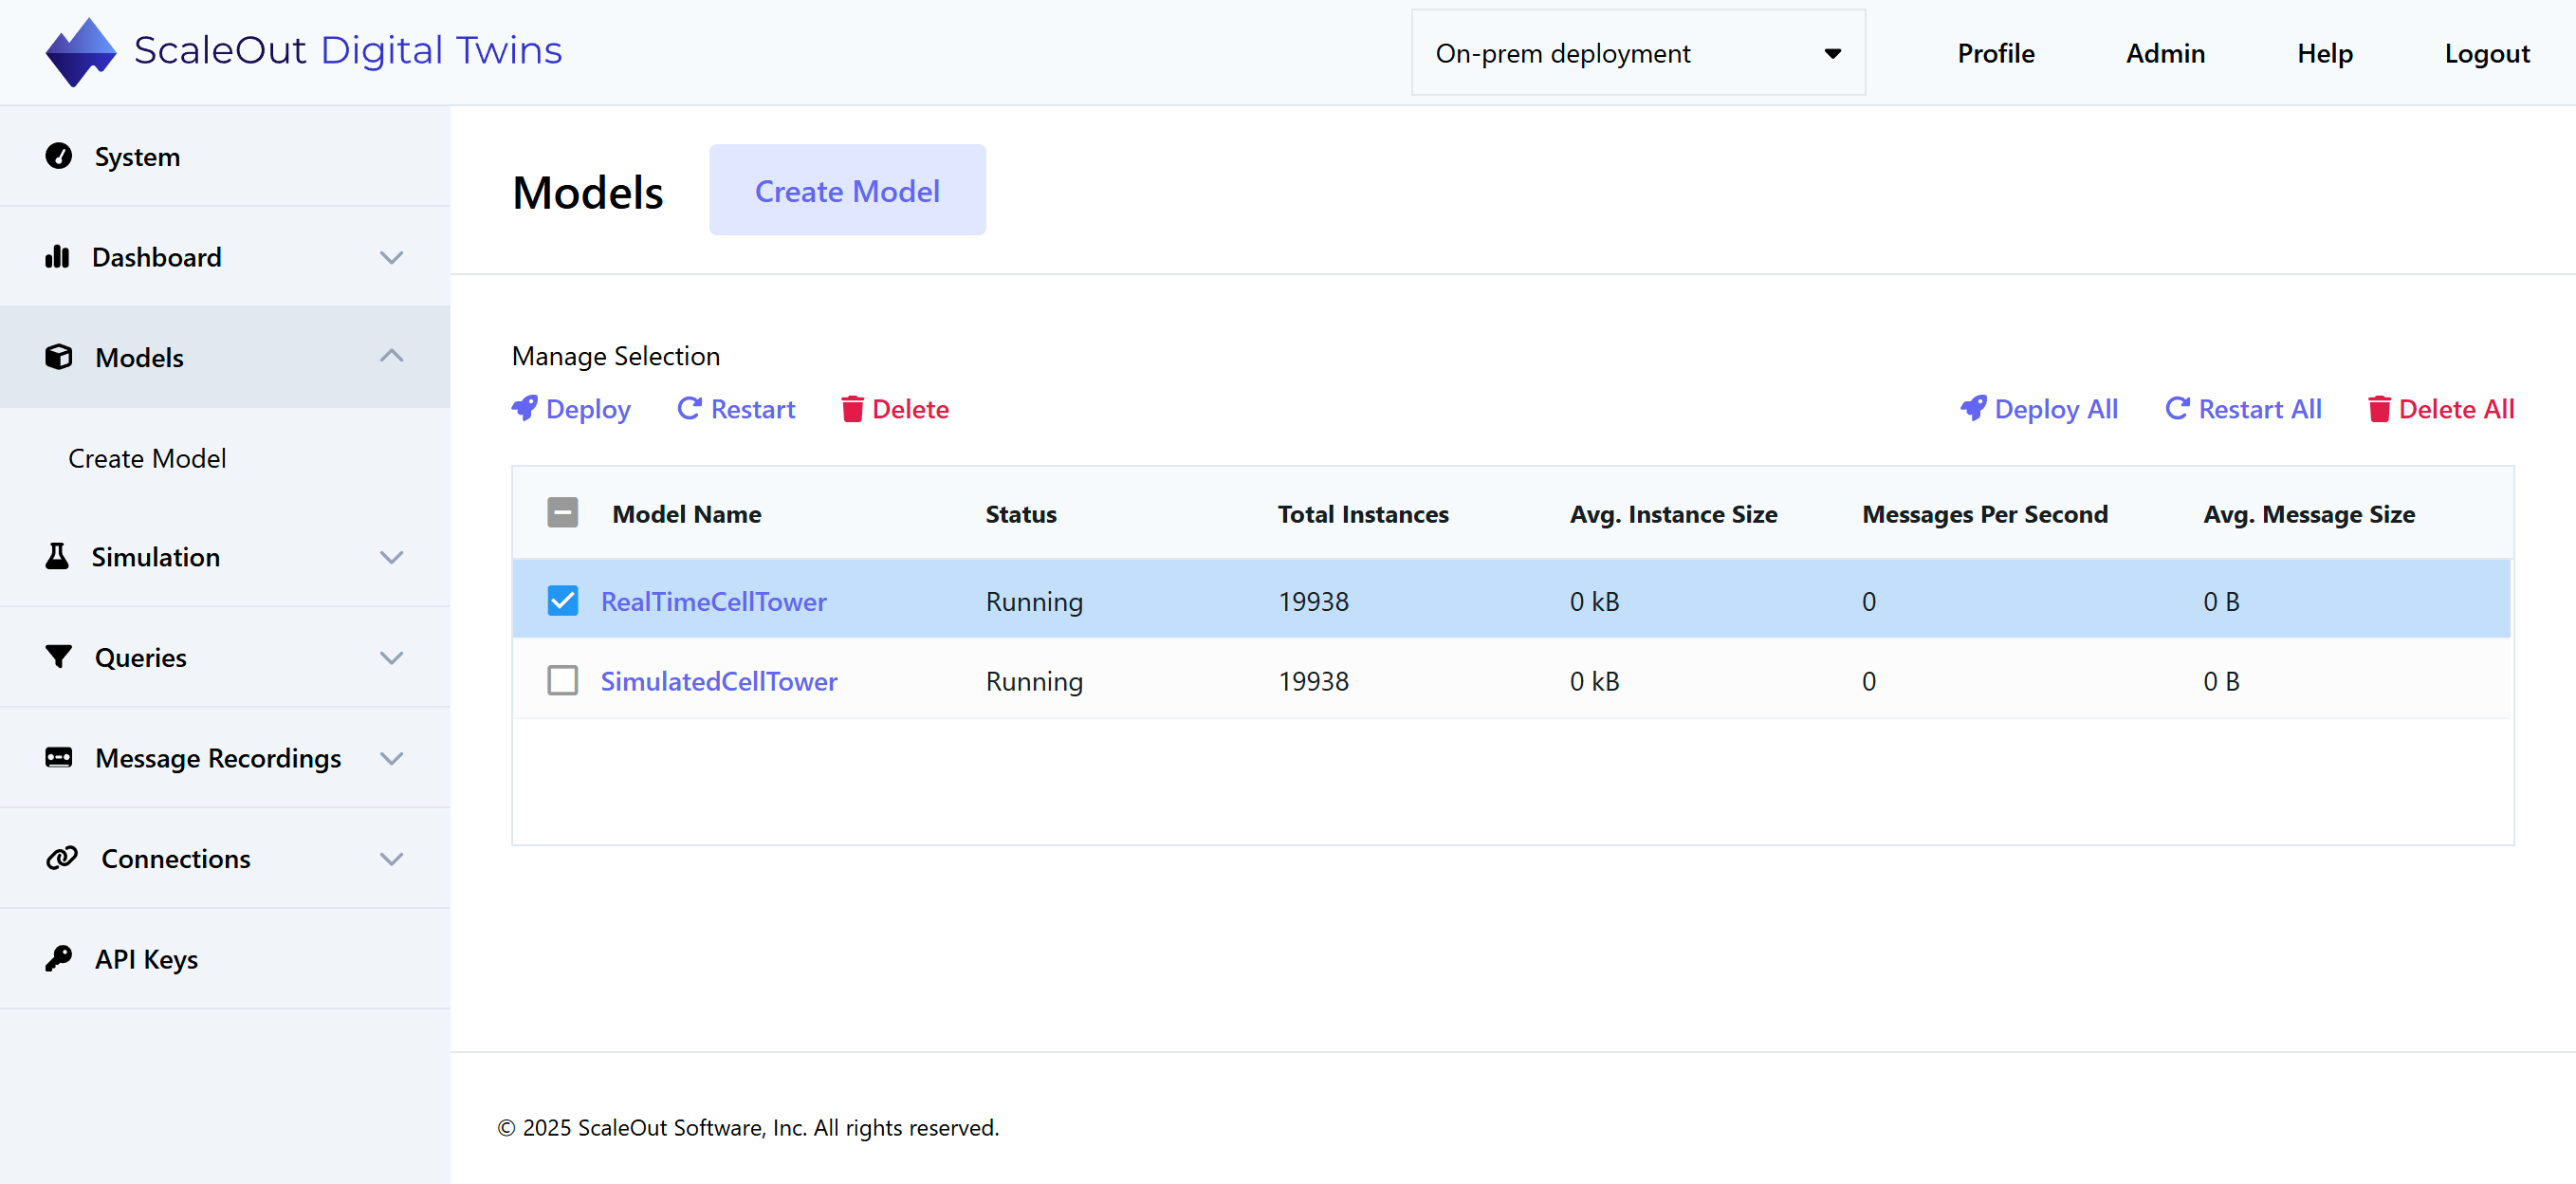
The buttons under “Manage Selection” allow you to manage the selected digital twins as follows:
Deploy: If the digital twin model is not currently running (i.e., deployed and running), then deploy the twin. This is equivalent to enabling the “Deploy when created” checkbox when creating the digital twin model. This action is unavailable if the digital twin is already running.
Restart: If the digital twin model is currently running but not behaving as expected, click this button to restart it. This will not remove any instances of the digital twin in the ScaleOut StreamServer data grid, but message delivery may be interrupted briefly while the digital twin restarts.
Delete: Removes the currently selected digital twin from the deployment. If the digital twin is currently running, it will be stopped. Any associated digital twin instances can optionally be removed as well.
When you click on the Delete button, you will see a pop-up message asking to confirm this operation. You can click the box in this dialog asking if you would like to remove all digital twin instances for the model:
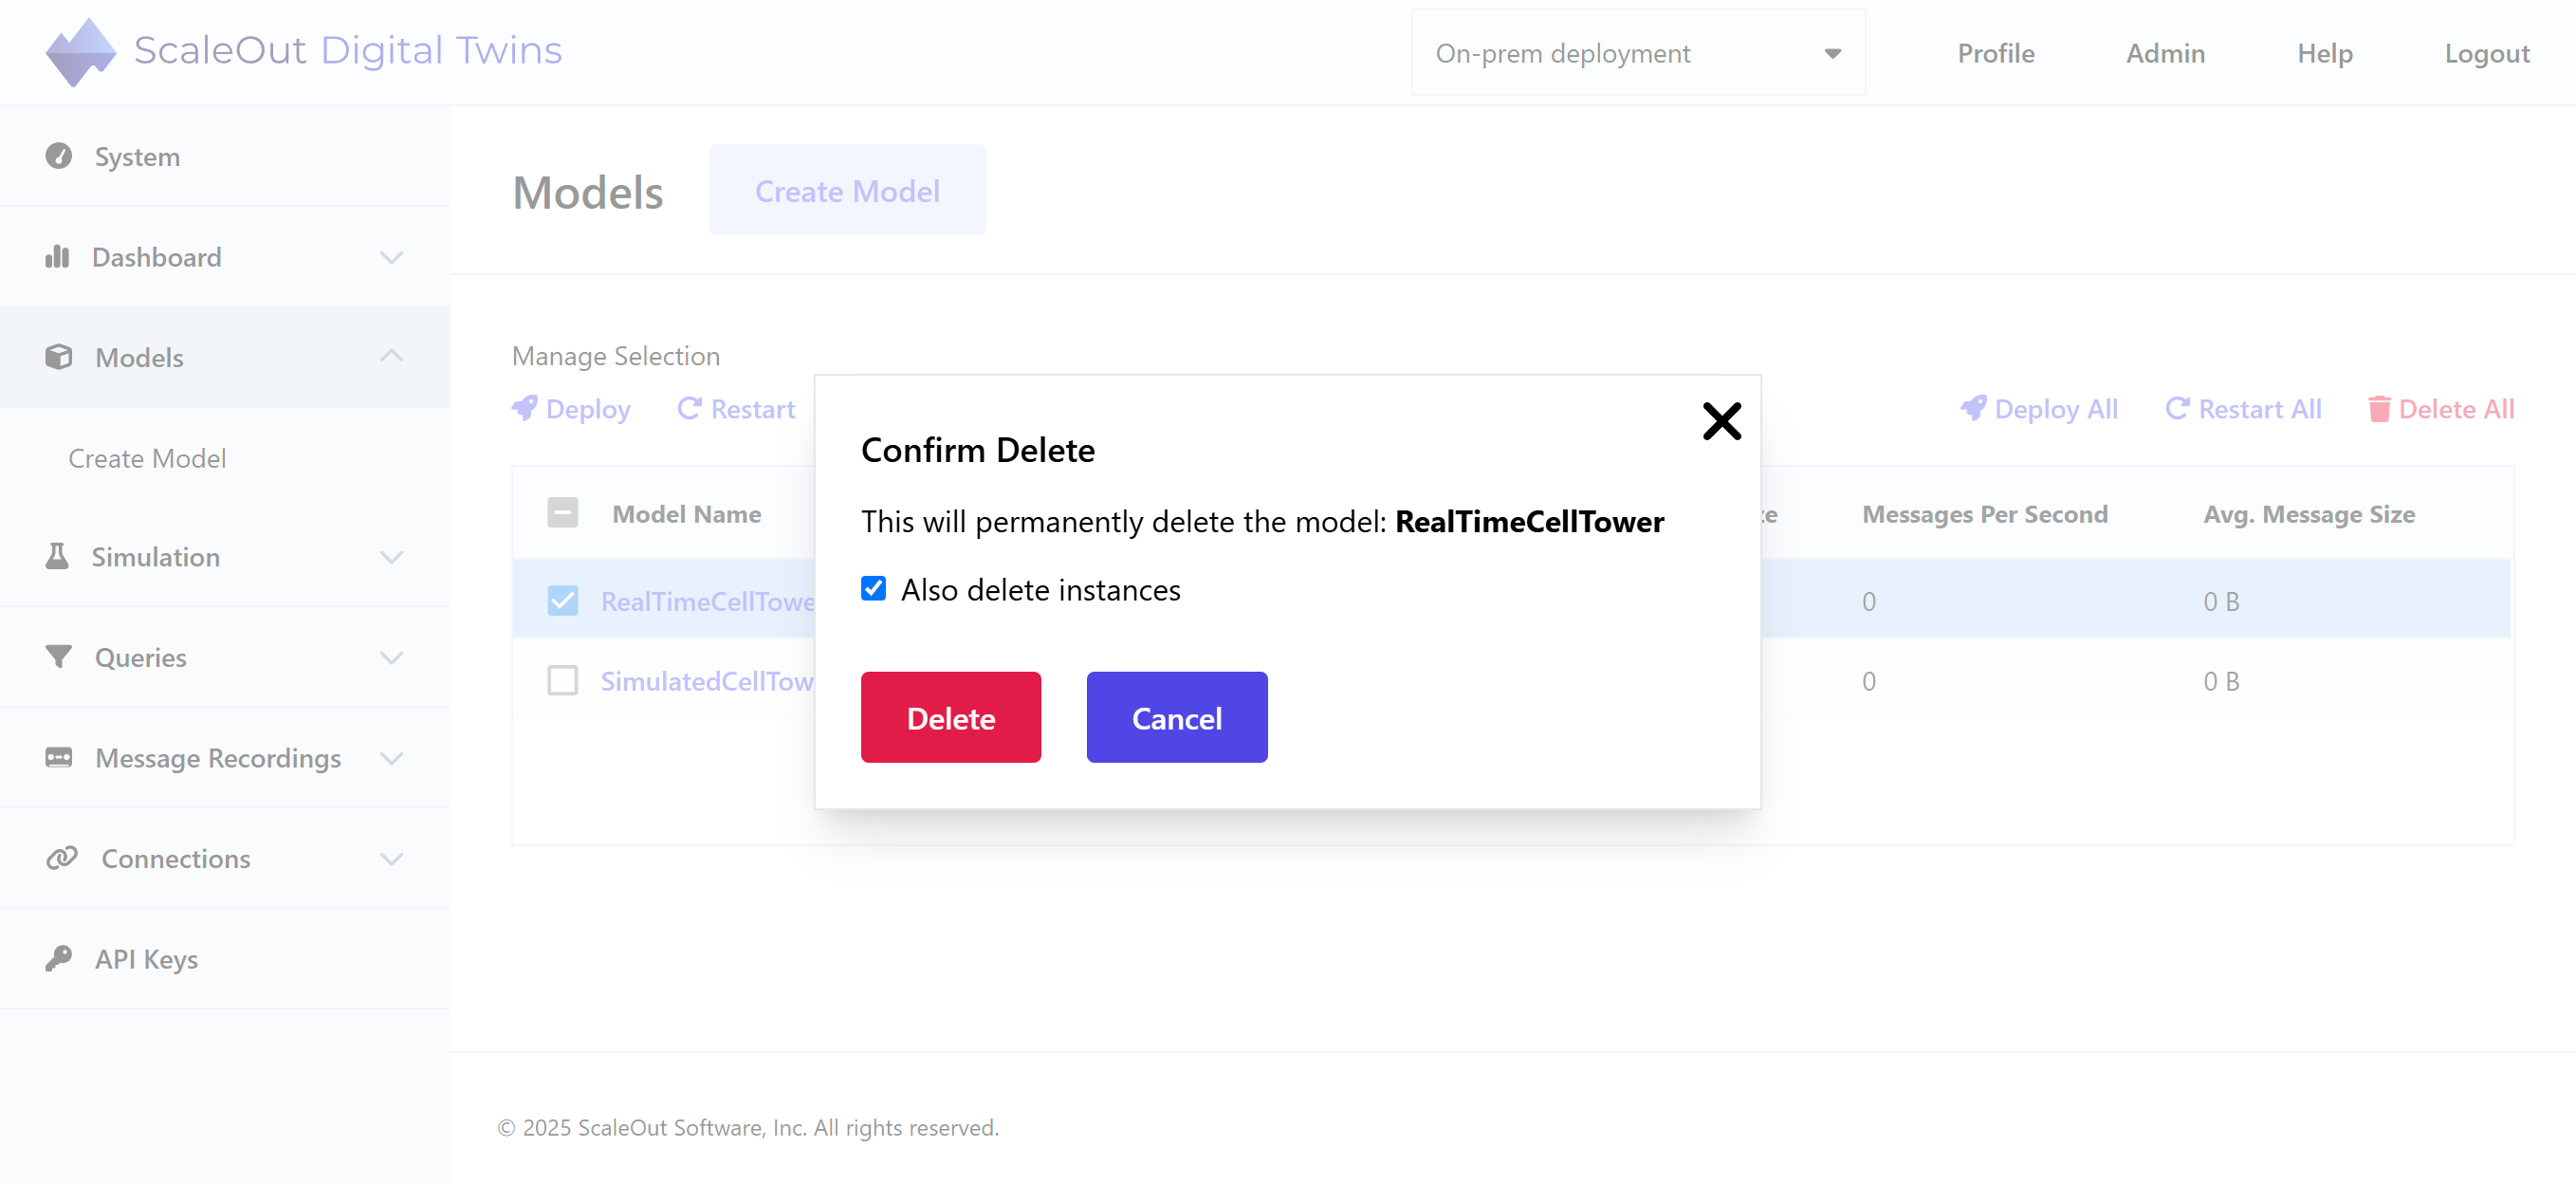
If you are deleting the model in order to upload an updated version, you might choose to keep the instances so that they are immediately available to the new model. In this case, be sure that the new model can properly deserialize the state information held in these instances.
Managing All Models
On the Models page, above the table to the right, you can find options to Deploy All, Restart All, or Delete All models. This allows you to perform bulk operations on all models currently in the system.
Examining a Digital Twin Model
To view status messages and instances for a digital twin model, click on the model’s name in the Model Name column of the table. You will reach the Model Details page for the selected model:
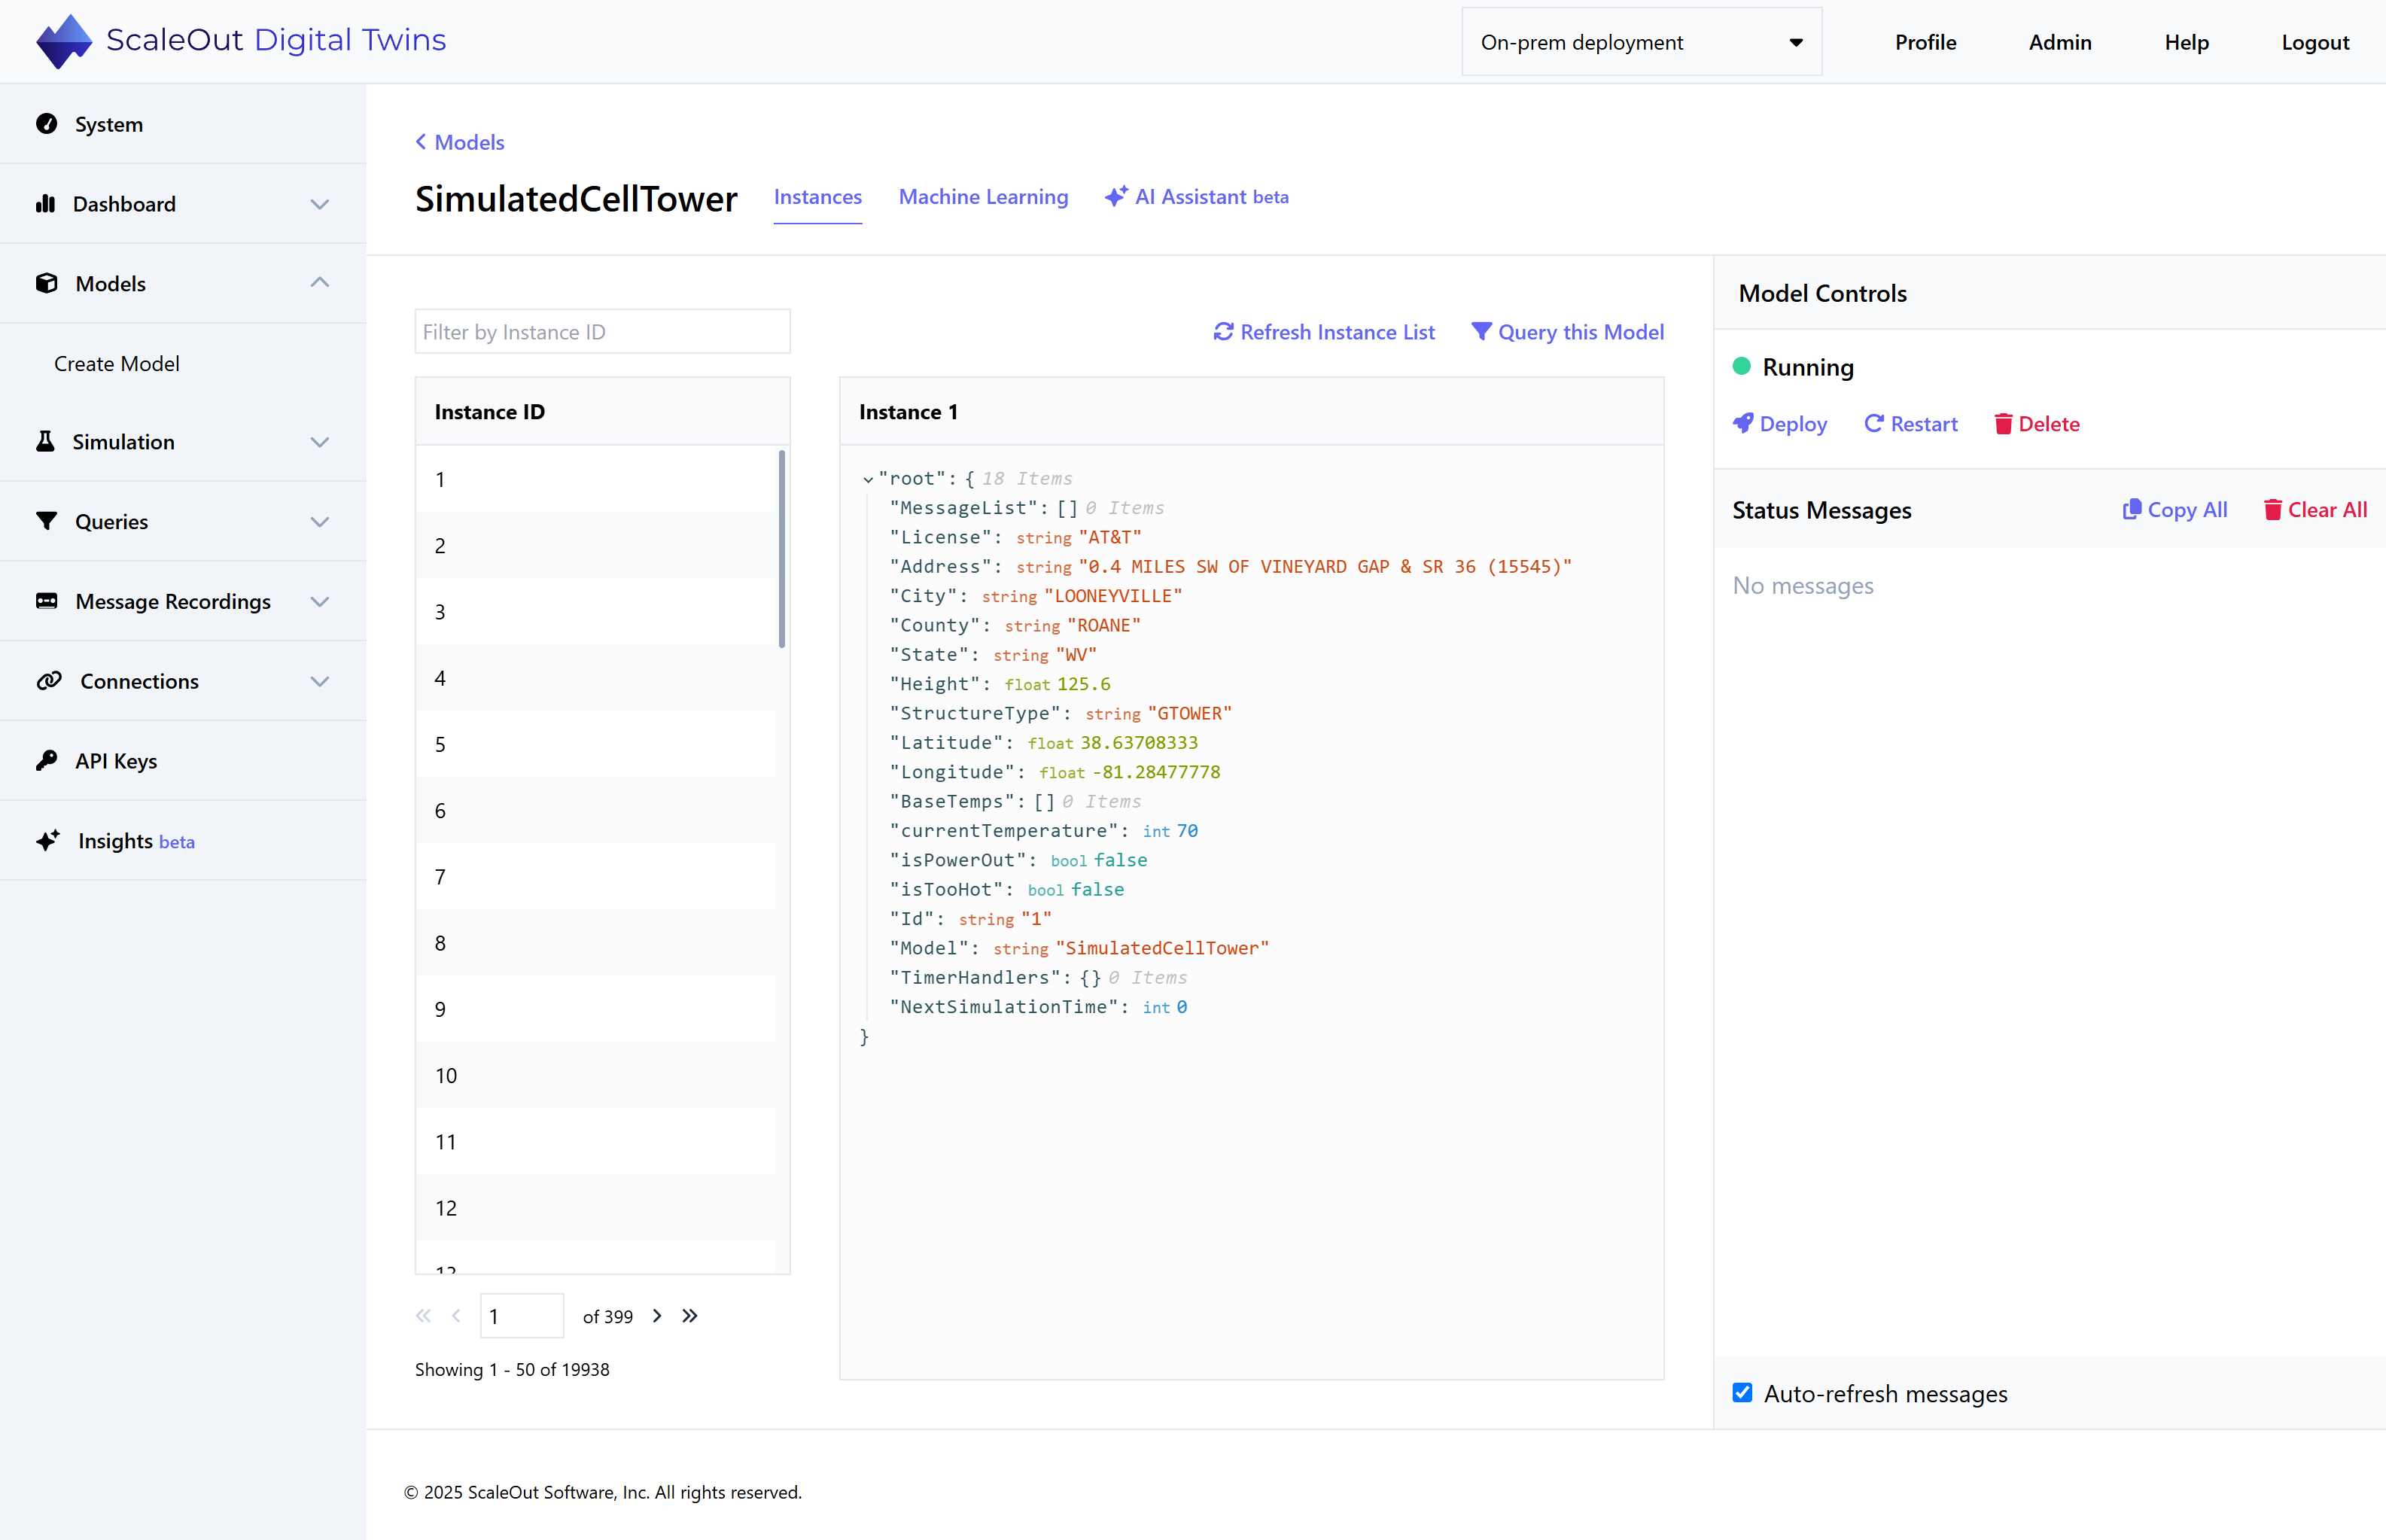
Under Model Controls in the right sidebar, you can see the model’s status as well as the option to Deploy, Restart, or Delete the model. These buttons have the same effect as the Deploy, Restart, and Delete buttons on the main Models page.
Under Connected Providers directly below model controls, you can view the names of the connected persistence and alert providers, if any.
The Status Messages section in the right sidebar shows log messages as well as messages originating from the digital twin’s message or simulation processor when it calls LogMessage. To mark all messages as read and clear them from the UI, click the Clear All button in the upper-right corner of the Status Message pane.
The left side of the screen shows a list of instance IDs. You can filter IDs by typing in the Filter by Instance ID field above the table.
The panel in the middle of the screen shows the instance details in JSON format. Click on an instance ID in the table to view its details. Above the center panel, you can choose Refresh Instance List to update the list of instances, or Query this Model to create a new Query for the selected model.
There are two additional tabs in the model detail view: Machine Learning and AI Assistant (if you have generative AI enabled). Read more about them here: