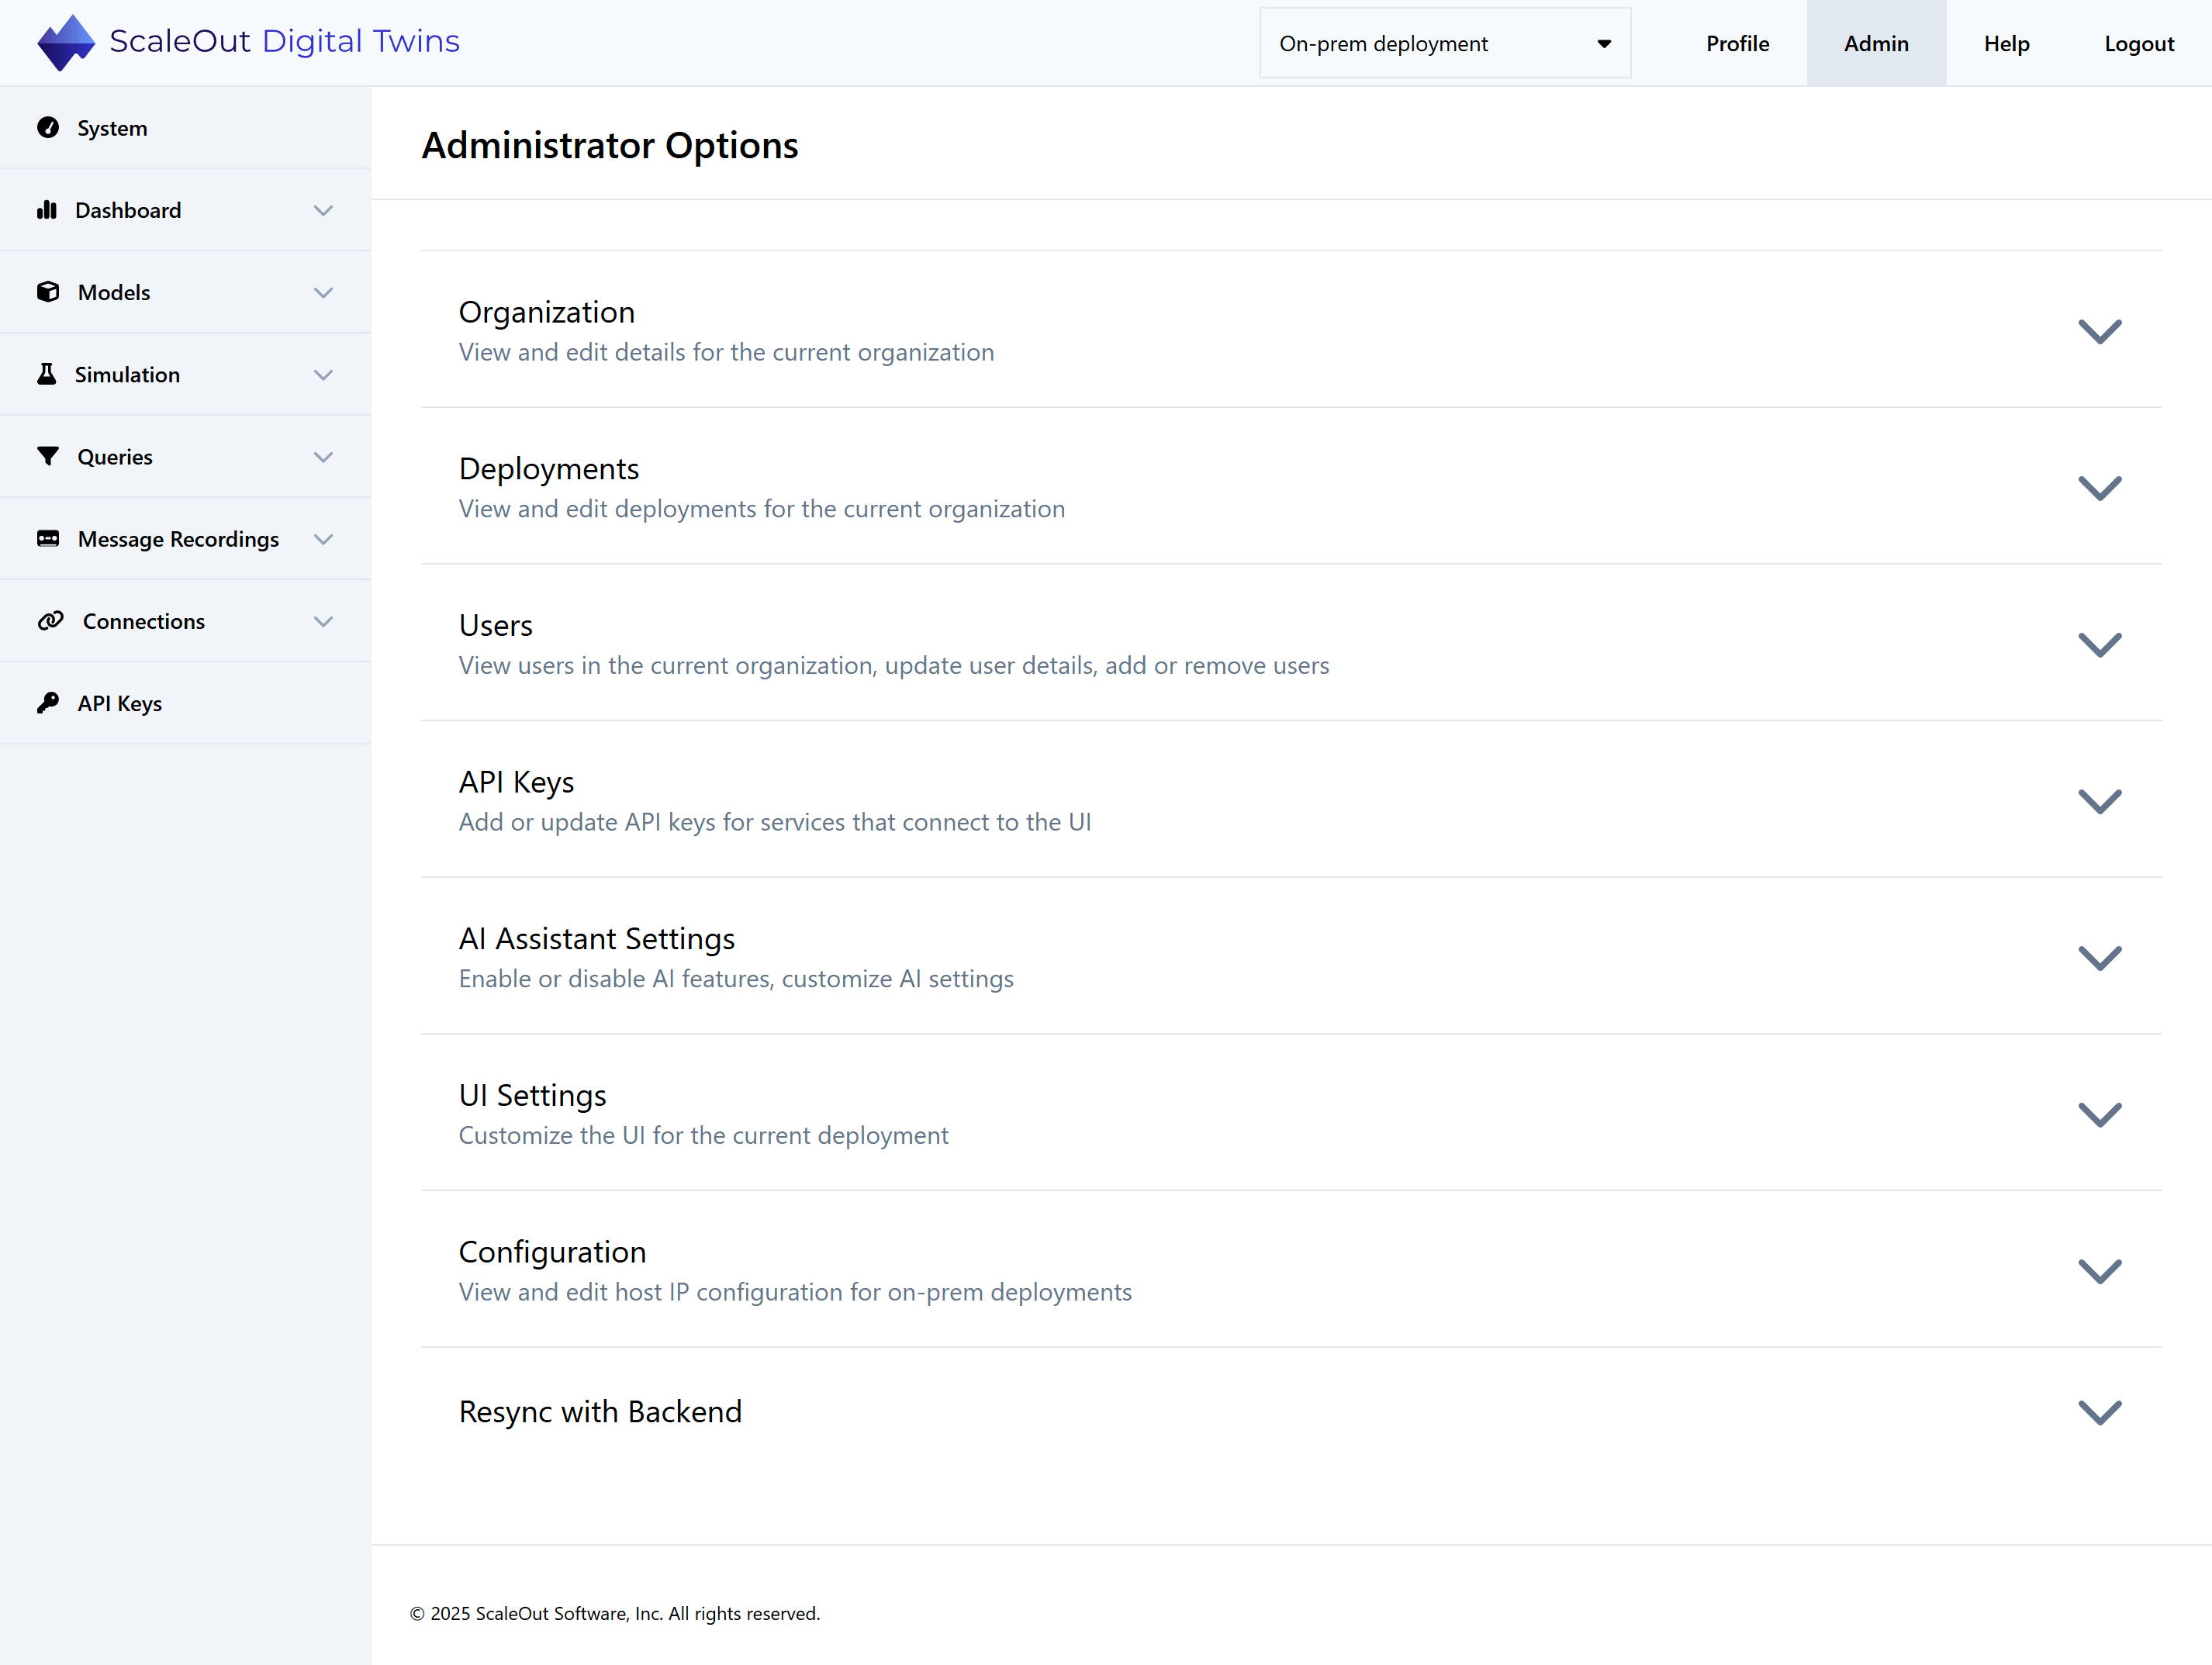
Administrator Options
As an administrator, you can manage users, global UI settings, and connections to external services that support UI features.
To reach the Administrator page, click on Admin in the top navigation bar.
Managing Users
In the Users section, you can see a table with all the users in the system.
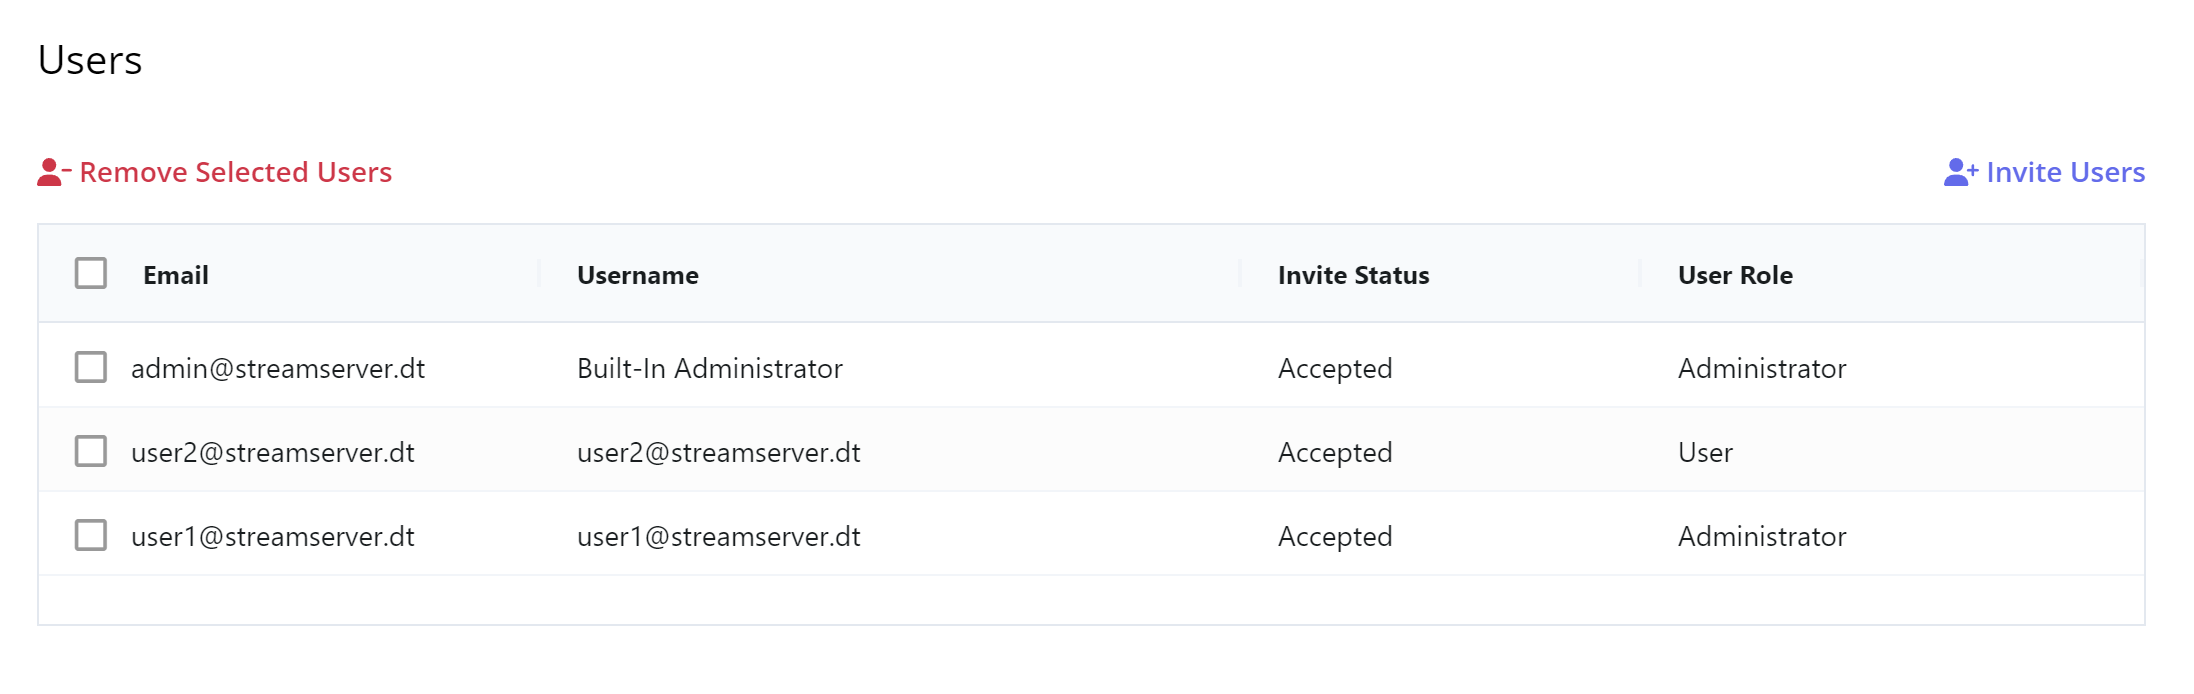
There are currently two supported roles:
User: The user is allowed to view, create, deploy, and delete resources from the environment, but cannot view or edit other users.
Administrator: The member has all privileges available to a User, and is also allowed to manage the system settings and other users.
Adding a User
To add a new user to the system, click the Add Users button at the upper right of the table. You will reach the Add User form. Complete the form with the required details:
User ID: A unique identifier for the user. This should be an email address.
Display Name: Display name for the new account.
Password: The password the new user will use to log in to the account.
Account Type: The role assigned to the new account.
Note
Make sure the new password meets all the requirements:
6-100 characters long
At least one symbol
At least one number
At least one capital letter and one lowercase letter
Click Add User to finish adding the user account. The user will now be able to log in with their User ID and password.
Removing a User
To remove one or more users from the system, first check the boxes next to the users’ names in the table. Then click Remove Selected Users to remove them from the system.
Important
The system must always have at least one Administrator. Operations that would remove all Administrators are not permitted.
Editing a User
As an administrator, you can change any user’s display name, user role, and password.
To edit the display name or user role, click Edit Details in the table row of the user you would like to edit. Enter a new name and/or role in the modal window, then click Save Changes to finalize the change.
To change the user password, click Change Password in the table row of the user whose password you would like to change. You can then enter a new password for the selected user.
Managing API Keys
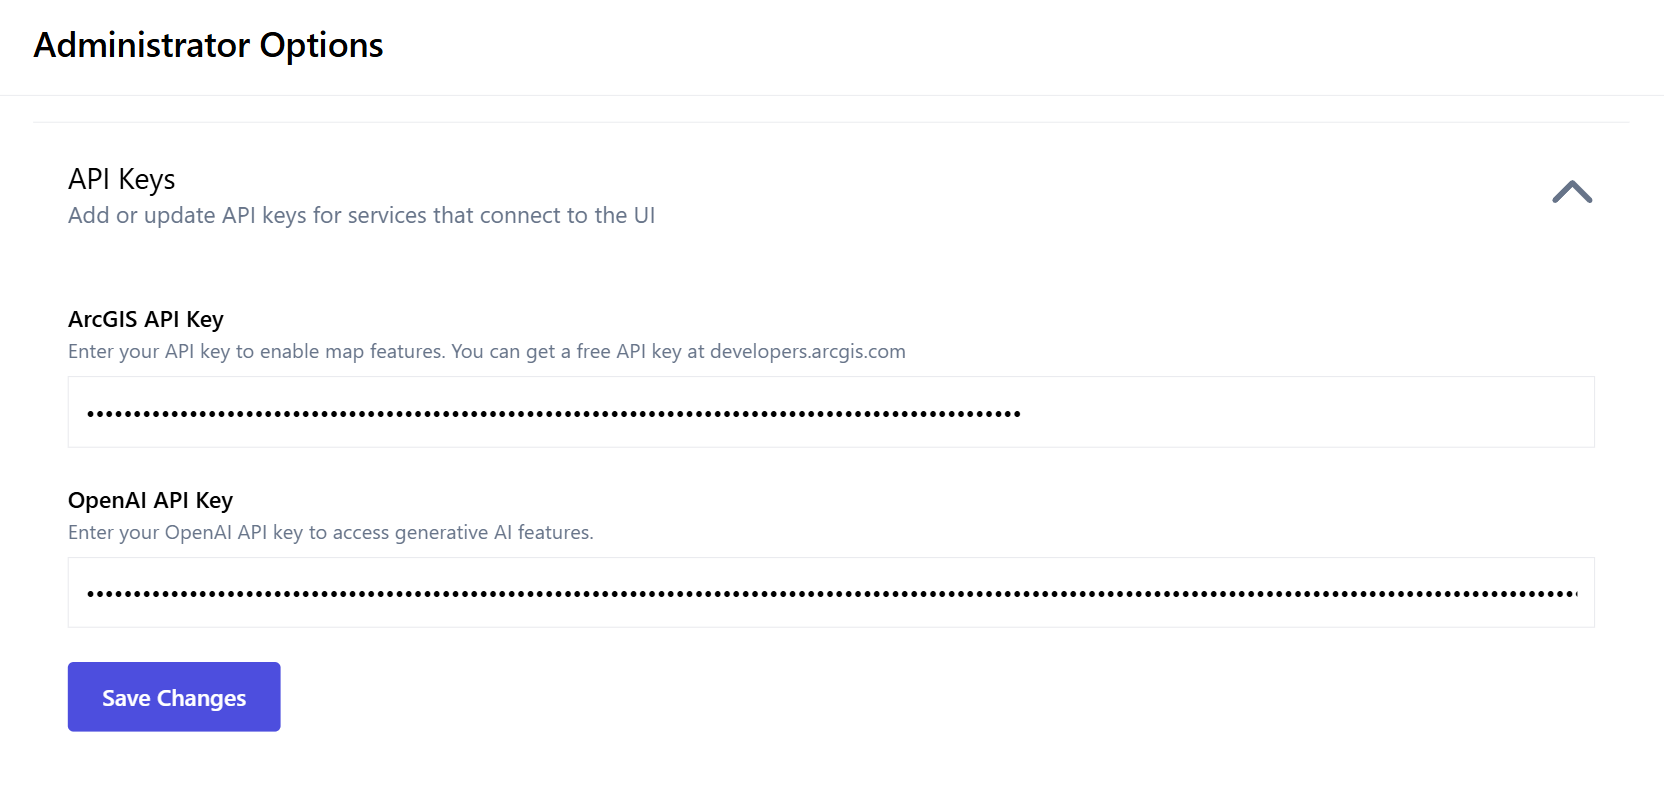
In the API Keys section of the Administrator Options page, you can enter your own API keys to connect to third-party services. Currently, you can connect to the following services:
ArcGIS: Enables map functionality for queries.
OpenAI: Allows you to enable generative AI features (see Configuring Generative AI for details).
Enter your API keys in the spaces provided and click Save Changes.
AI Assistant Settings
This section allows you to enable or disable generative AI features and customize certain parameters. See the section on Configuring Generative AI for detailed instructions.
UI Settings
This section allows you to configure certain parameters of the UI. These settings are system-wide and apply to all users.
Custom Refresh Intervals
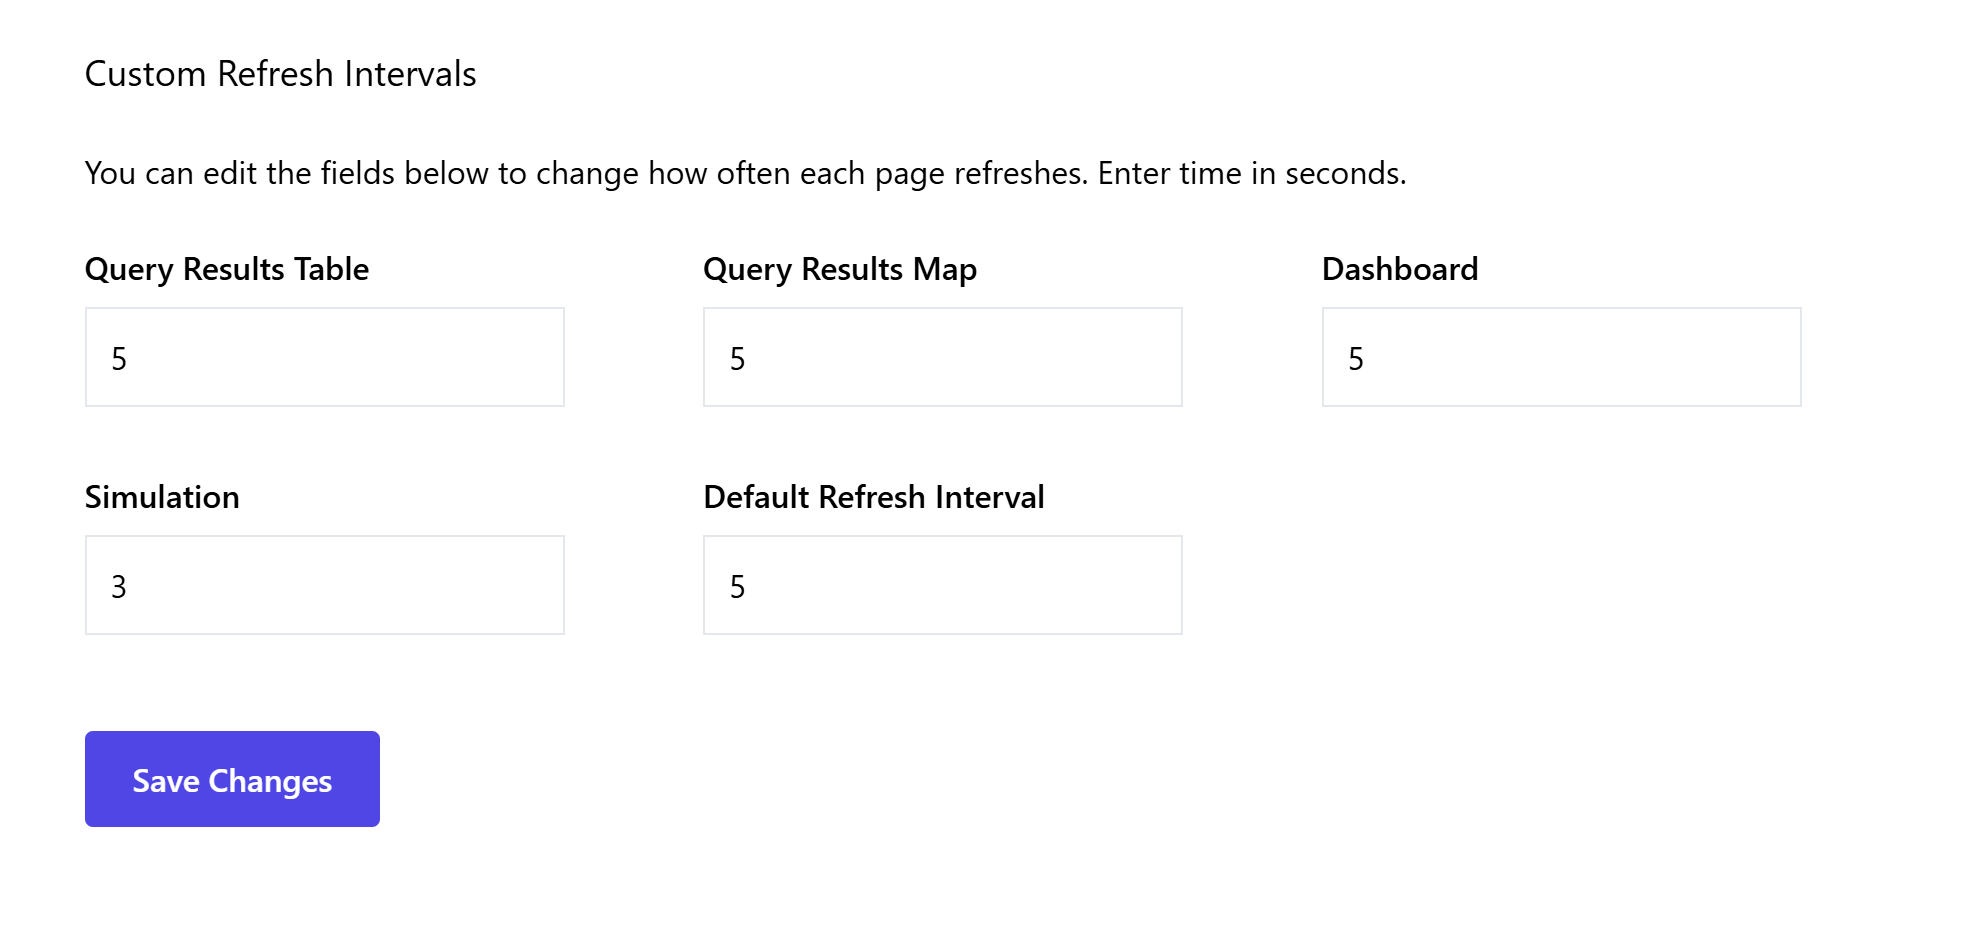
You can customize how often certain pages refresh. For example, if you only want the dashboard to refresh every 30 seconds, or if you want the query results map to refresh every 2 seconds, you can specify that here. The following intervals are customizable:
Query Results Table: Applies to the query results table.
Query Results Map: Applies to the query results map.
Dashboard: Applies to the chart dashboard.
Simulation: Applies to the simulation while it is running.
Default Refresh Interval: Applies to all other refresh intervals in the UI.
Enter your preferred values and click Save Changes.
Resync with Backend
Clicking the Resync Now button will validate all components (models, etc.) and resync with the backend if necessary.